![99745fd6-afc8-495e-a1a1-c5fa6c1501aa.png]](https://resources.spectotechnology.com/hs-fs/hubfs/99745fd6-afc8-495e-a1a1-c5fa6c1501aa.png?width=300&height=113&name=99745fd6-afc8-495e-a1a1-c5fa6c1501aa.png)
Pairing a Vaisala Weather Station with a Loadsensing Digital Logger
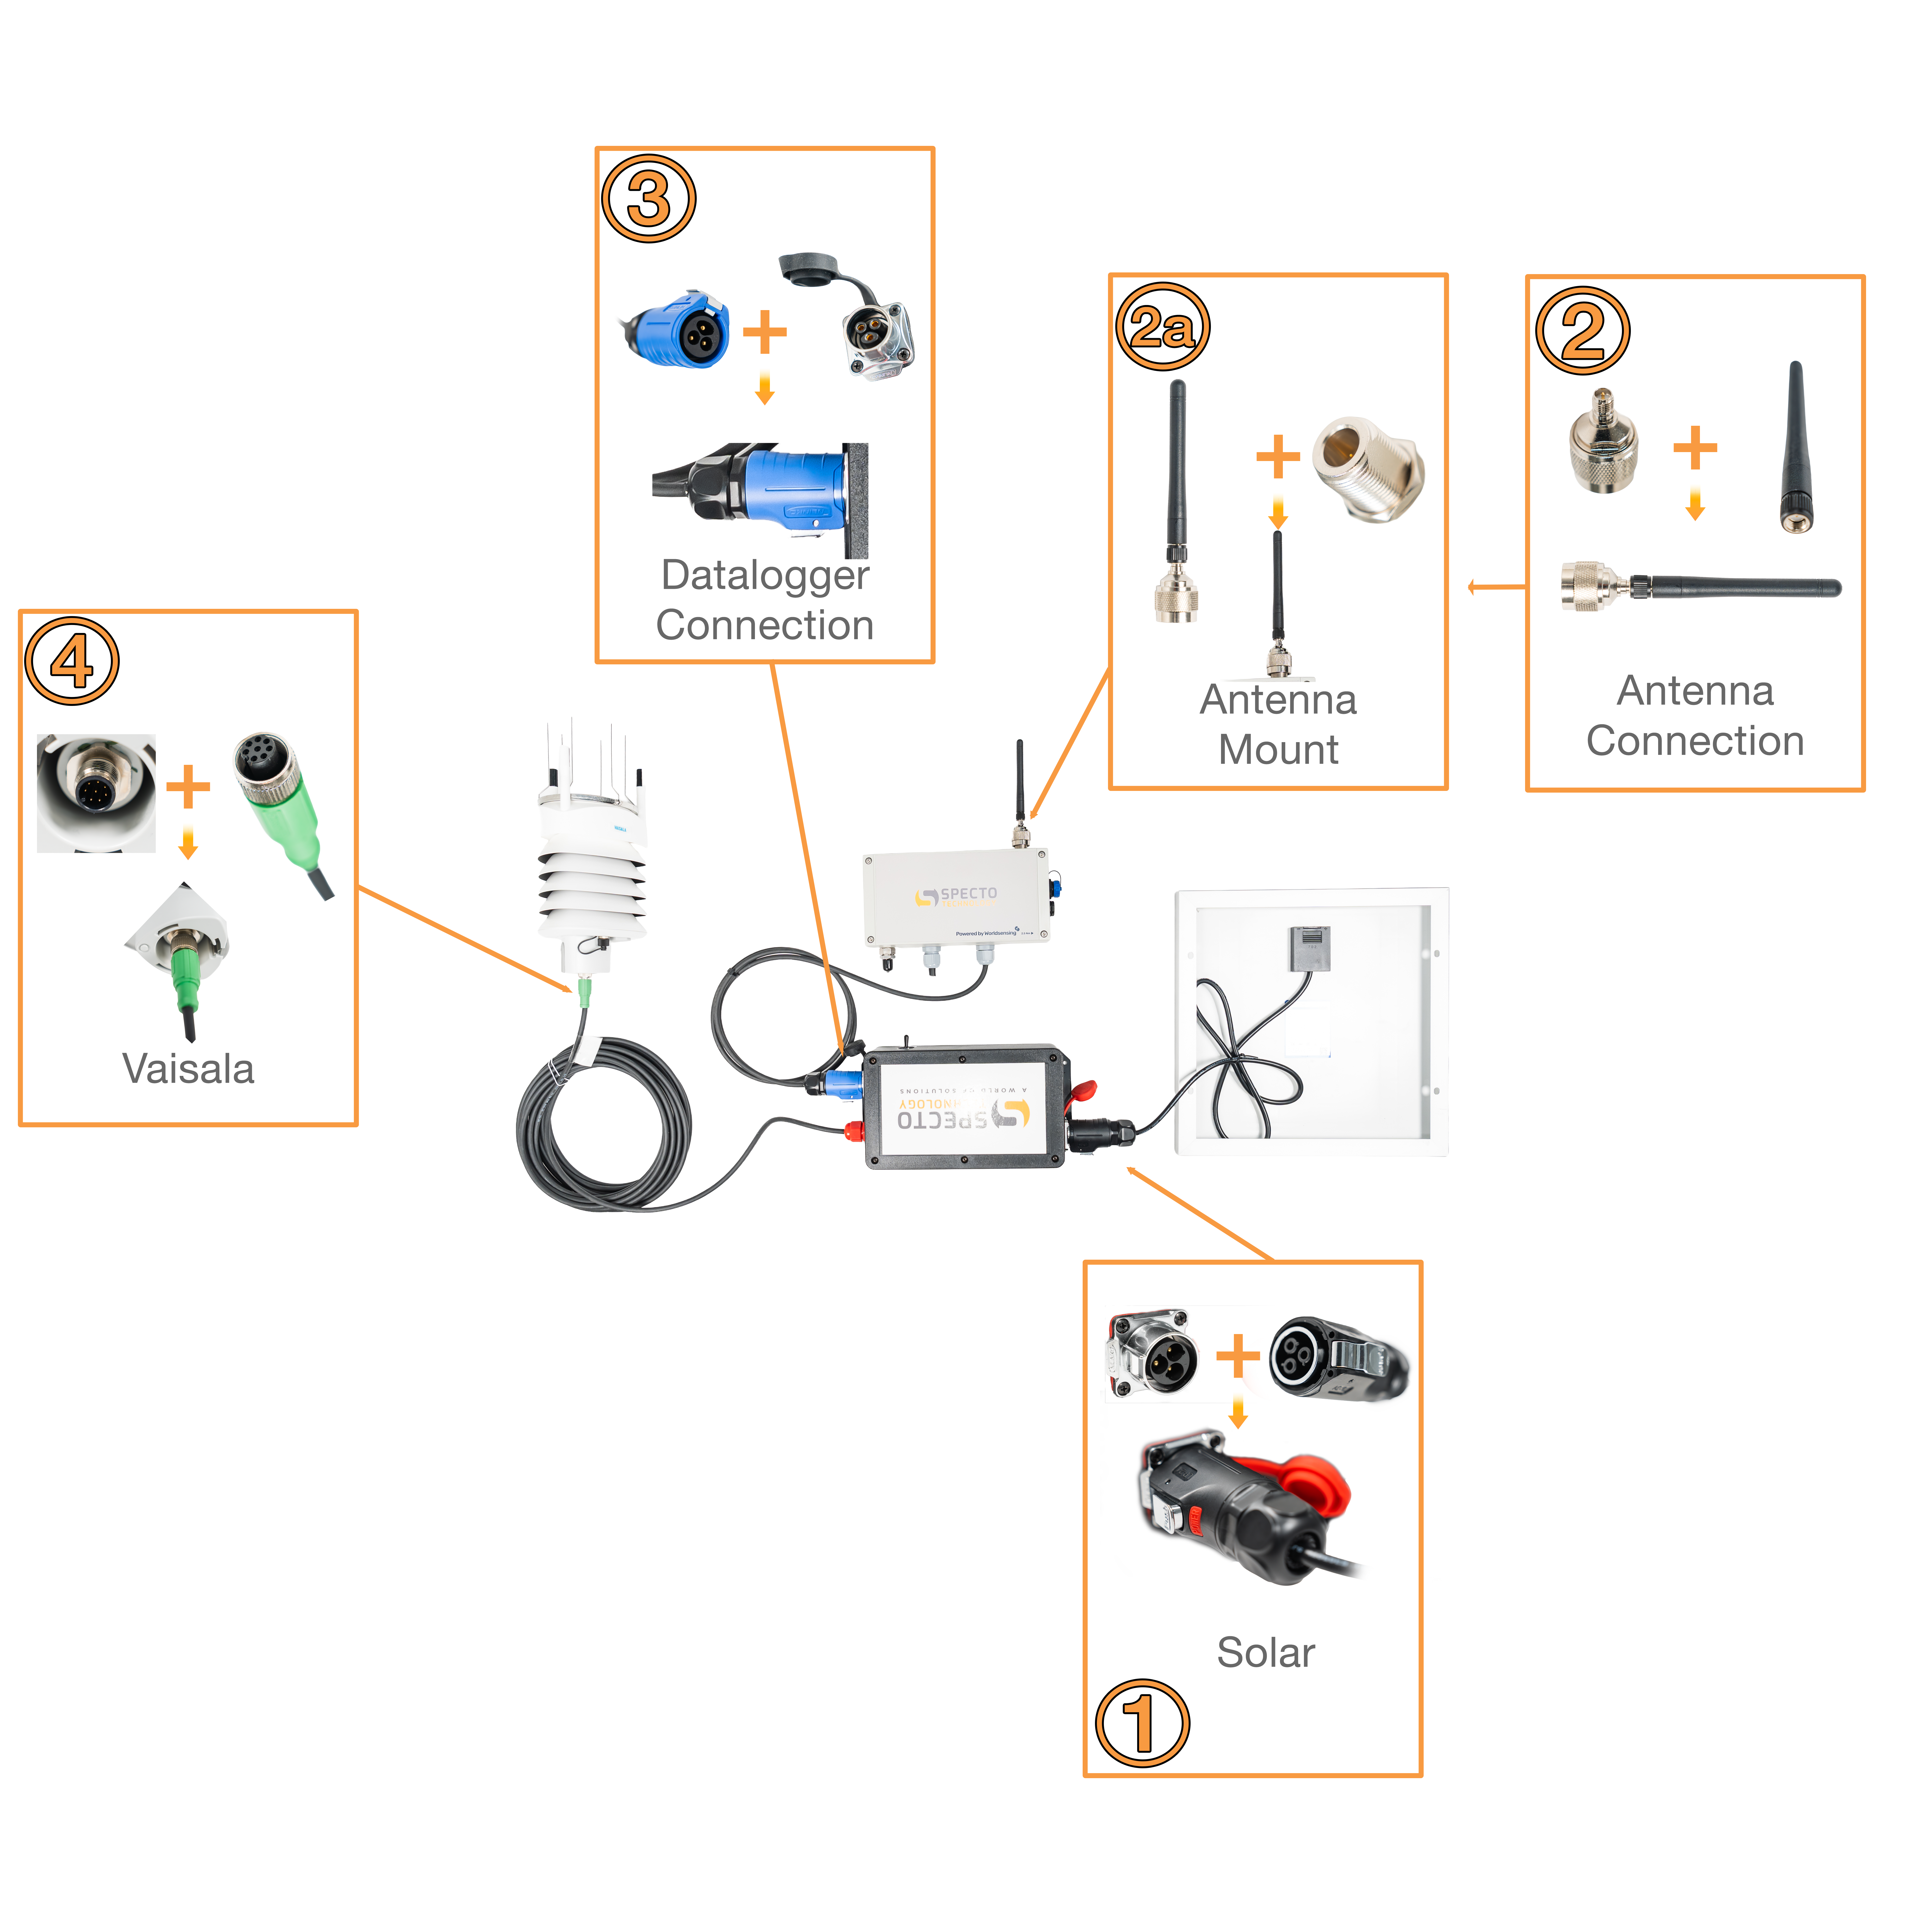
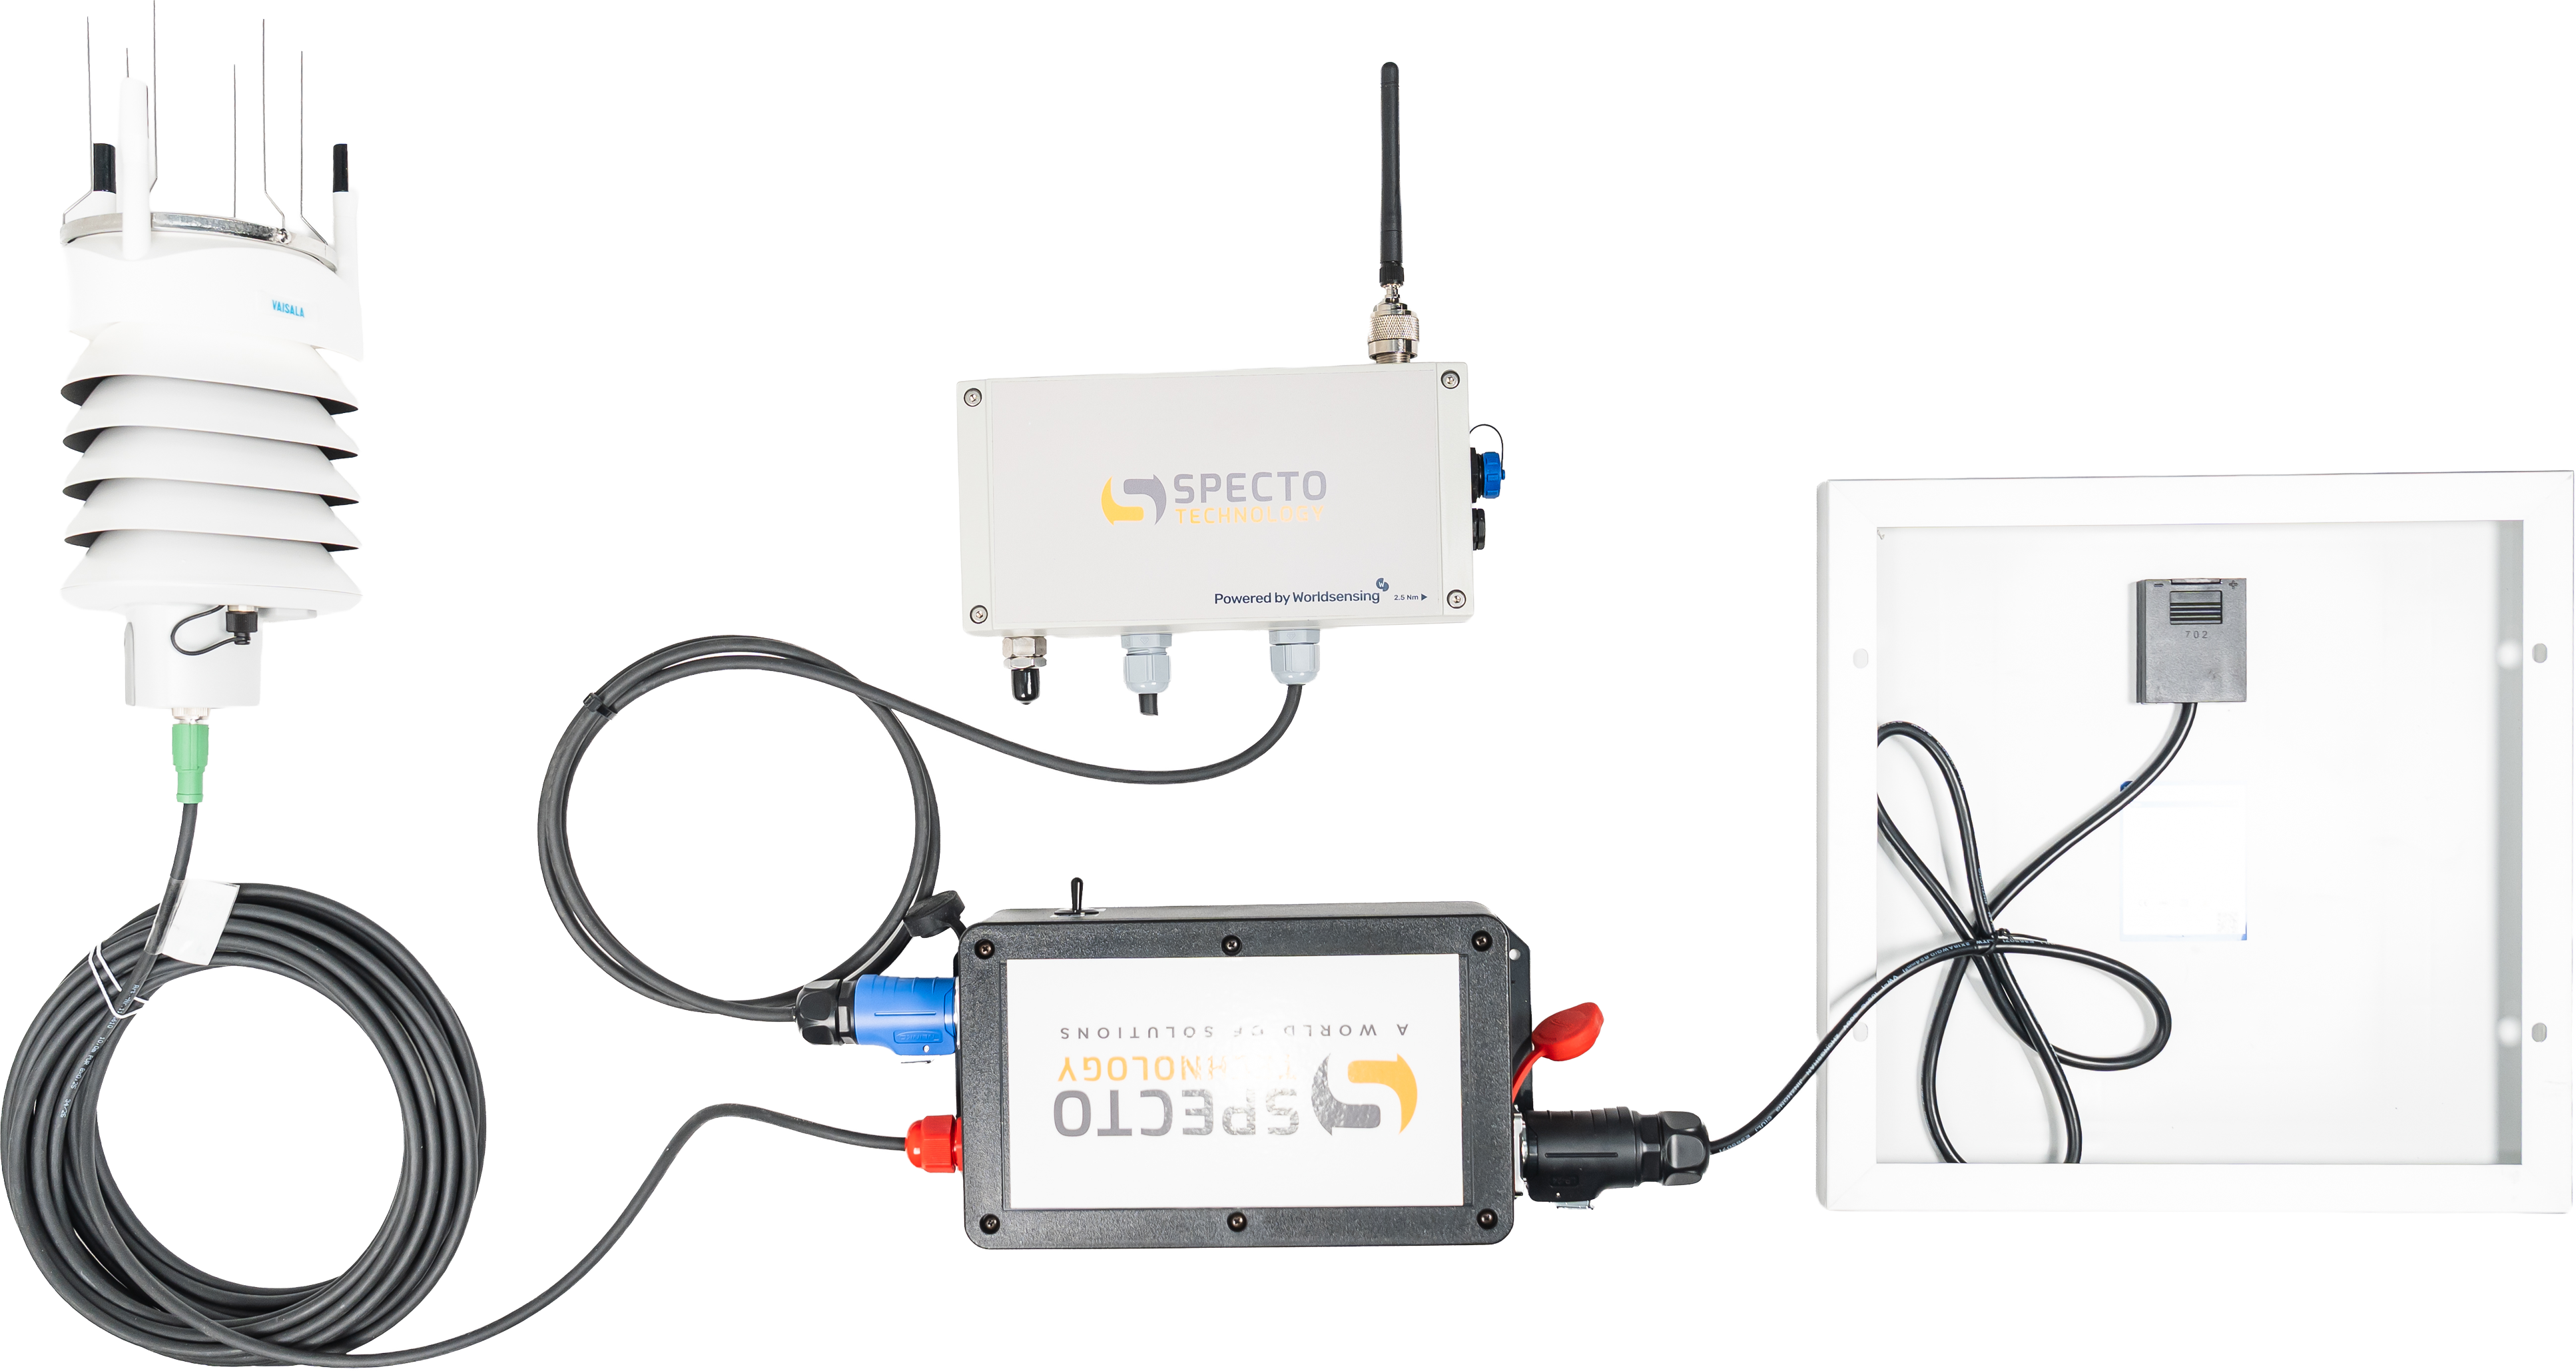
Follow the steps below to properly assemble and connect your Vaisala Weather Station with the Loadsensing Digital Logger.
- Connect the solar panel to the Solar Battery Enclosure.
- Attach the antenna to the antenna base.
- Once assembled, mount the antenna to the top of the Worldsensing Datalogger.
- Connect the Datalogger to the Solar Battery Enclosure.
- Connect the Vaisala sensor cable:
- Align the connector carefully
- Push the connector in fully
- Push the connector in fully
Prepare the Datalogger:
Let's connect the weather station to the Worldsensing Datalogger
 1. Using the provided hardware, unscrew the four corner screws on the Datalogger enclosure.

2. Open the enclosure and confirm that a battery is installed.

3. Verify that the SW A switch is set to “BATT” mode.

4. Take the cable from the Solar Battery Enclosure and route it through an open port at the bottom of the Datalogger.
 5. Connect the Vaisala wires to the Datalogger terminals according to the wiring diagram shown above.
- Ensure all connections are secure and properly tightened.
- Confirm cables are fully seated and not loose.
- The white cable (solar kit) has to be connected to the RS485-A of the data logger.
- The black cable (solar kit) has to be connected to the RS485-B of the data logger.
- The green cable (solar kit) has to be connected to the ground of the data logger

Internal wiring:
|
Vaisala WXT536 |
Solar Kit |
LSG6-DIG |
|
RS485-A (Gray) |
- |
RS485-A (White or Gray) |
|
RS485-B (Blue) |
- |
RS485-B (Black or Blue) |
|
Supply V+ (Brown) |
Load V+ (Red) |
|
|
Ground (Green) |
Load V- (Black) |
Ground (Green) |