![99745fd6-afc8-495e-a1a1-c5fa6c1501aa.png]](https://resources.spectotechnology.com/hs-fs/hubfs/99745fd6-afc8-495e-a1a1-c5fa6c1501aa.png?width=300&height=113&name=99745fd6-afc8-495e-a1a1-c5fa6c1501aa.png)
Automated Exports
Click Interfaces. Click Import & Export.
Click ![]() (Add Import / Add Export).
(Add Import / Add Export).
Name the export (name should include project name or point group and may include interval or format information)
Sensor Type: Geodetic sensor (default)
Import/Export: Export (default)
Export folder: Choose desired folder
Time interval: this determines how often the file is exported - the export will include all data since the previous export.
Export type: this determines the format, a custom format can be created by cancelling this export setup and selecting Custom format.
Select Project: select the project that has your point group of interest
Select Groups: select your desired point group(s)
See the Setting Up a Network in Delta Watch article for help making groups.
Click OK.
Click Apply.
Once some data has arrived, been processed, and the appropriate time interval has elapsed, you will be able to see the csv in the folder you selected.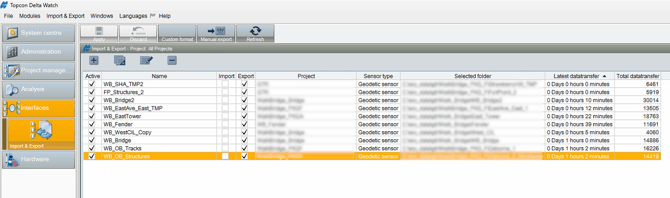
Manual Exports
Click Interfaces. Click Import & Export.![]()
Select your desired Export type: this determines the format, a custom format can be created by cancelling this export and selecting Custom format.
Choose your desired Export folder. You can navigate to find the desired directory by clicking ![]() .
.
Select Groups: select your desired point group(s)
Networks: Choose the network you want to export epochs from, typically the "auto" version of the network.
Display an epoch range using intervals and or start/end dates.
Right click an epoch to designate it as your starting or ending epoch.
Click OK