![99745fd6-afc8-495e-a1a1-c5fa6c1501aa.png]](https://resources.spectotechnology.com/hs-fs/hubfs/99745fd6-afc8-495e-a1a1-c5fa6c1501aa.png?width=300&height=113&name=99745fd6-afc8-495e-a1a1-c5fa6c1501aa.png)
Before beginning the Vibrating Wire setup, ensure the Loadsensing Gateway is powered on and connected to the internet.
1. Download and Install the Worldsensing App
-
- Download the Worldsensing app from the Google Play Store.
- Once the download and installation are complete, open the app

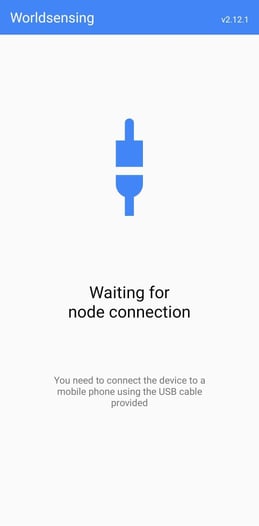
2. Connect the Tiltmeter to Your Mobile Device
- Use a USB cable to connect one end to your mobile device and the other to the Tiltmeter.
3. Check for Updates
-
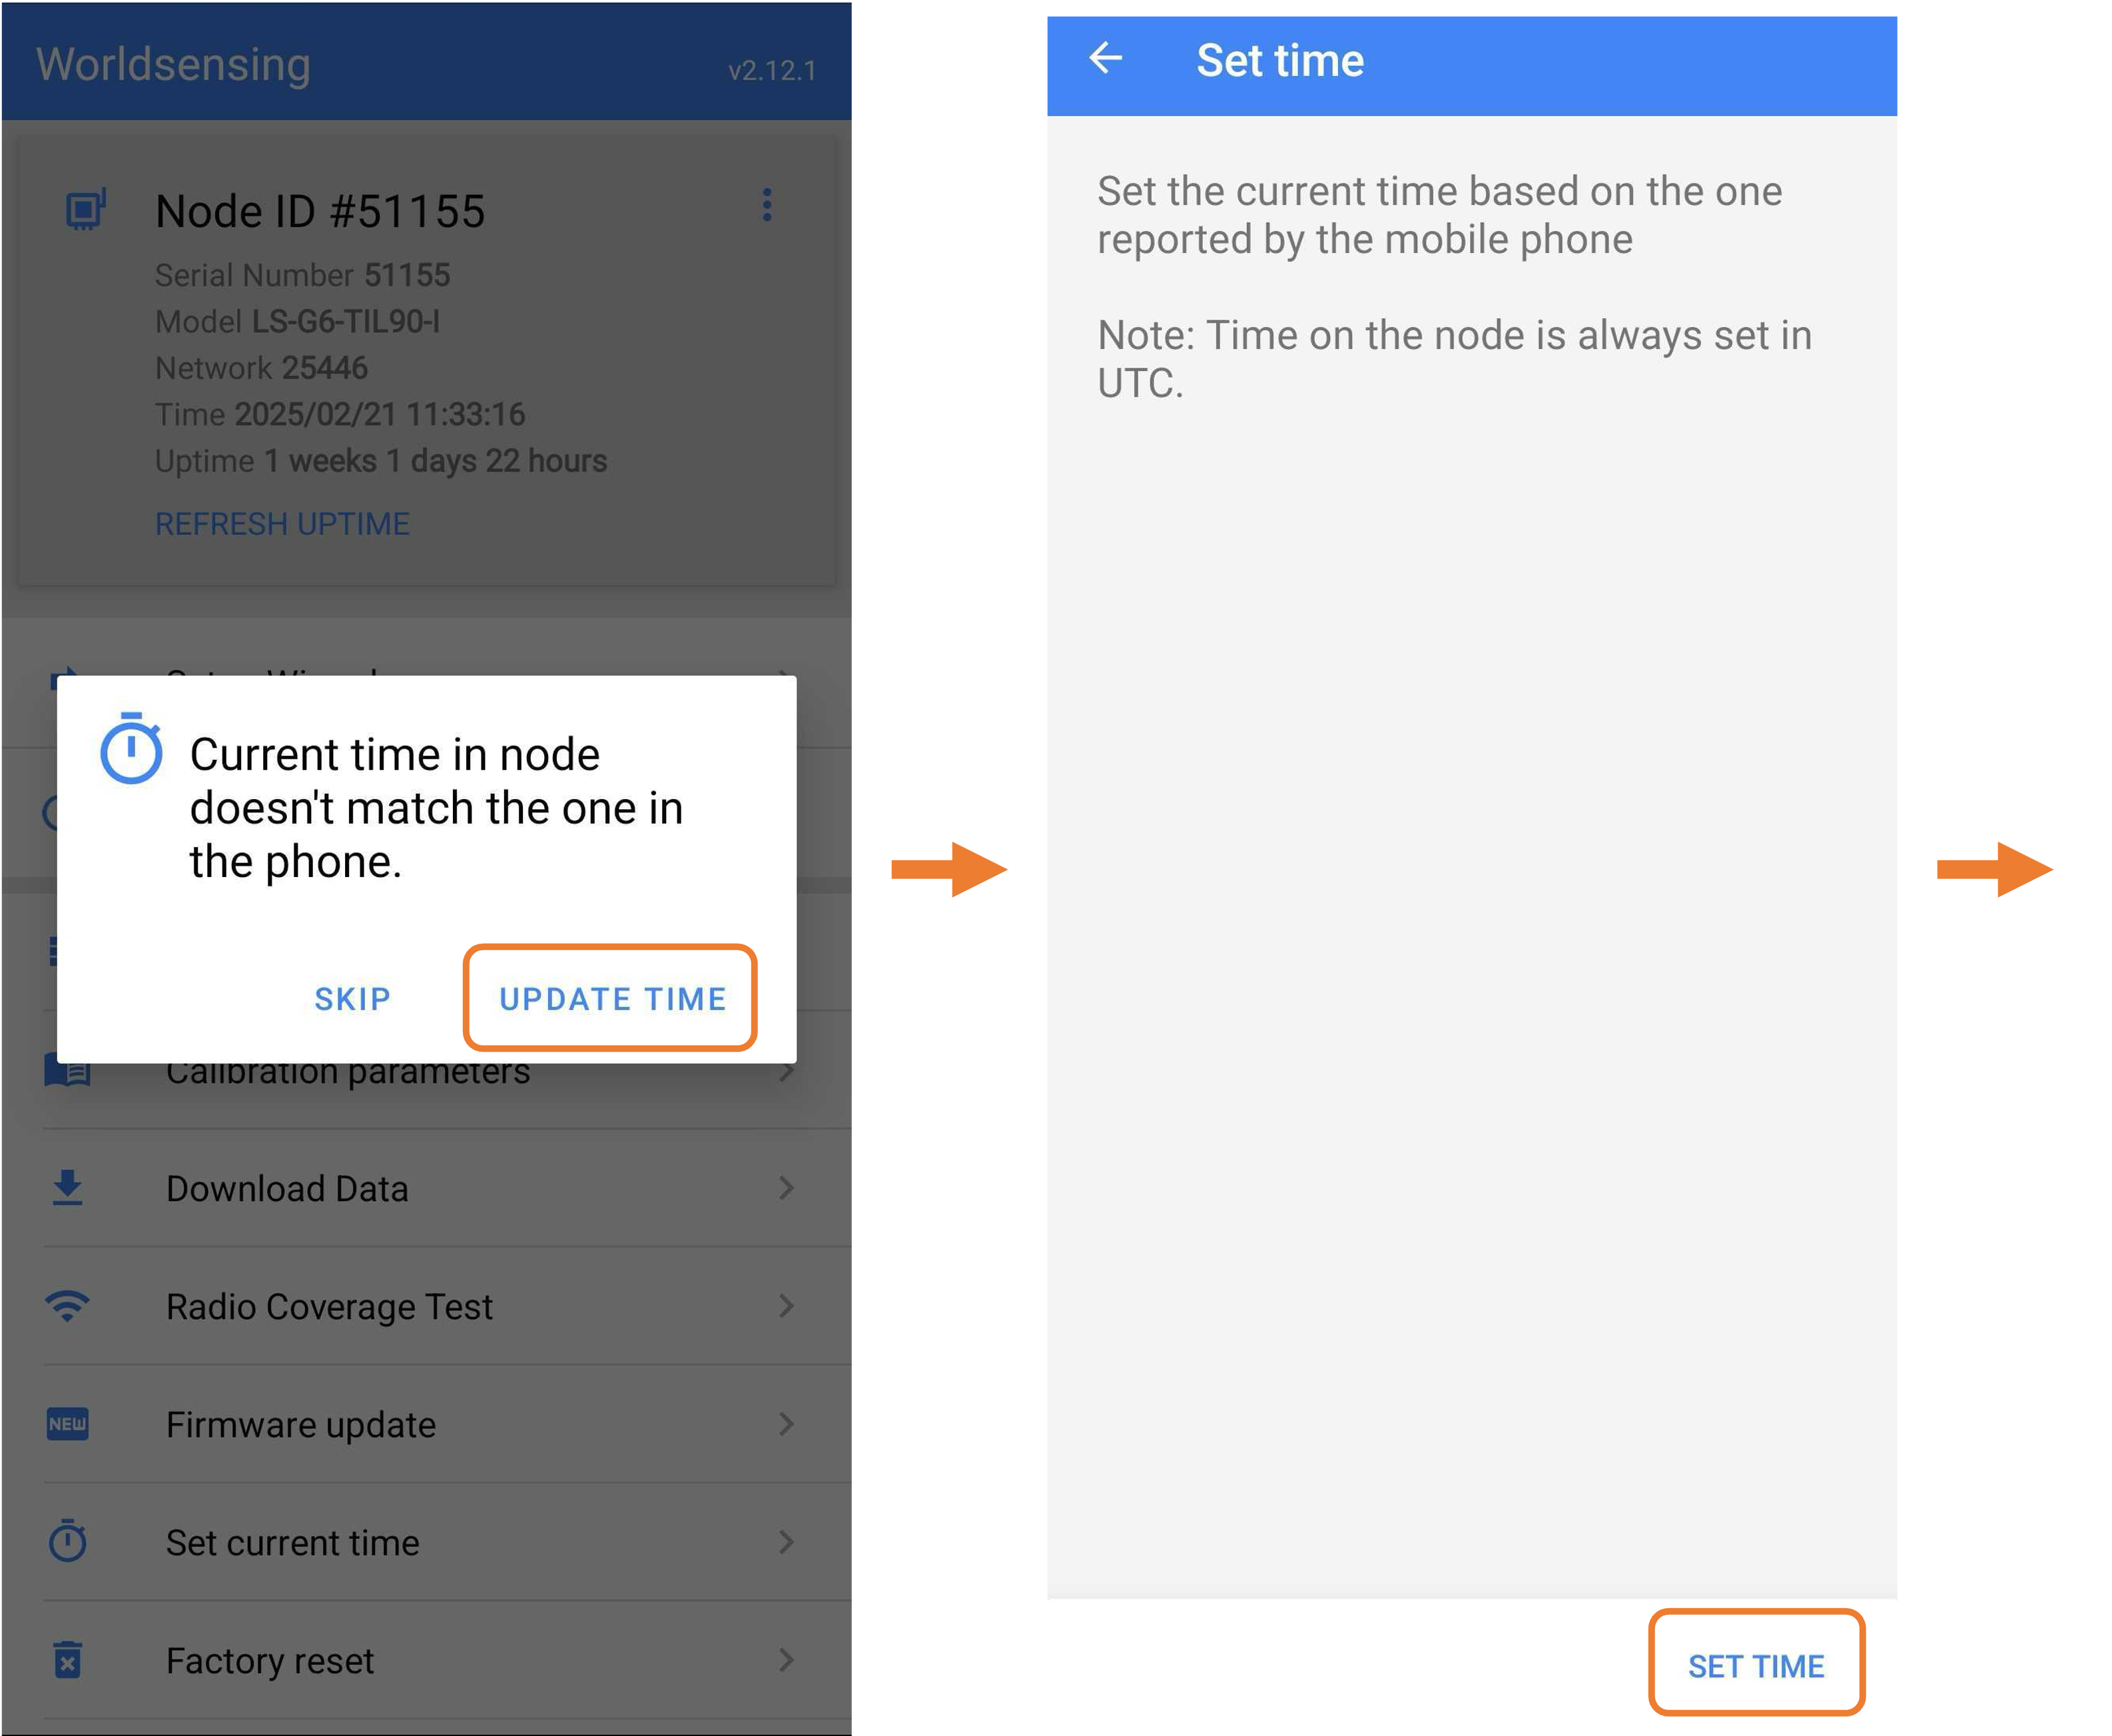
- The tiltmeter could be out of sync with the mobile device's current timezone. a message stating "Current time in node doesn't match the one in the phone." Proceed by selecting "Update Time".
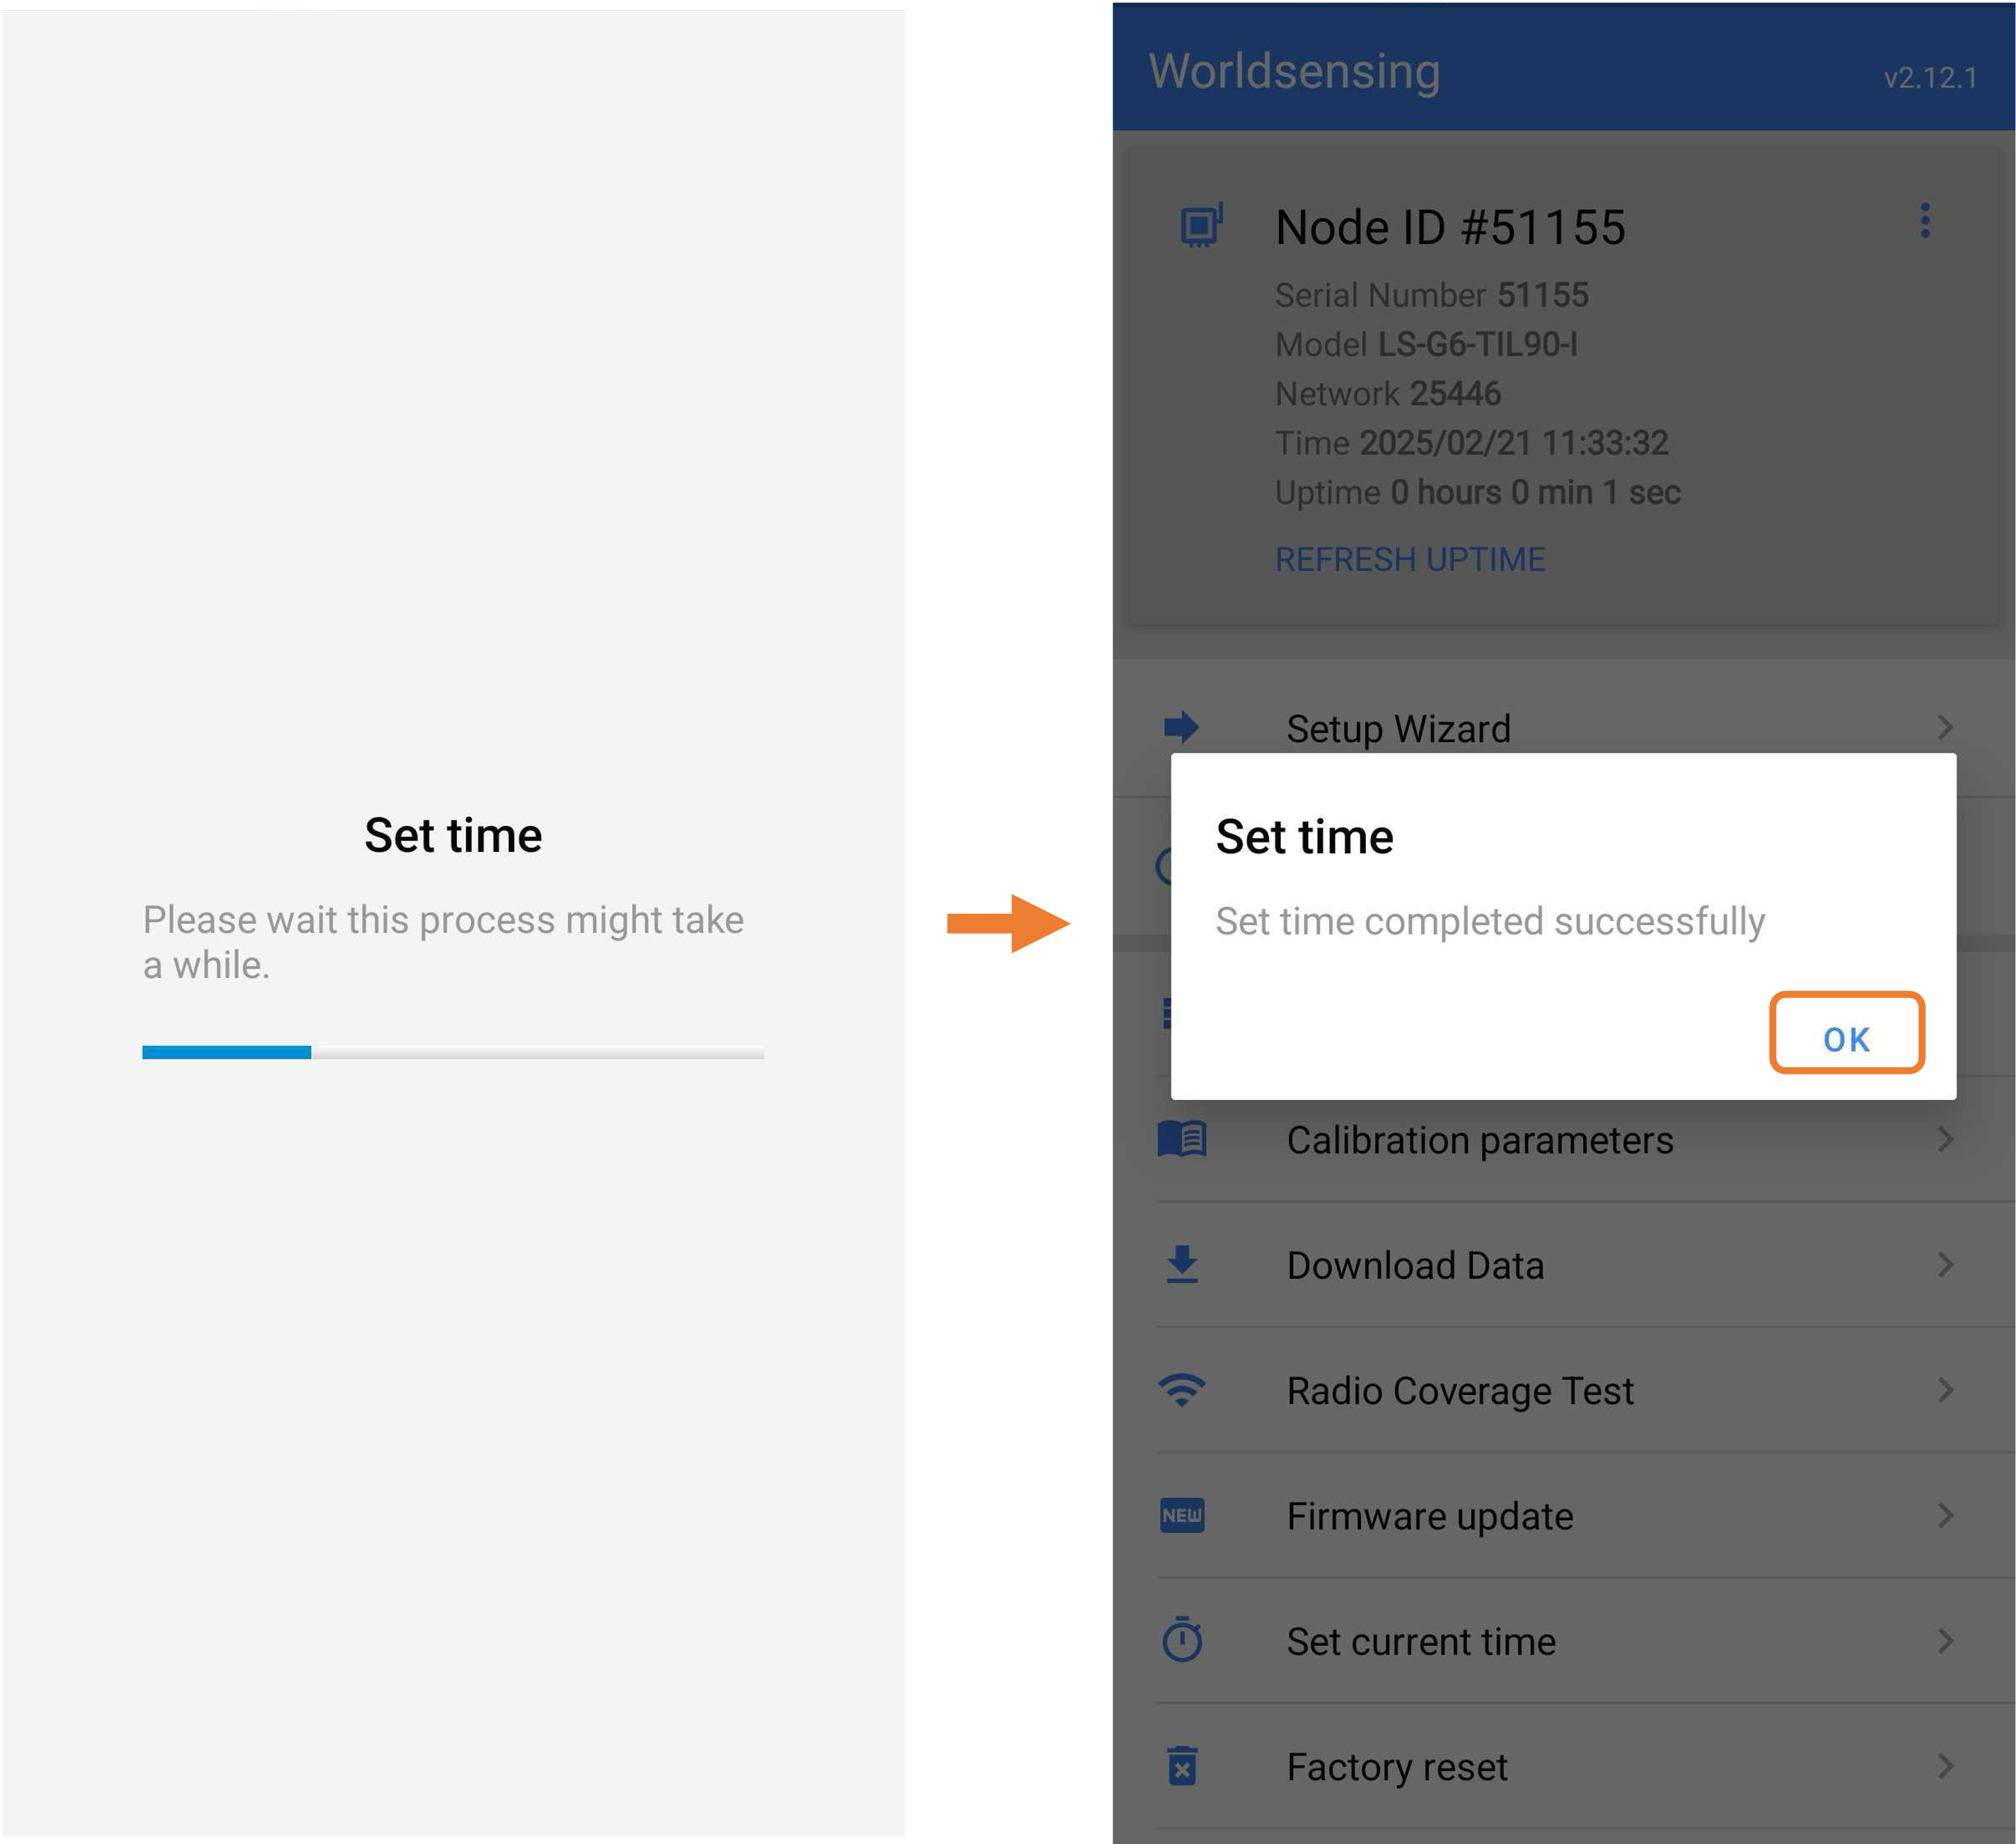
- Select "Set Time".
- Select "OK".
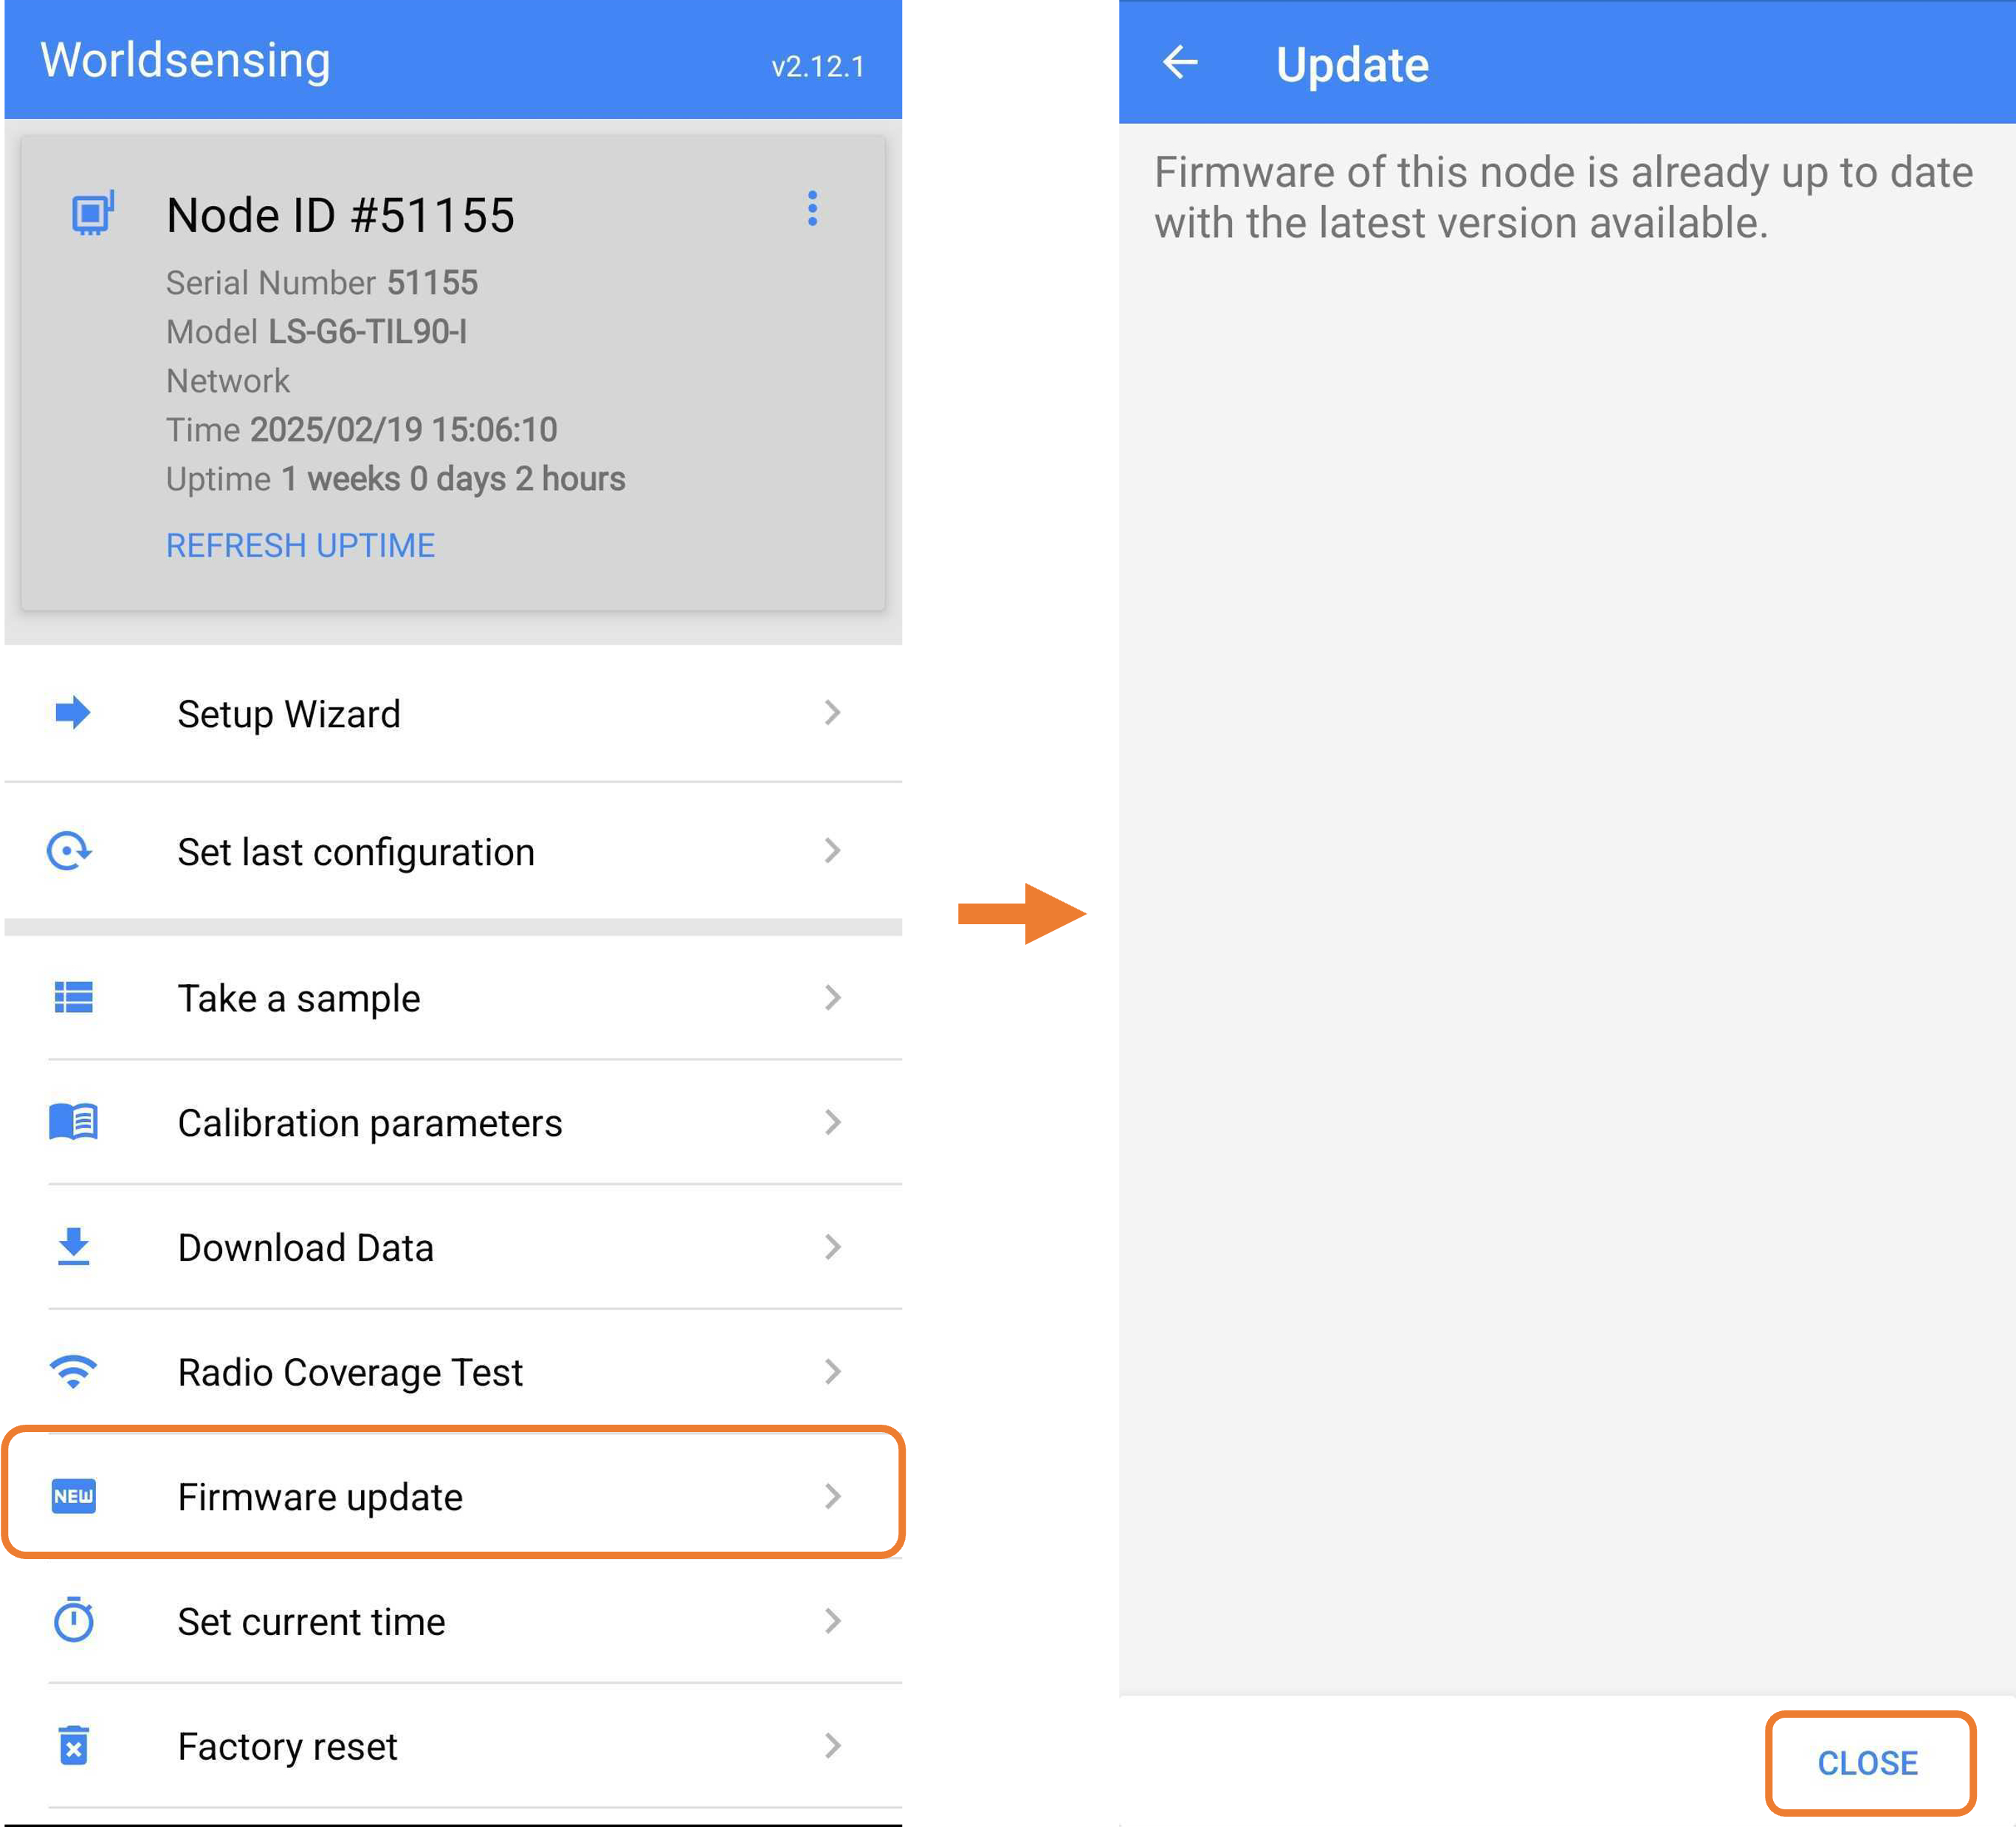
- In the app, select “Firmware Update” to check if the Tiltmeter is up to date.
- If an update is available, install it.
- If no update is required, select “Close”.
- The tiltmeter could be out of sync with the mobile device's current timezone. a message stating "Current time in node doesn't match the one in the phone." Proceed by selecting "Update Time".
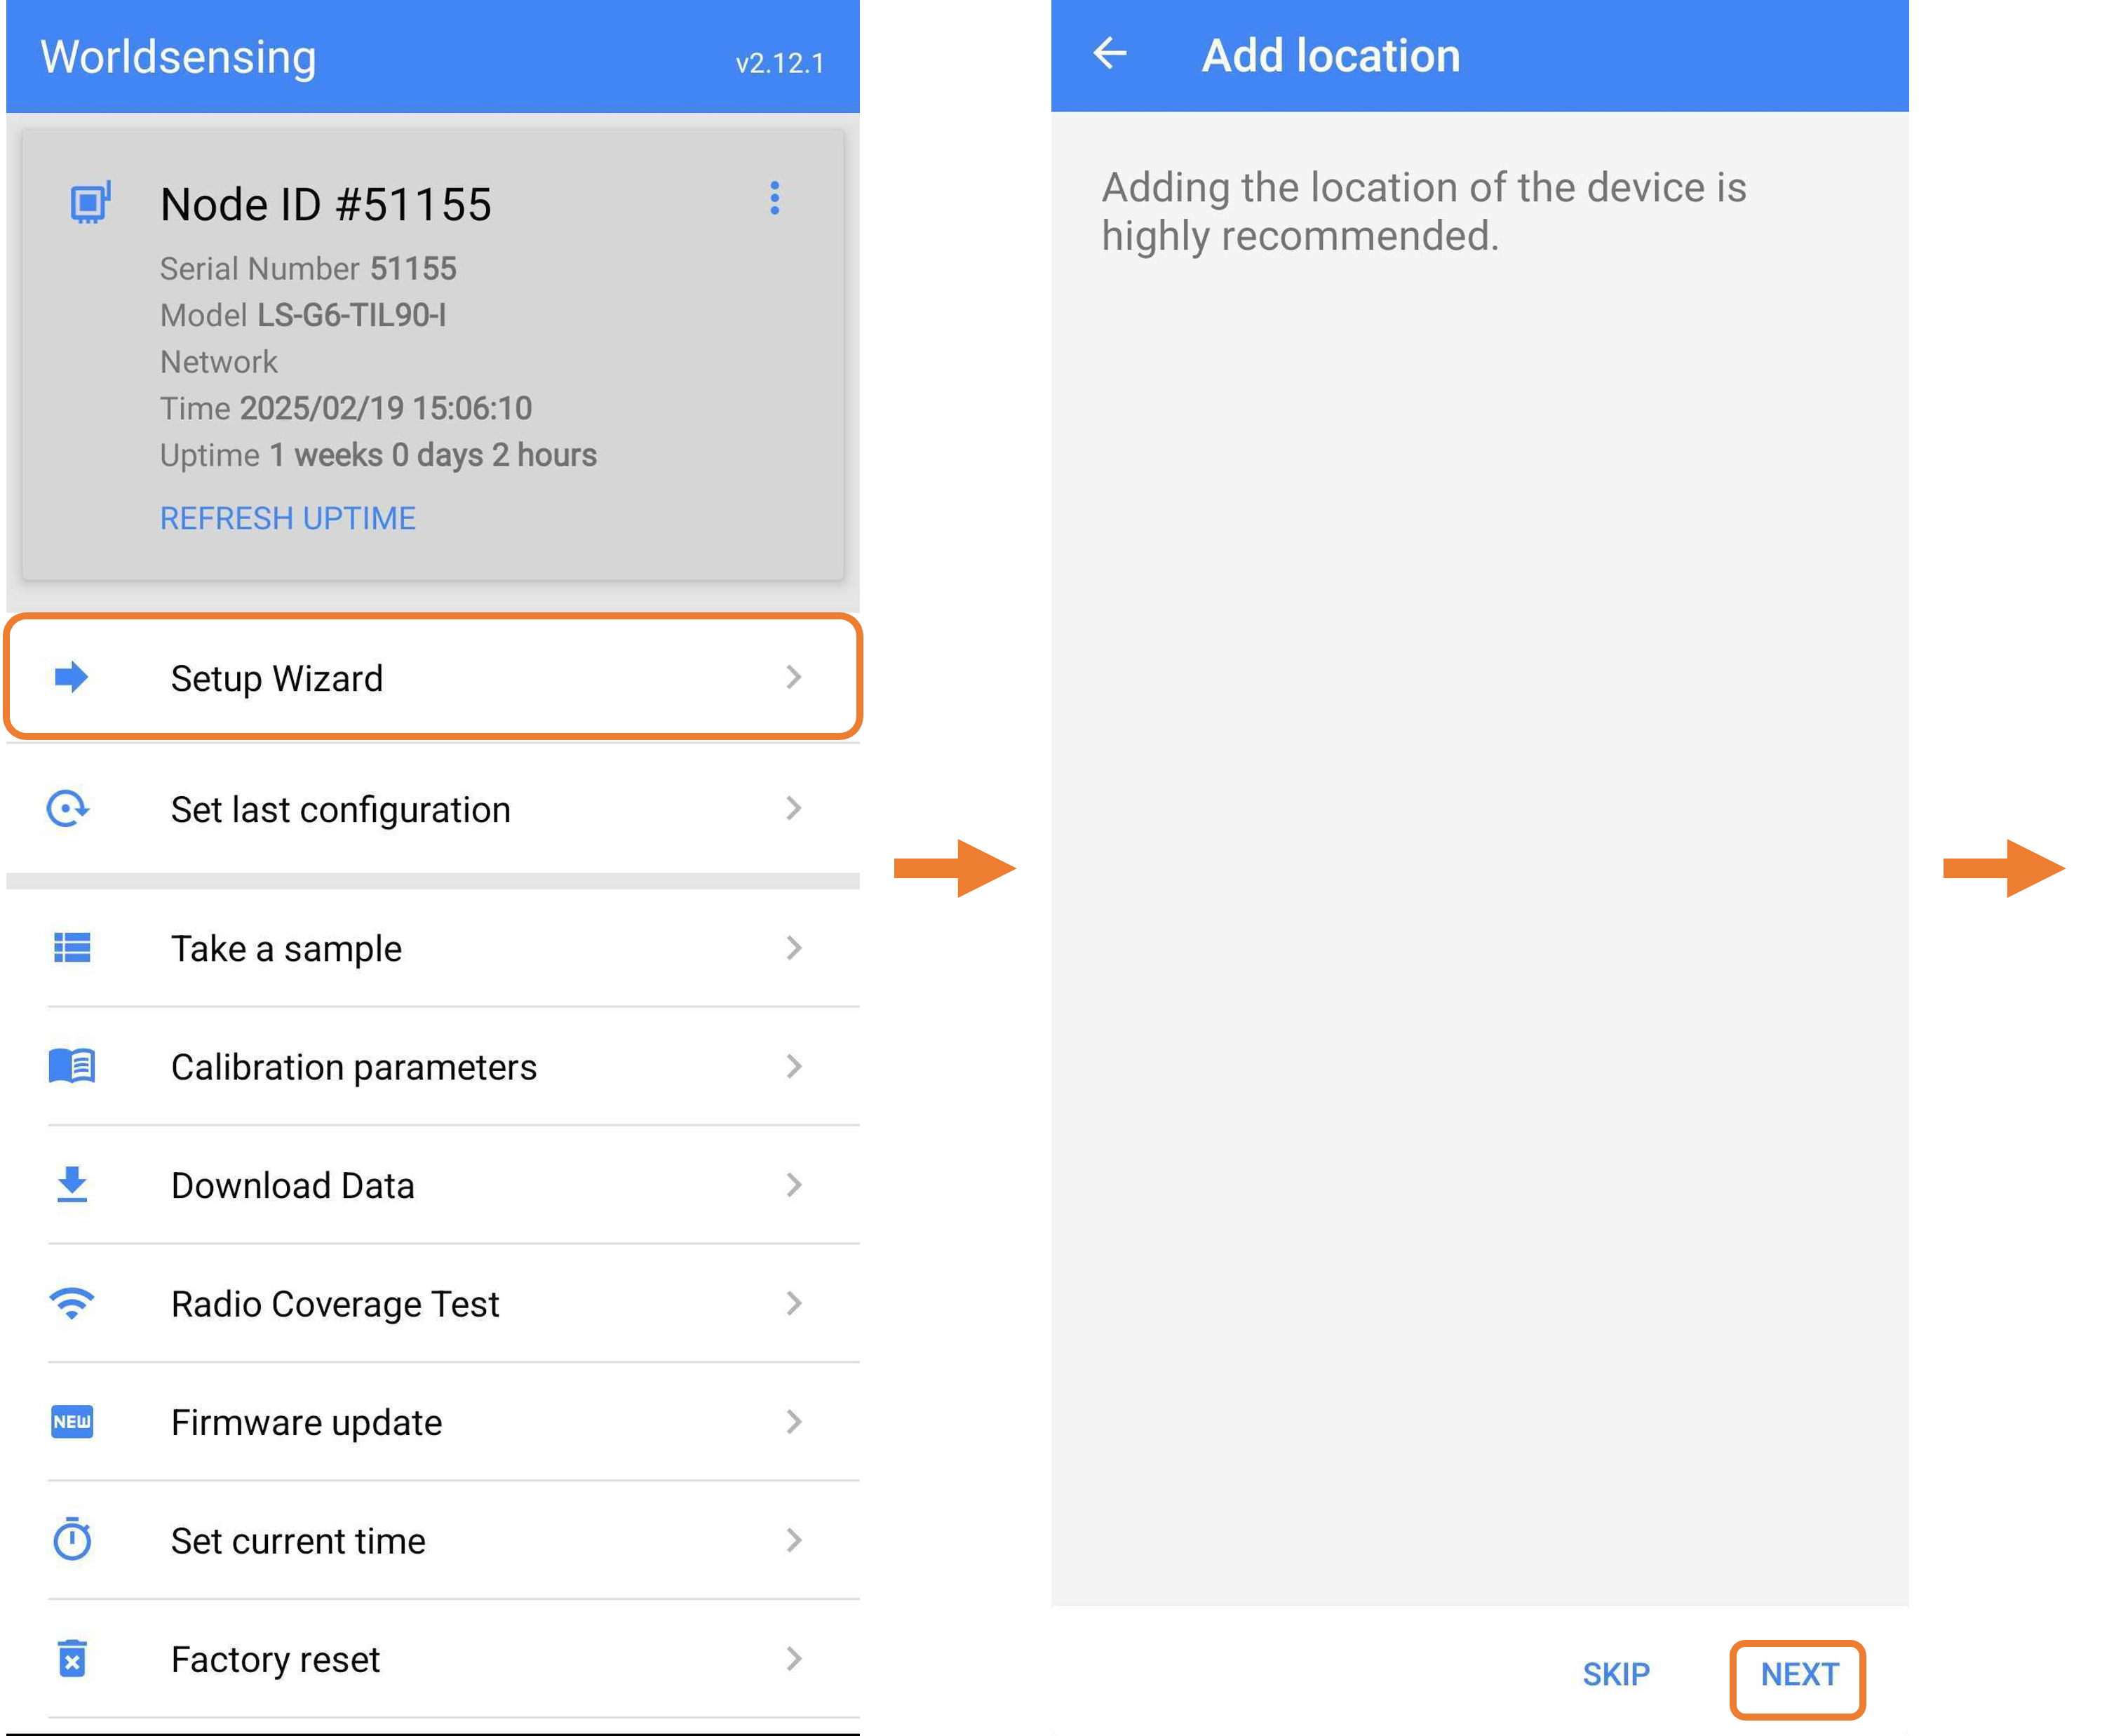
4. Configure the Tiltmeter Using the Setup Wizard
-
- Select “Setup Wizard” in the app.
- Tap “Next” to validate the Tiltmeter’s location.
- Ensure the mobile device is connected to the internet.
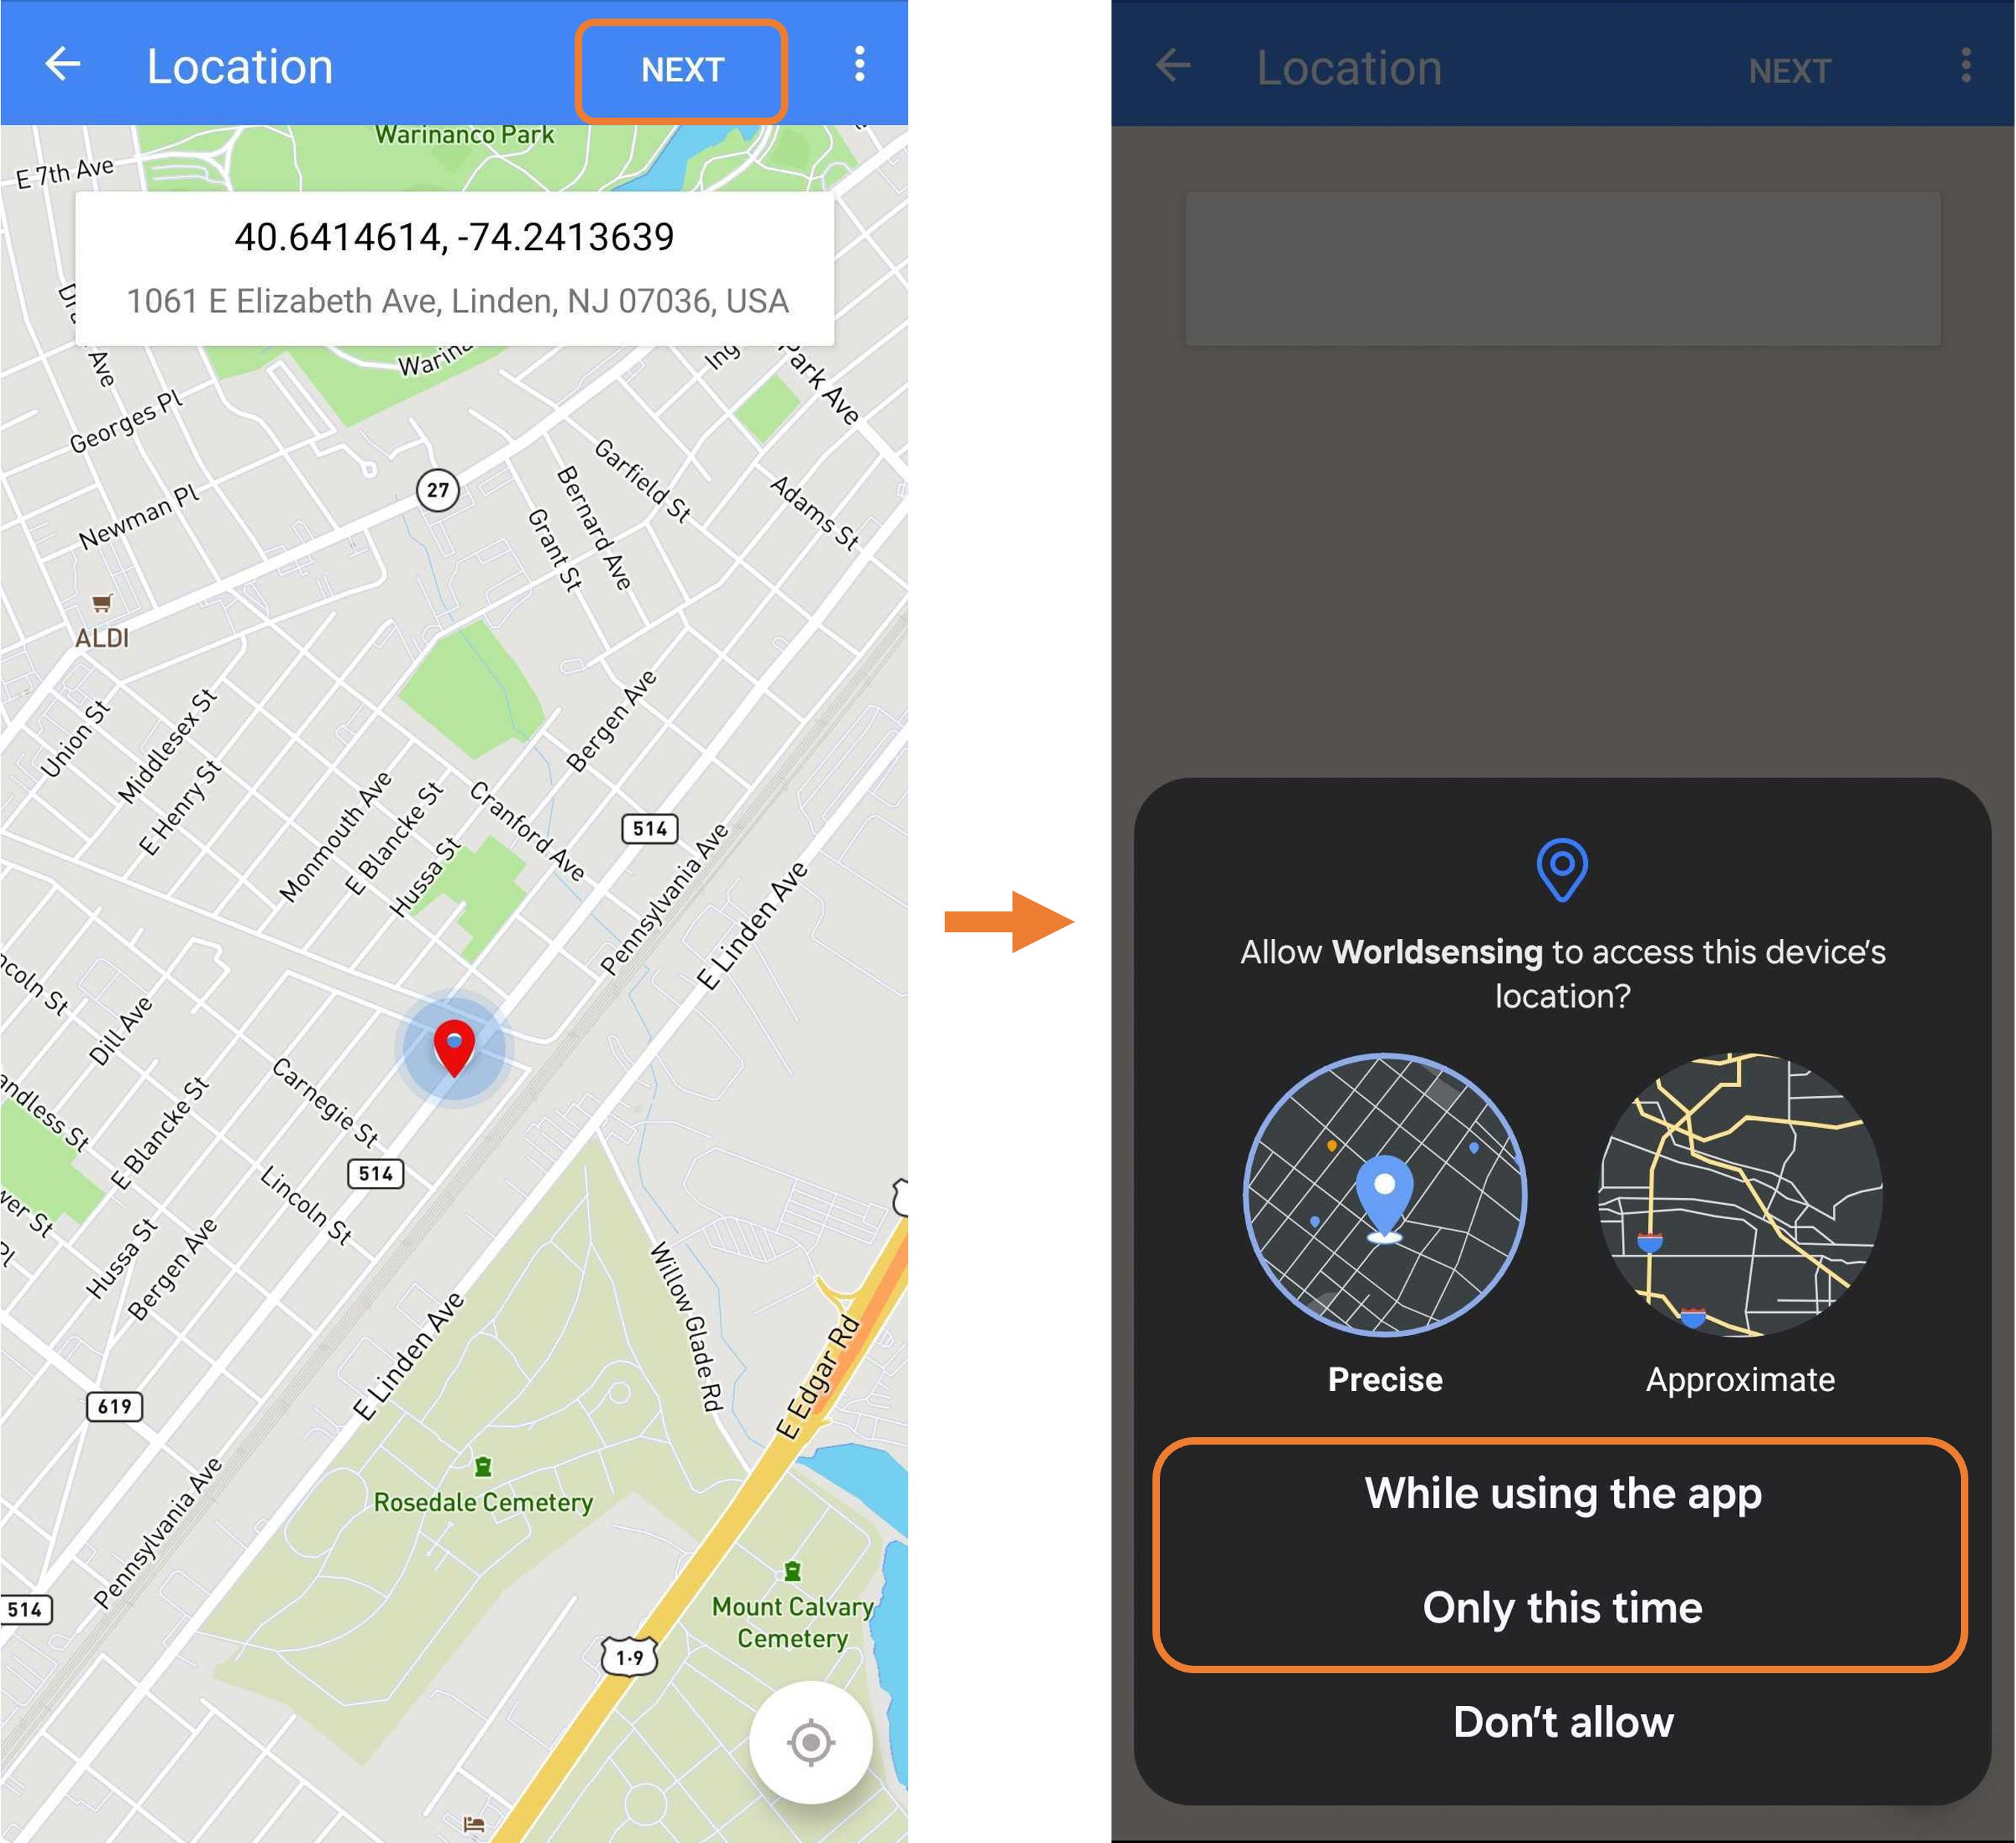
- When prompted for location access, select “While using the App” or “Only this time” to grant location permission.
- The device’s location will appear on the map. Select “Next” to continue.
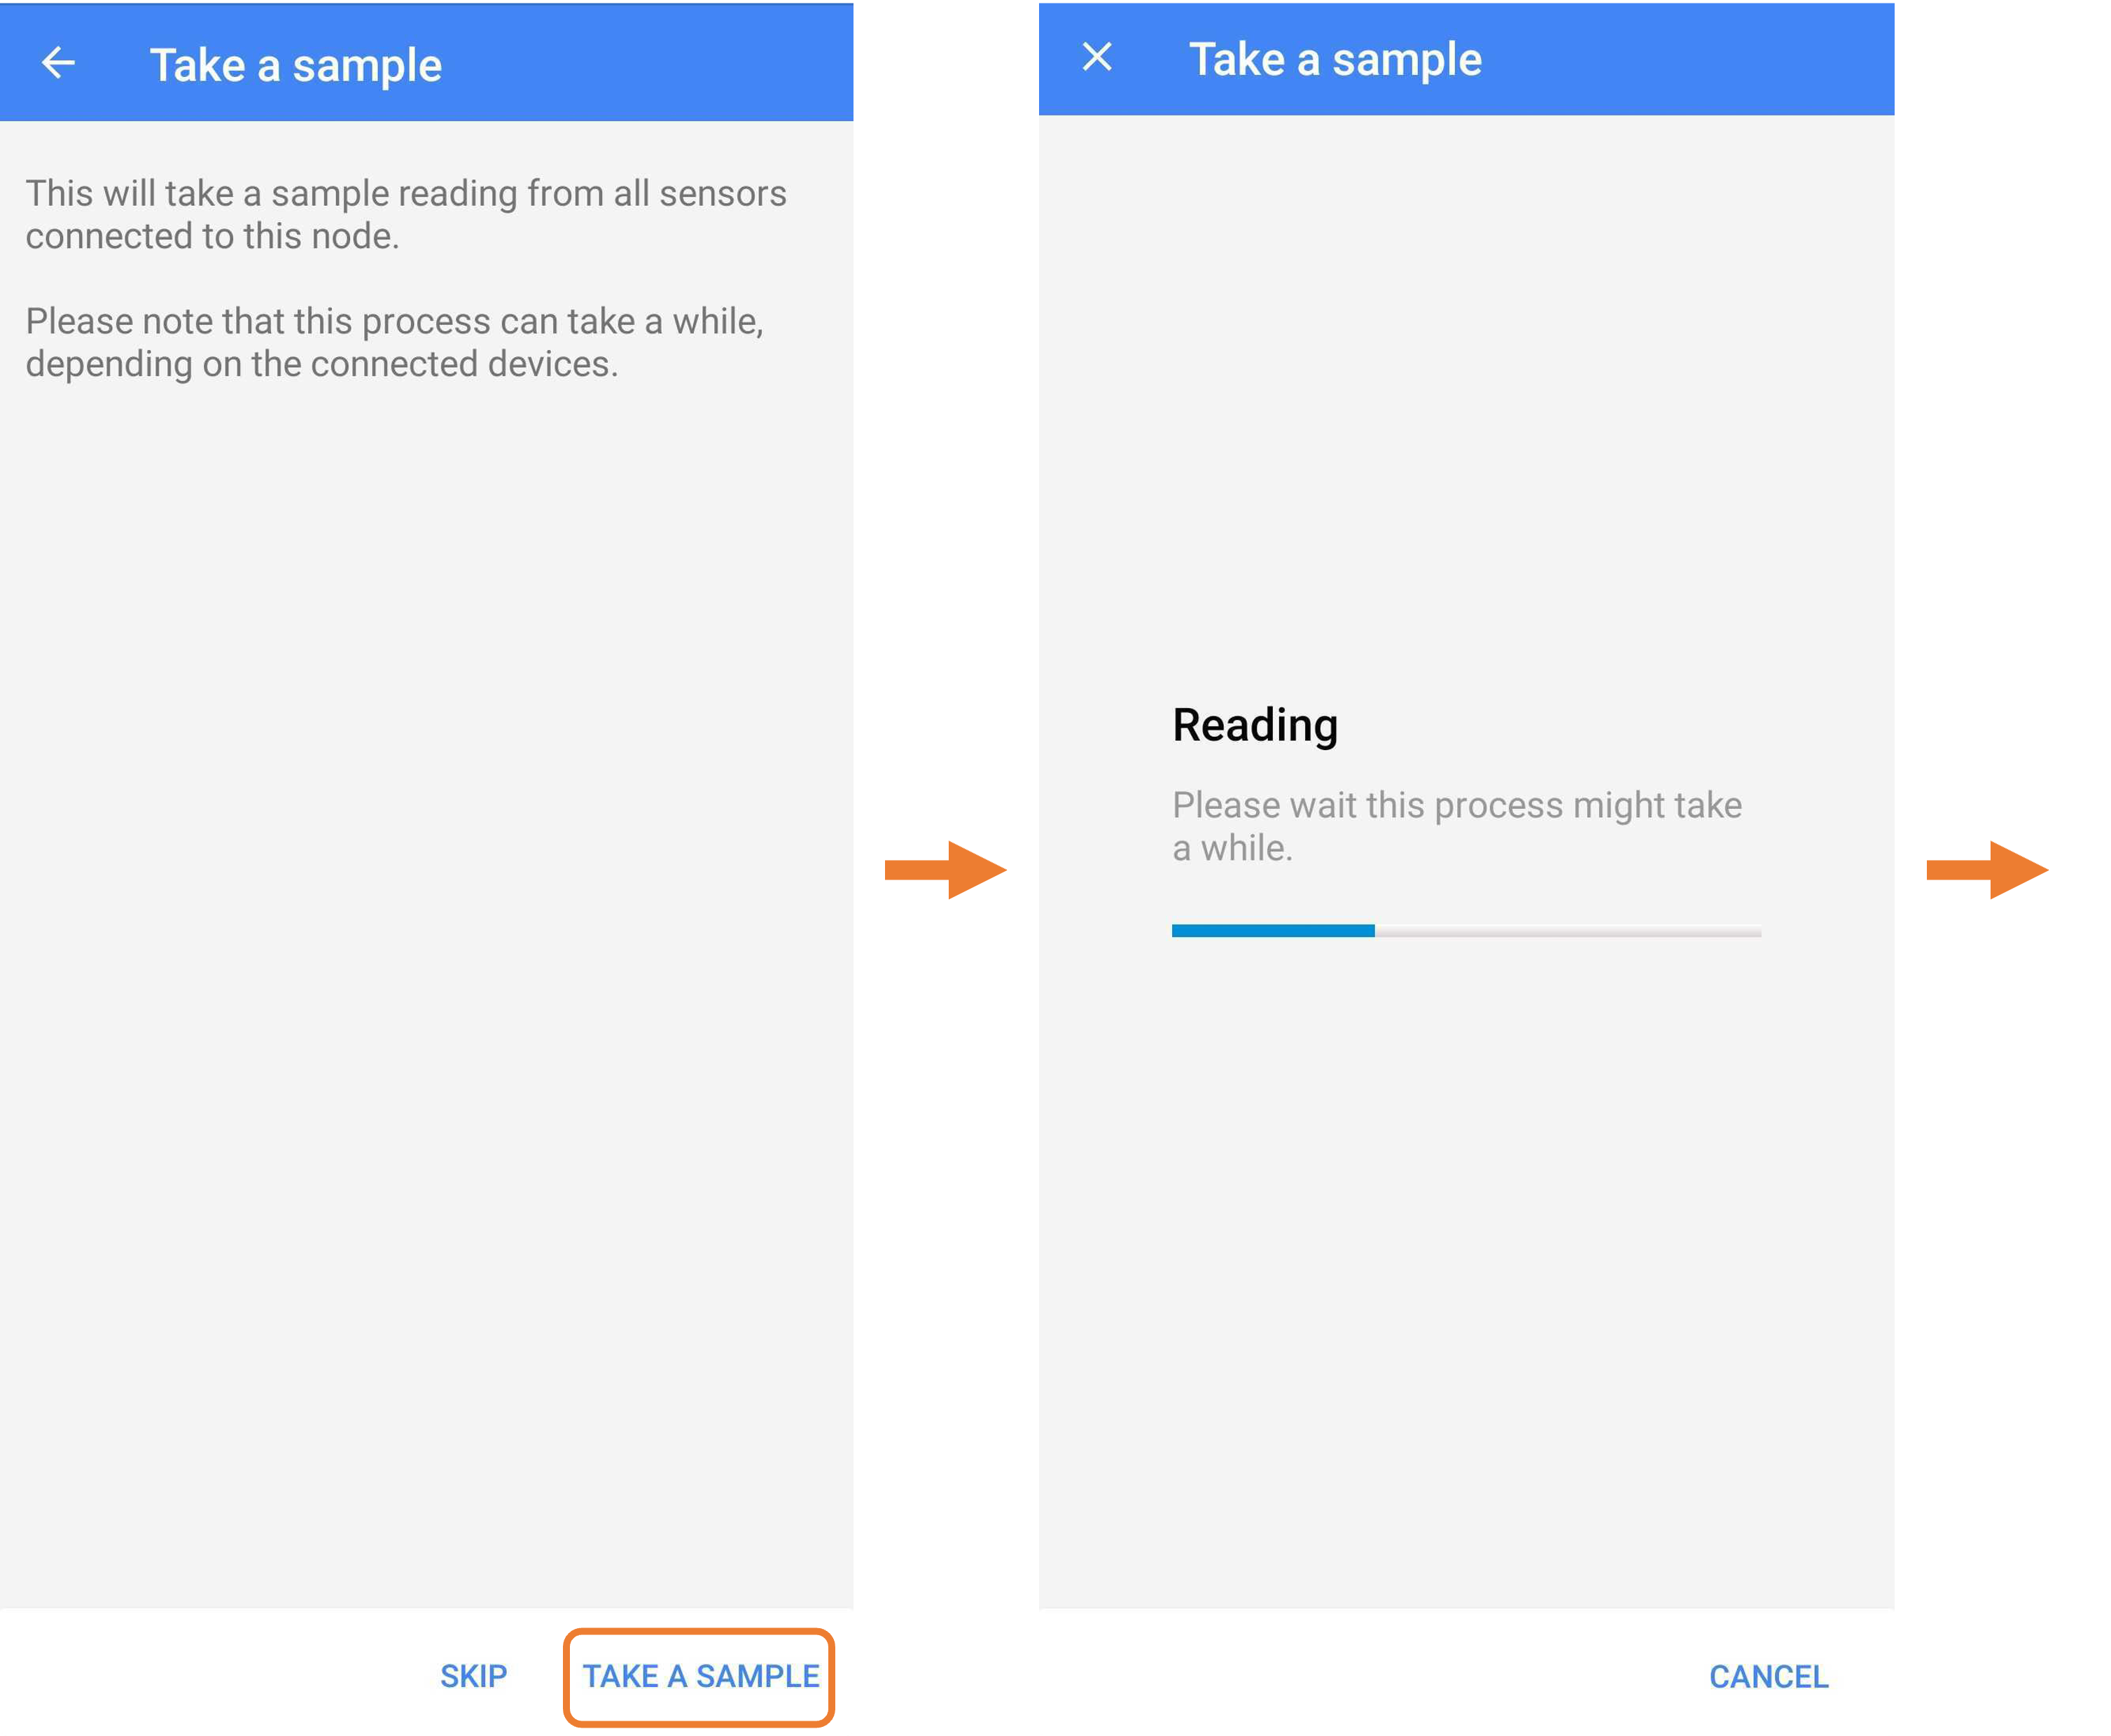
5. Perform a Sample Test
-
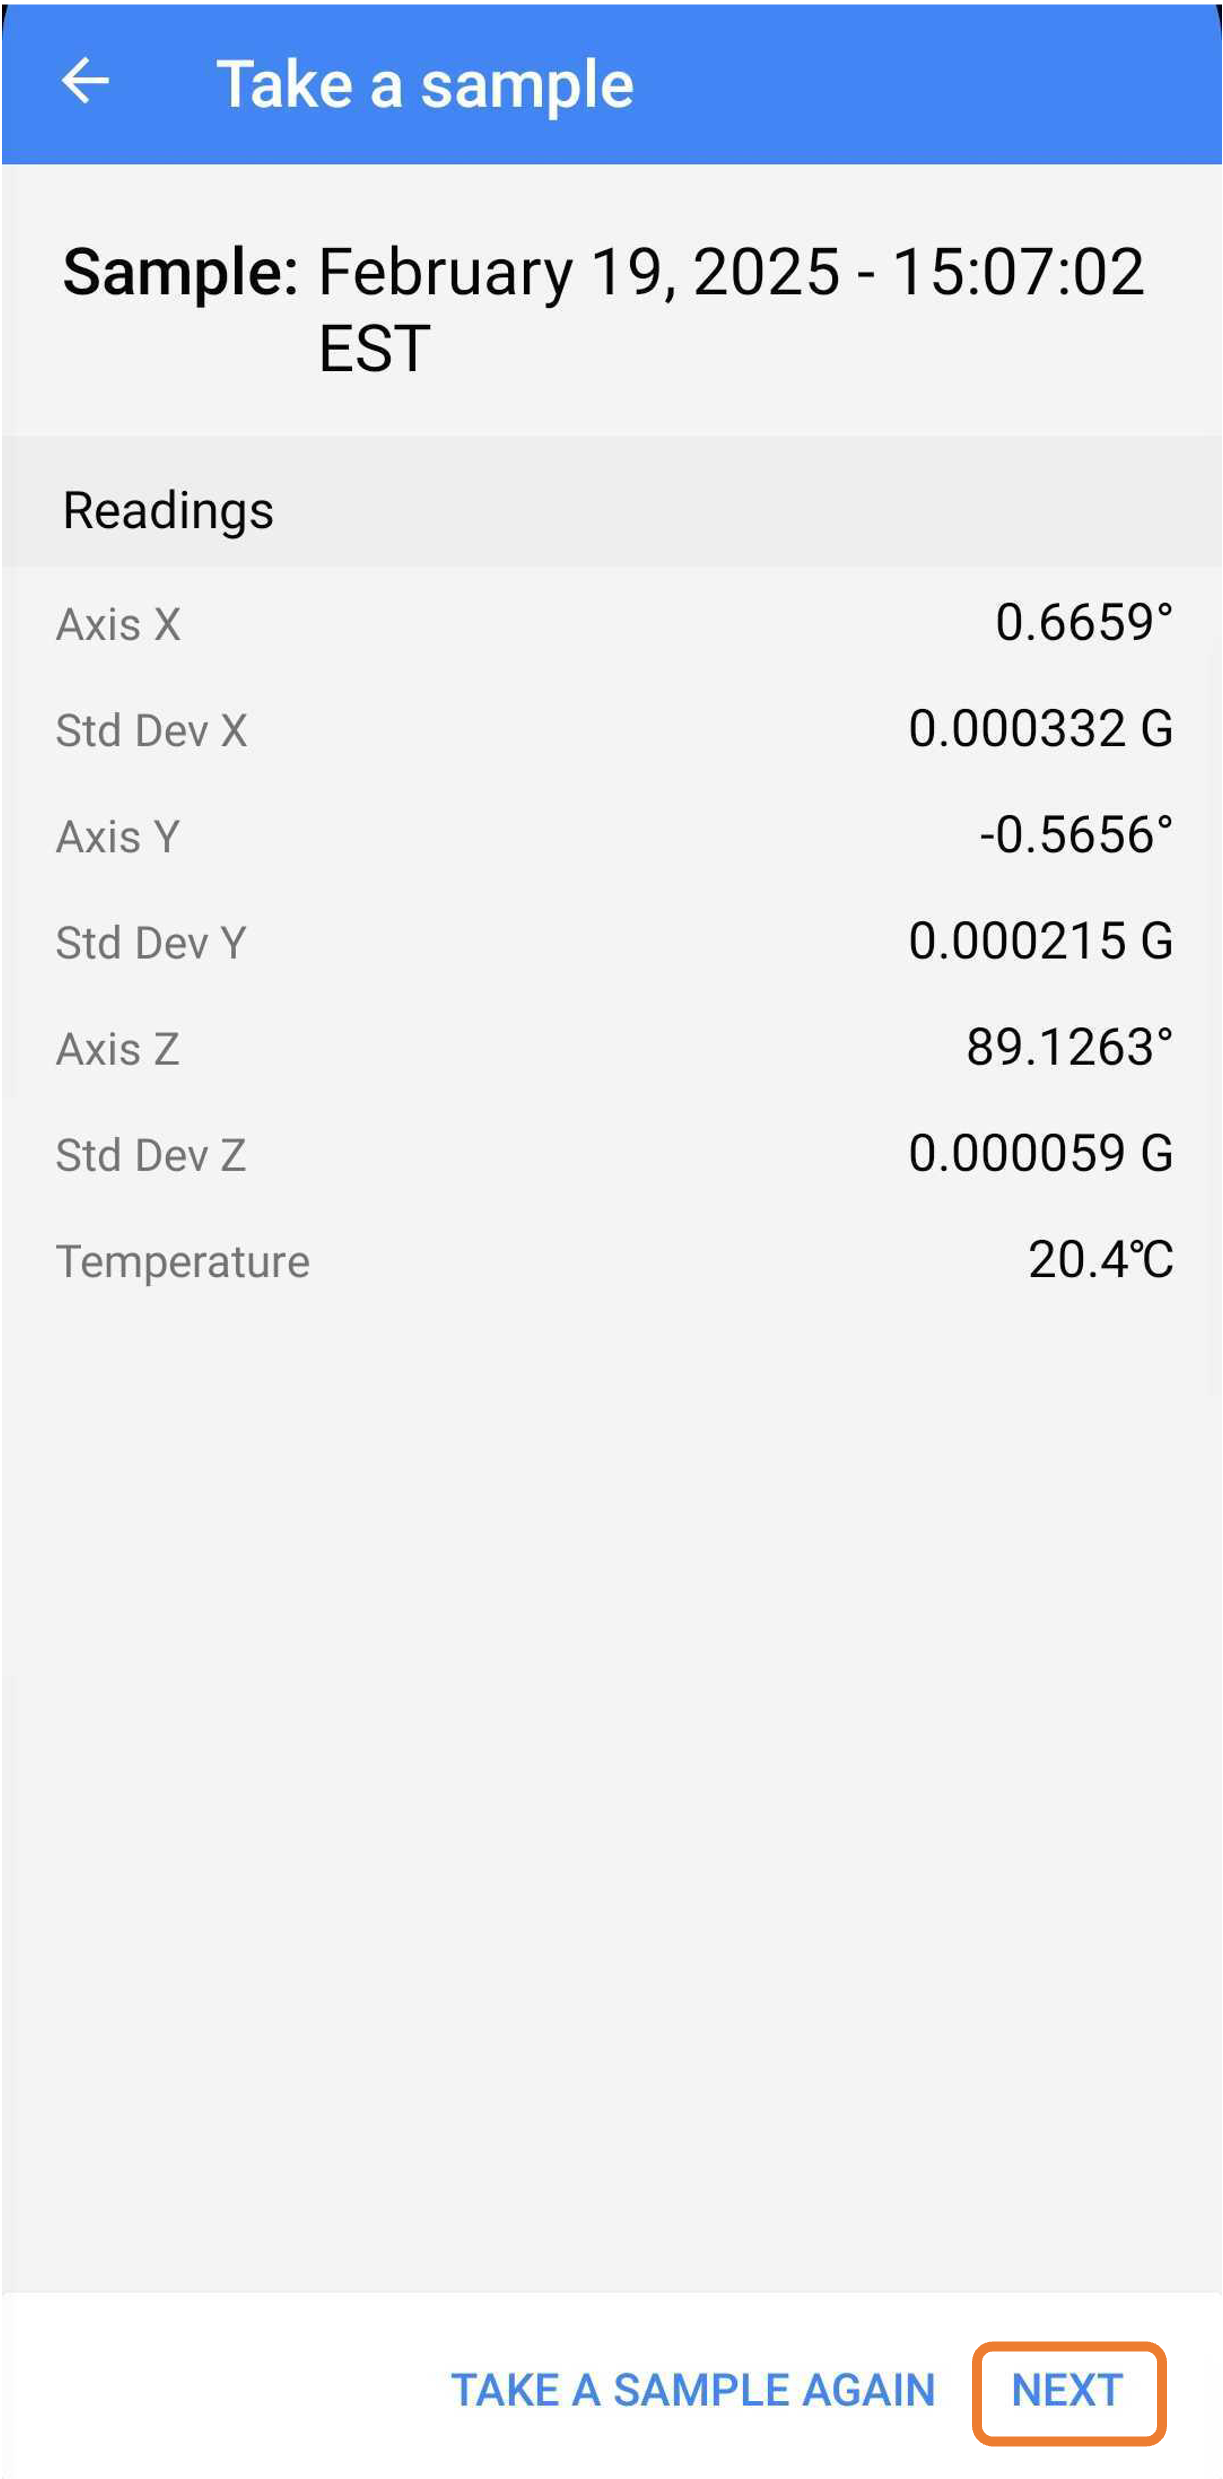
- Select “Take a Sample” to test the Tiltmeter.
- Once the results appear, select “Next".
6. Select the Region
Choose the appropriate region for the Tiltmeter:- United States: Select “FCC”.
- Other Regions: Choose the corresponding option. Contact Specto Technology Support if the Region selection is unknown
- Select “Next”.

7. Configure the CMT Radio
Select one of the 2 options
- CMT Edge
- Select “CMT Edge Radio”, then tap “Next”.
- Set the Maximum Spreading Factor to the default number, “9”.
- Ensure the Channels select “0 - Freq…”.
- Ensure “ADR” is toggled on (it should appear blue).

- CMT Cloud
- Select "CMT Cloud Radio", then "Next".
- Set the CMT Version to "CMT Cloud V2" followed by "Next".

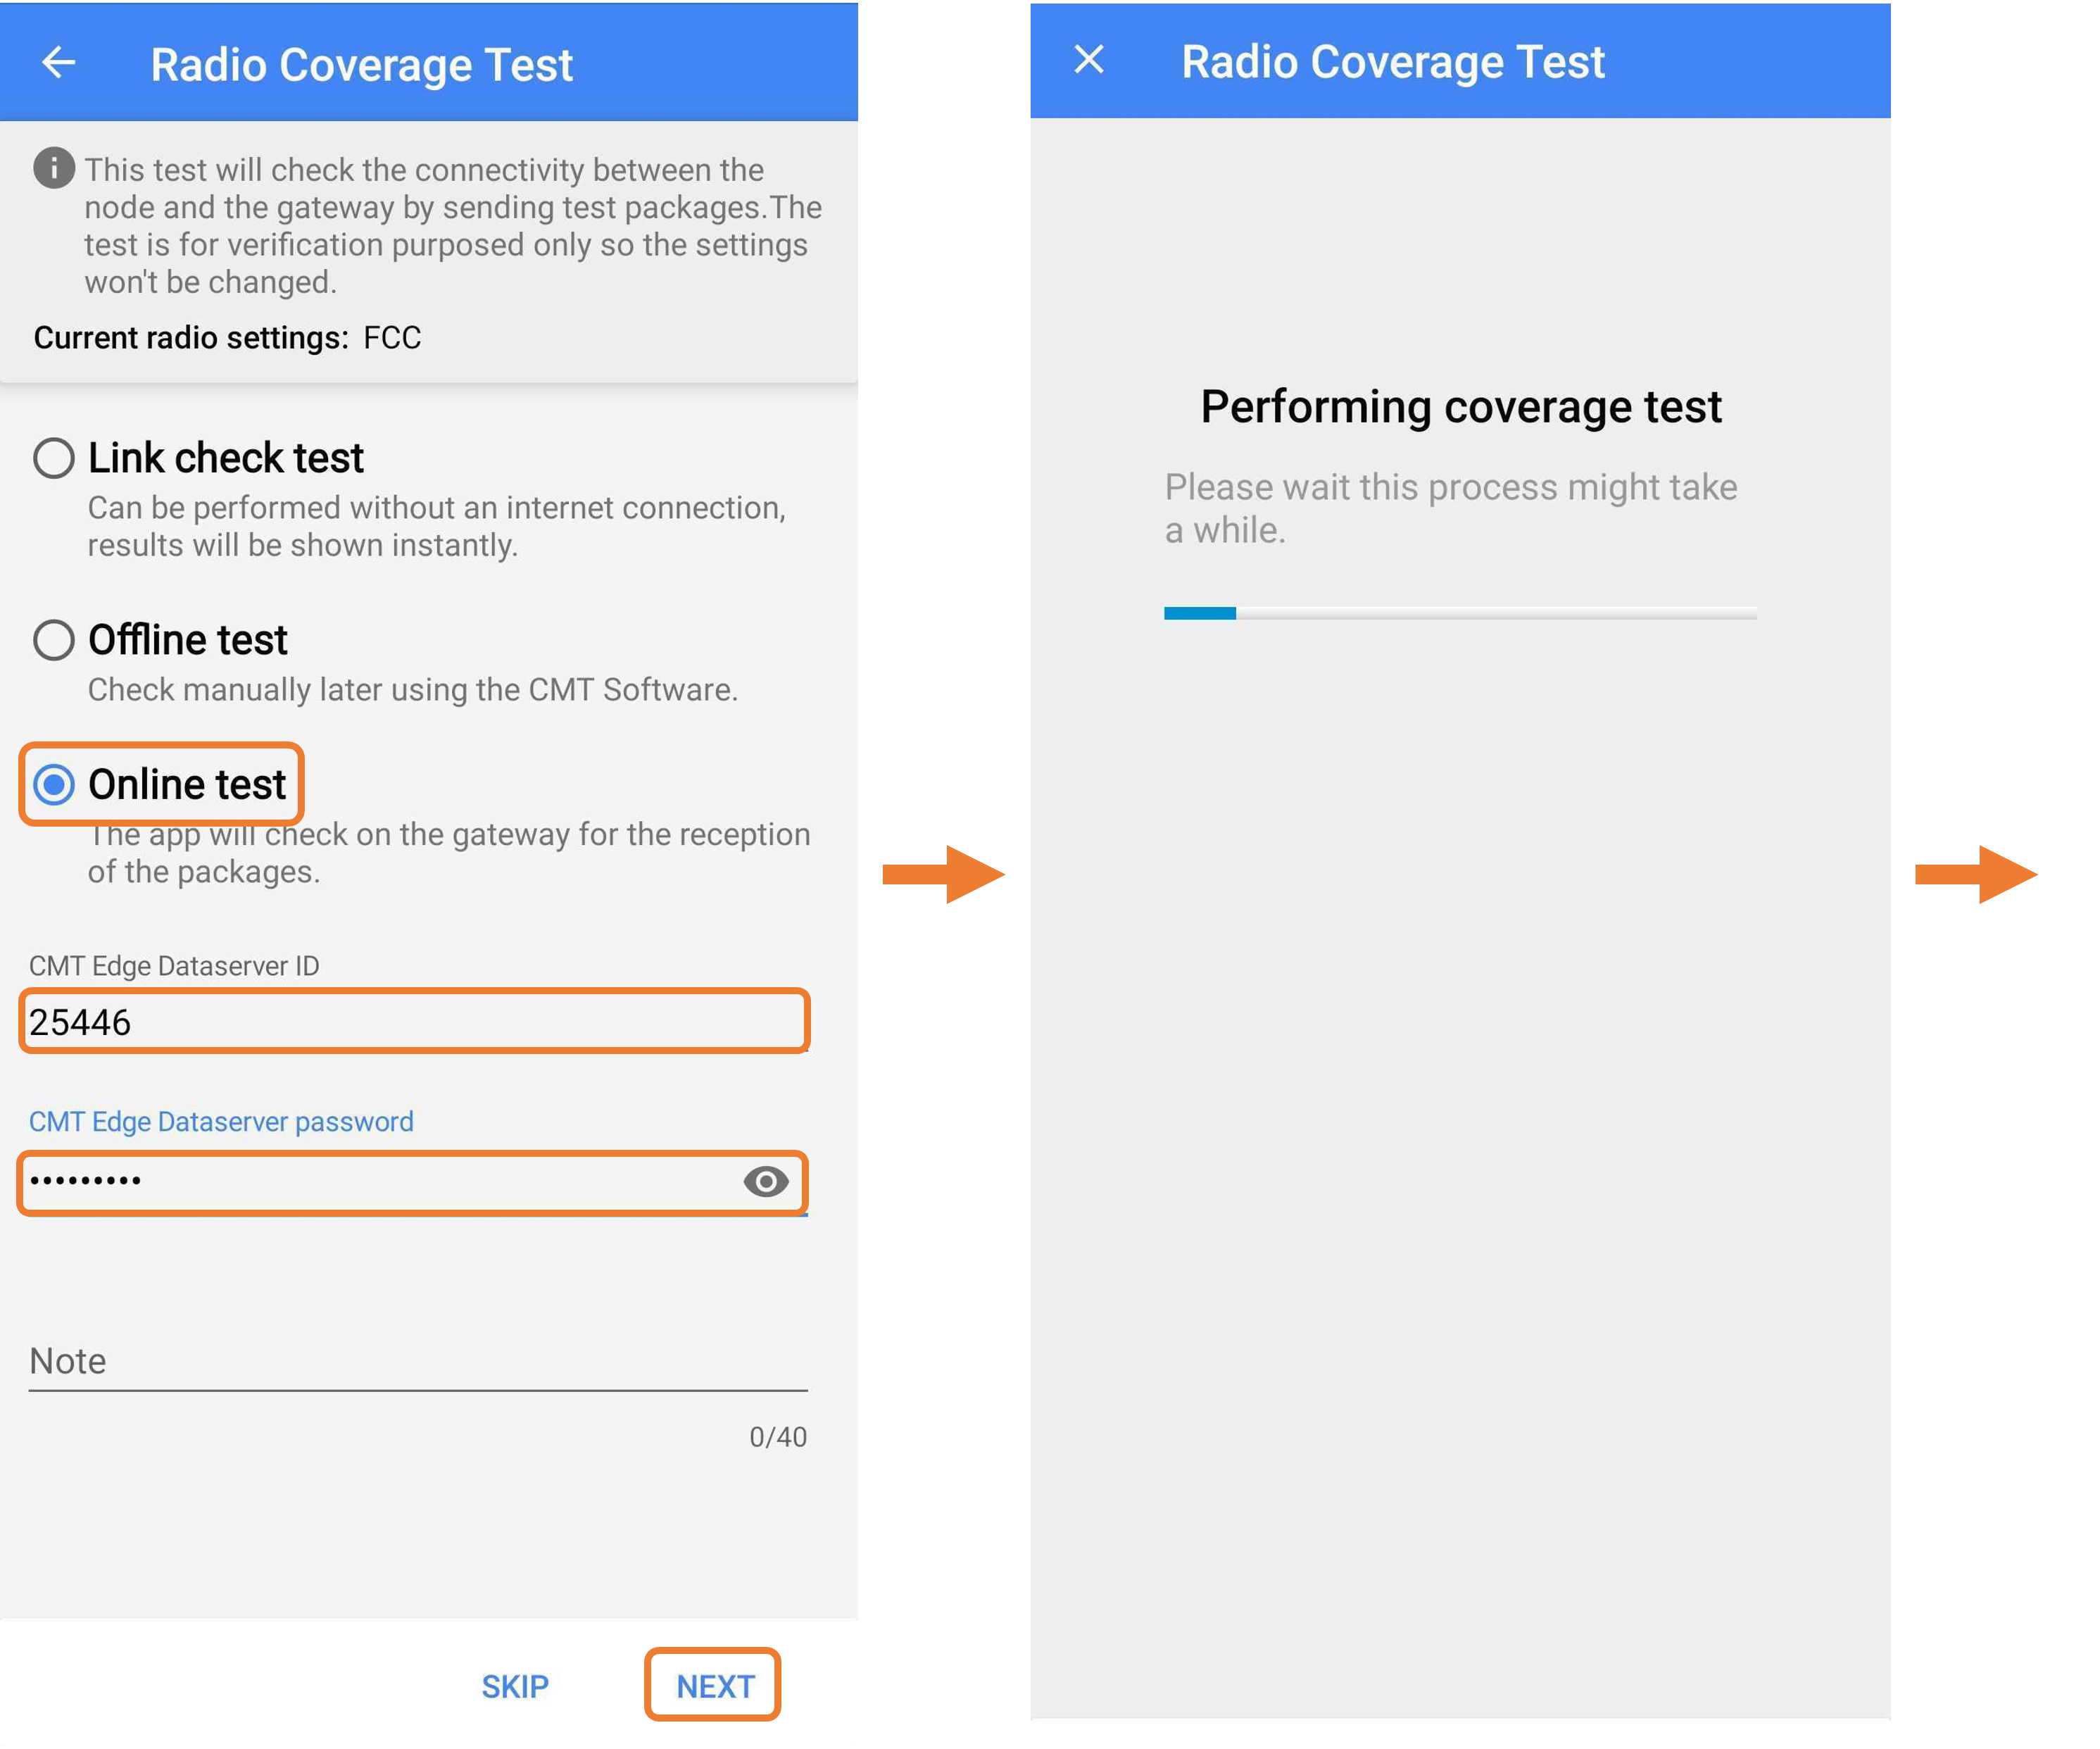
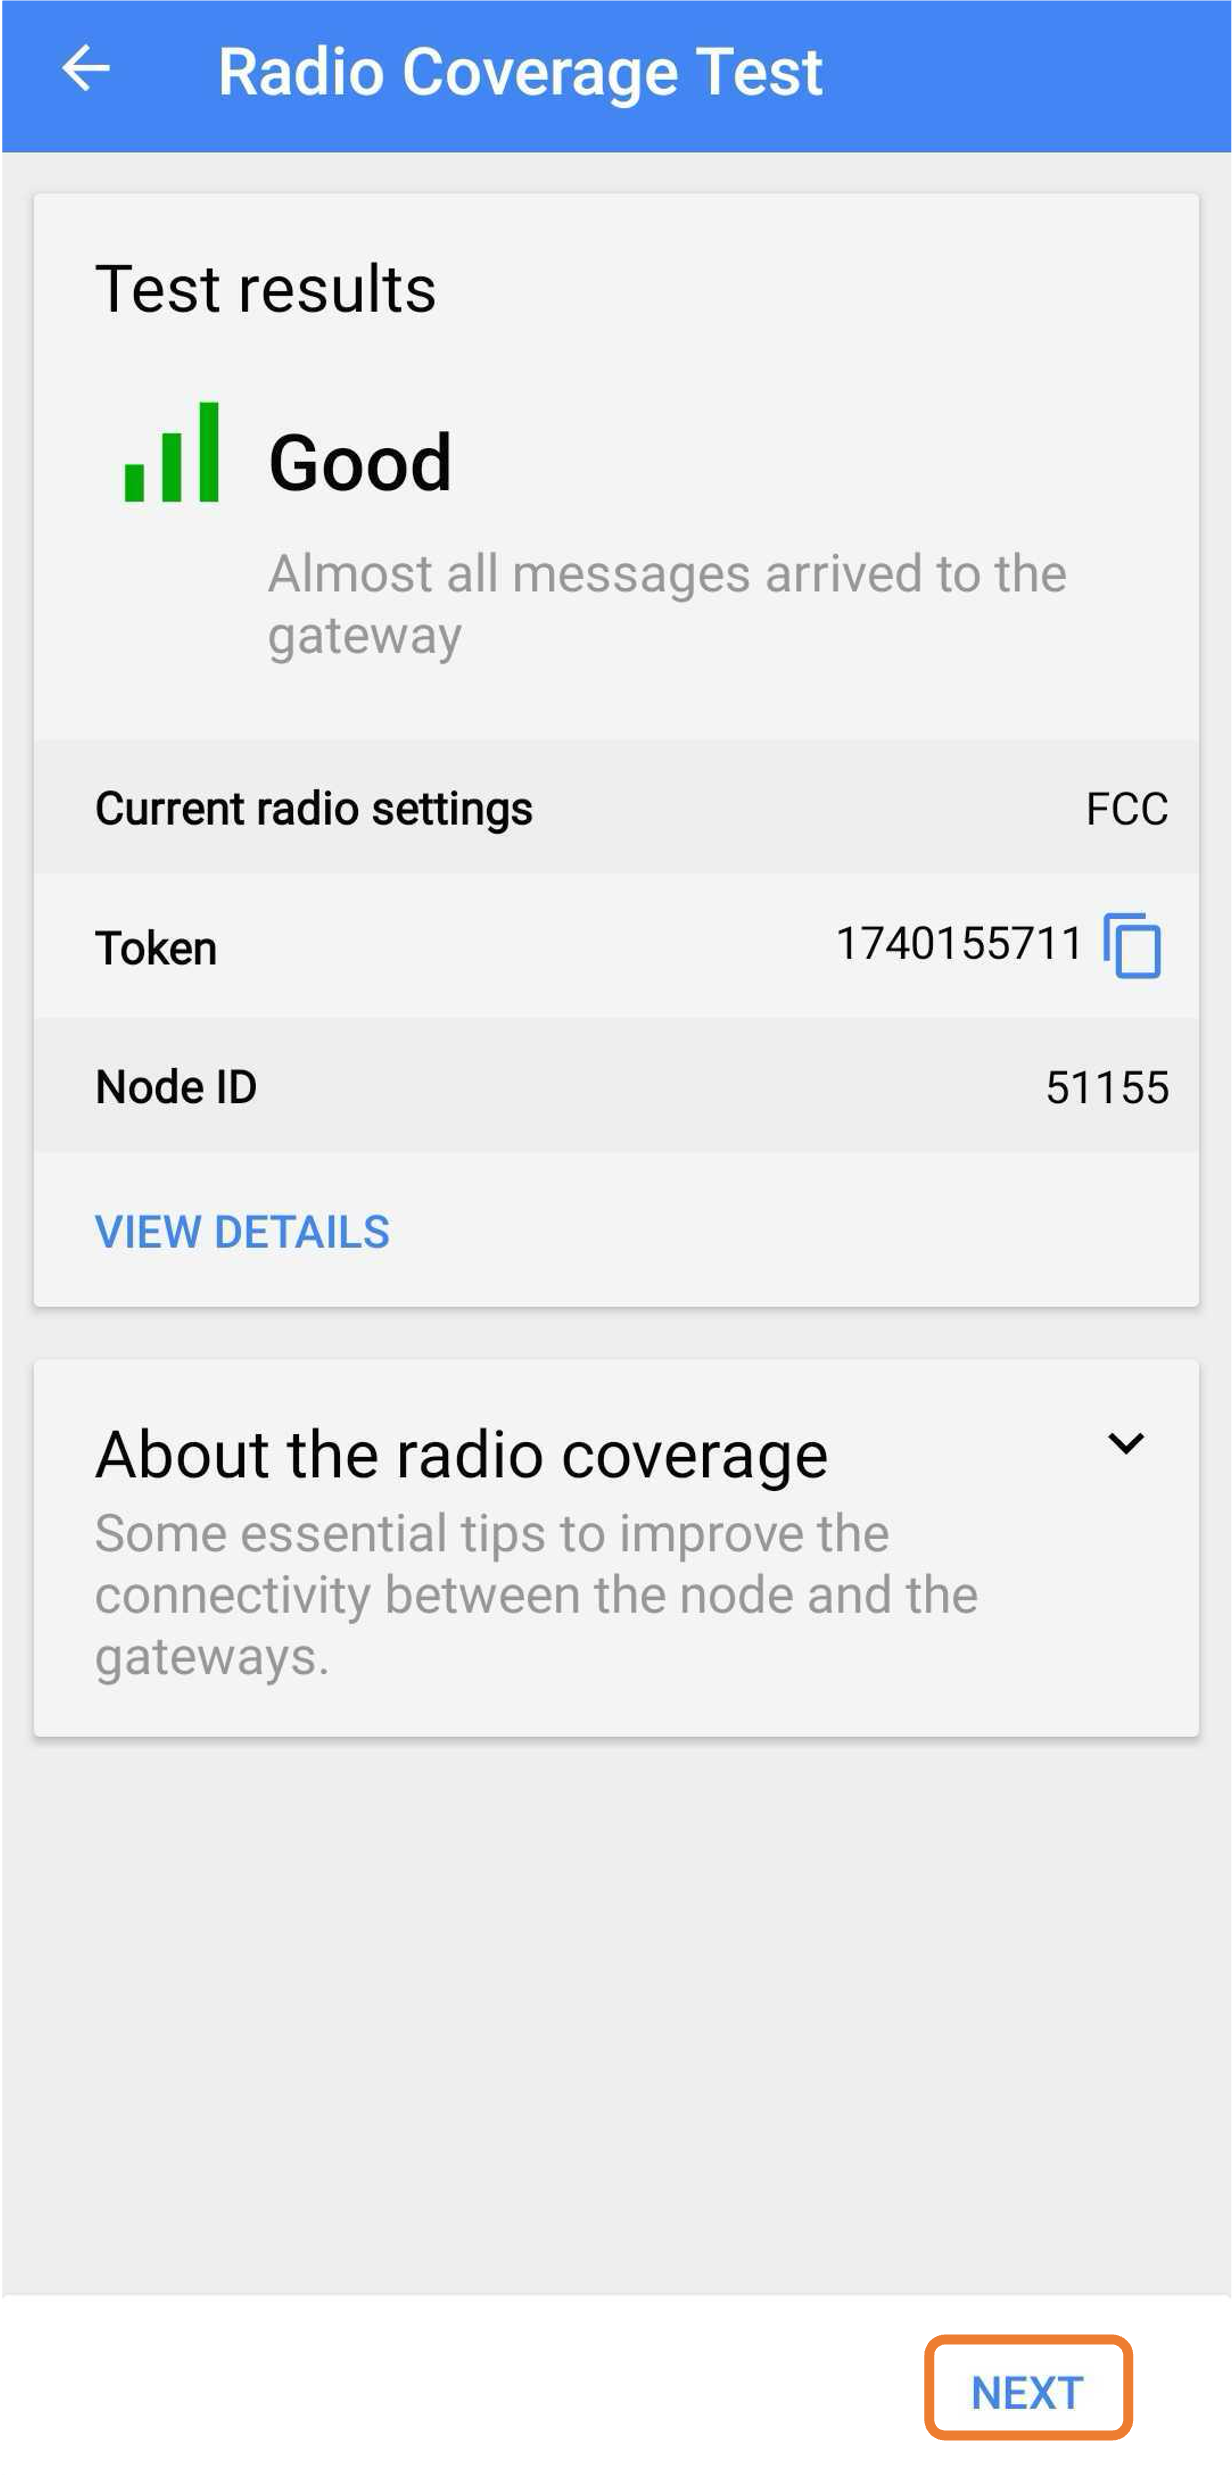
8. Run an Online Test
Select one of the 2 options
- CMT Edge
- Select “Online Test”.
- If the mobile device or gateway is offline, select “Link Check Test” to verify the connection
- Enter the Gateway ID for the CMT Edge Dataserver.
- Enter the Gateway Password for the CMT Edge Dataserver.
- Select “Next”.
- Select “Online Test”.
- CMT Cloud
- Ensure the "Register node with CMT Cloud server" is toggled on.
- If the credentials under the Email address or Password are incorrect or missing, toggle on the "Edit credentials".
- Select "Next".

9. Final Configuration Steps
-
- Choose the maximum number of devices that will connect to the Gateway.
- After setup is complete, confirm/change the reporting period in the gateway setting and select the reading frequency for the Tiltmeter (default recommendation is 1 hour).
- Tap “Next”
- Choose the maximum number of devices that will connect to the Gateway.

10. Complete the Setup
-
-
The Tiltmeter is now operational.
- Select “Close” to finish the setup.
-

Supported links: