![99745fd6-afc8-495e-a1a1-c5fa6c1501aa.png]](https://resources.spectotechnology.com/hs-fs/hubfs/99745fd6-afc8-495e-a1a1-c5fa6c1501aa.png?width=300&height=113&name=99745fd6-afc8-495e-a1a1-c5fa6c1501aa.png)
Ensure that the Base and the Rover are mounted with a clear view of the sky before setting up the software.
1. Download and install the Worldsensing App
a. Download the Worldsensing app from the Google Play Store.
b. Once the download and installation are complete, open the app

2. Open the Loadsensing app. Use a USB cable to connect one end to your mobile device and the other to the Loadsensing GNSS.

3. Check for Updates
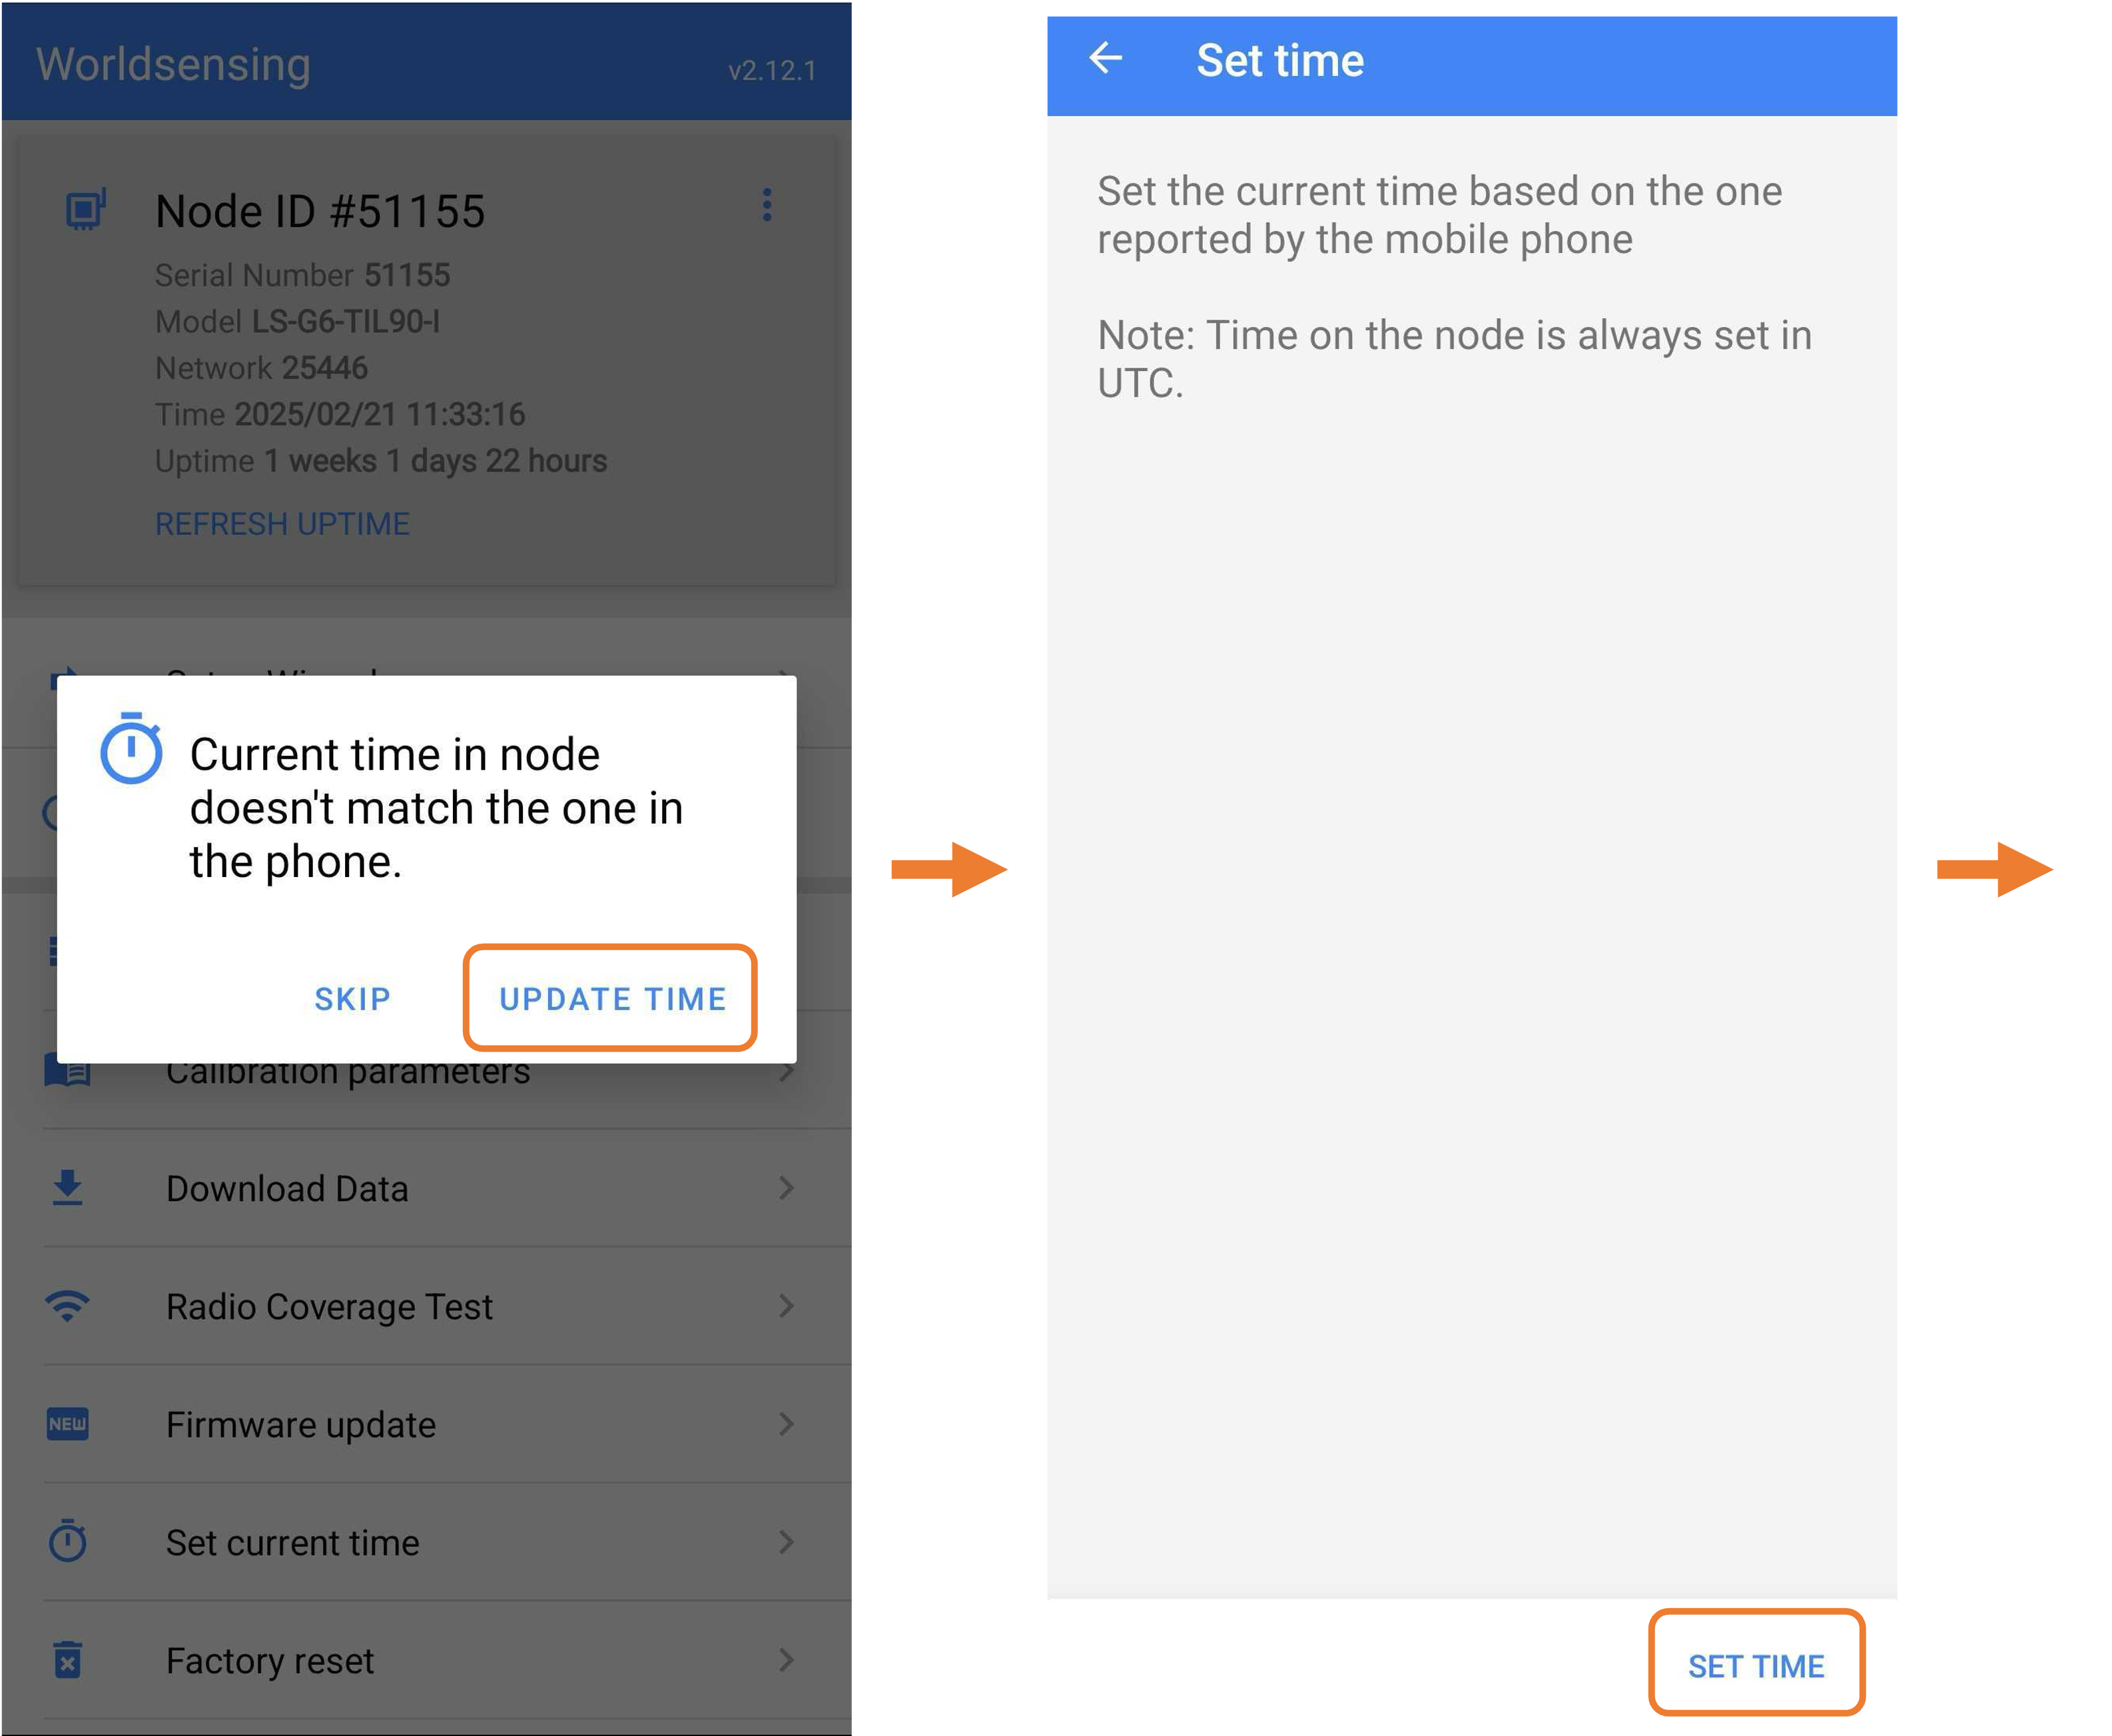
a. The GNSS could be out of sync with the mobile device's current timezone. a message stating "Current time in node doesn't match the one in the phone." Proceed by selecting "Update Time".
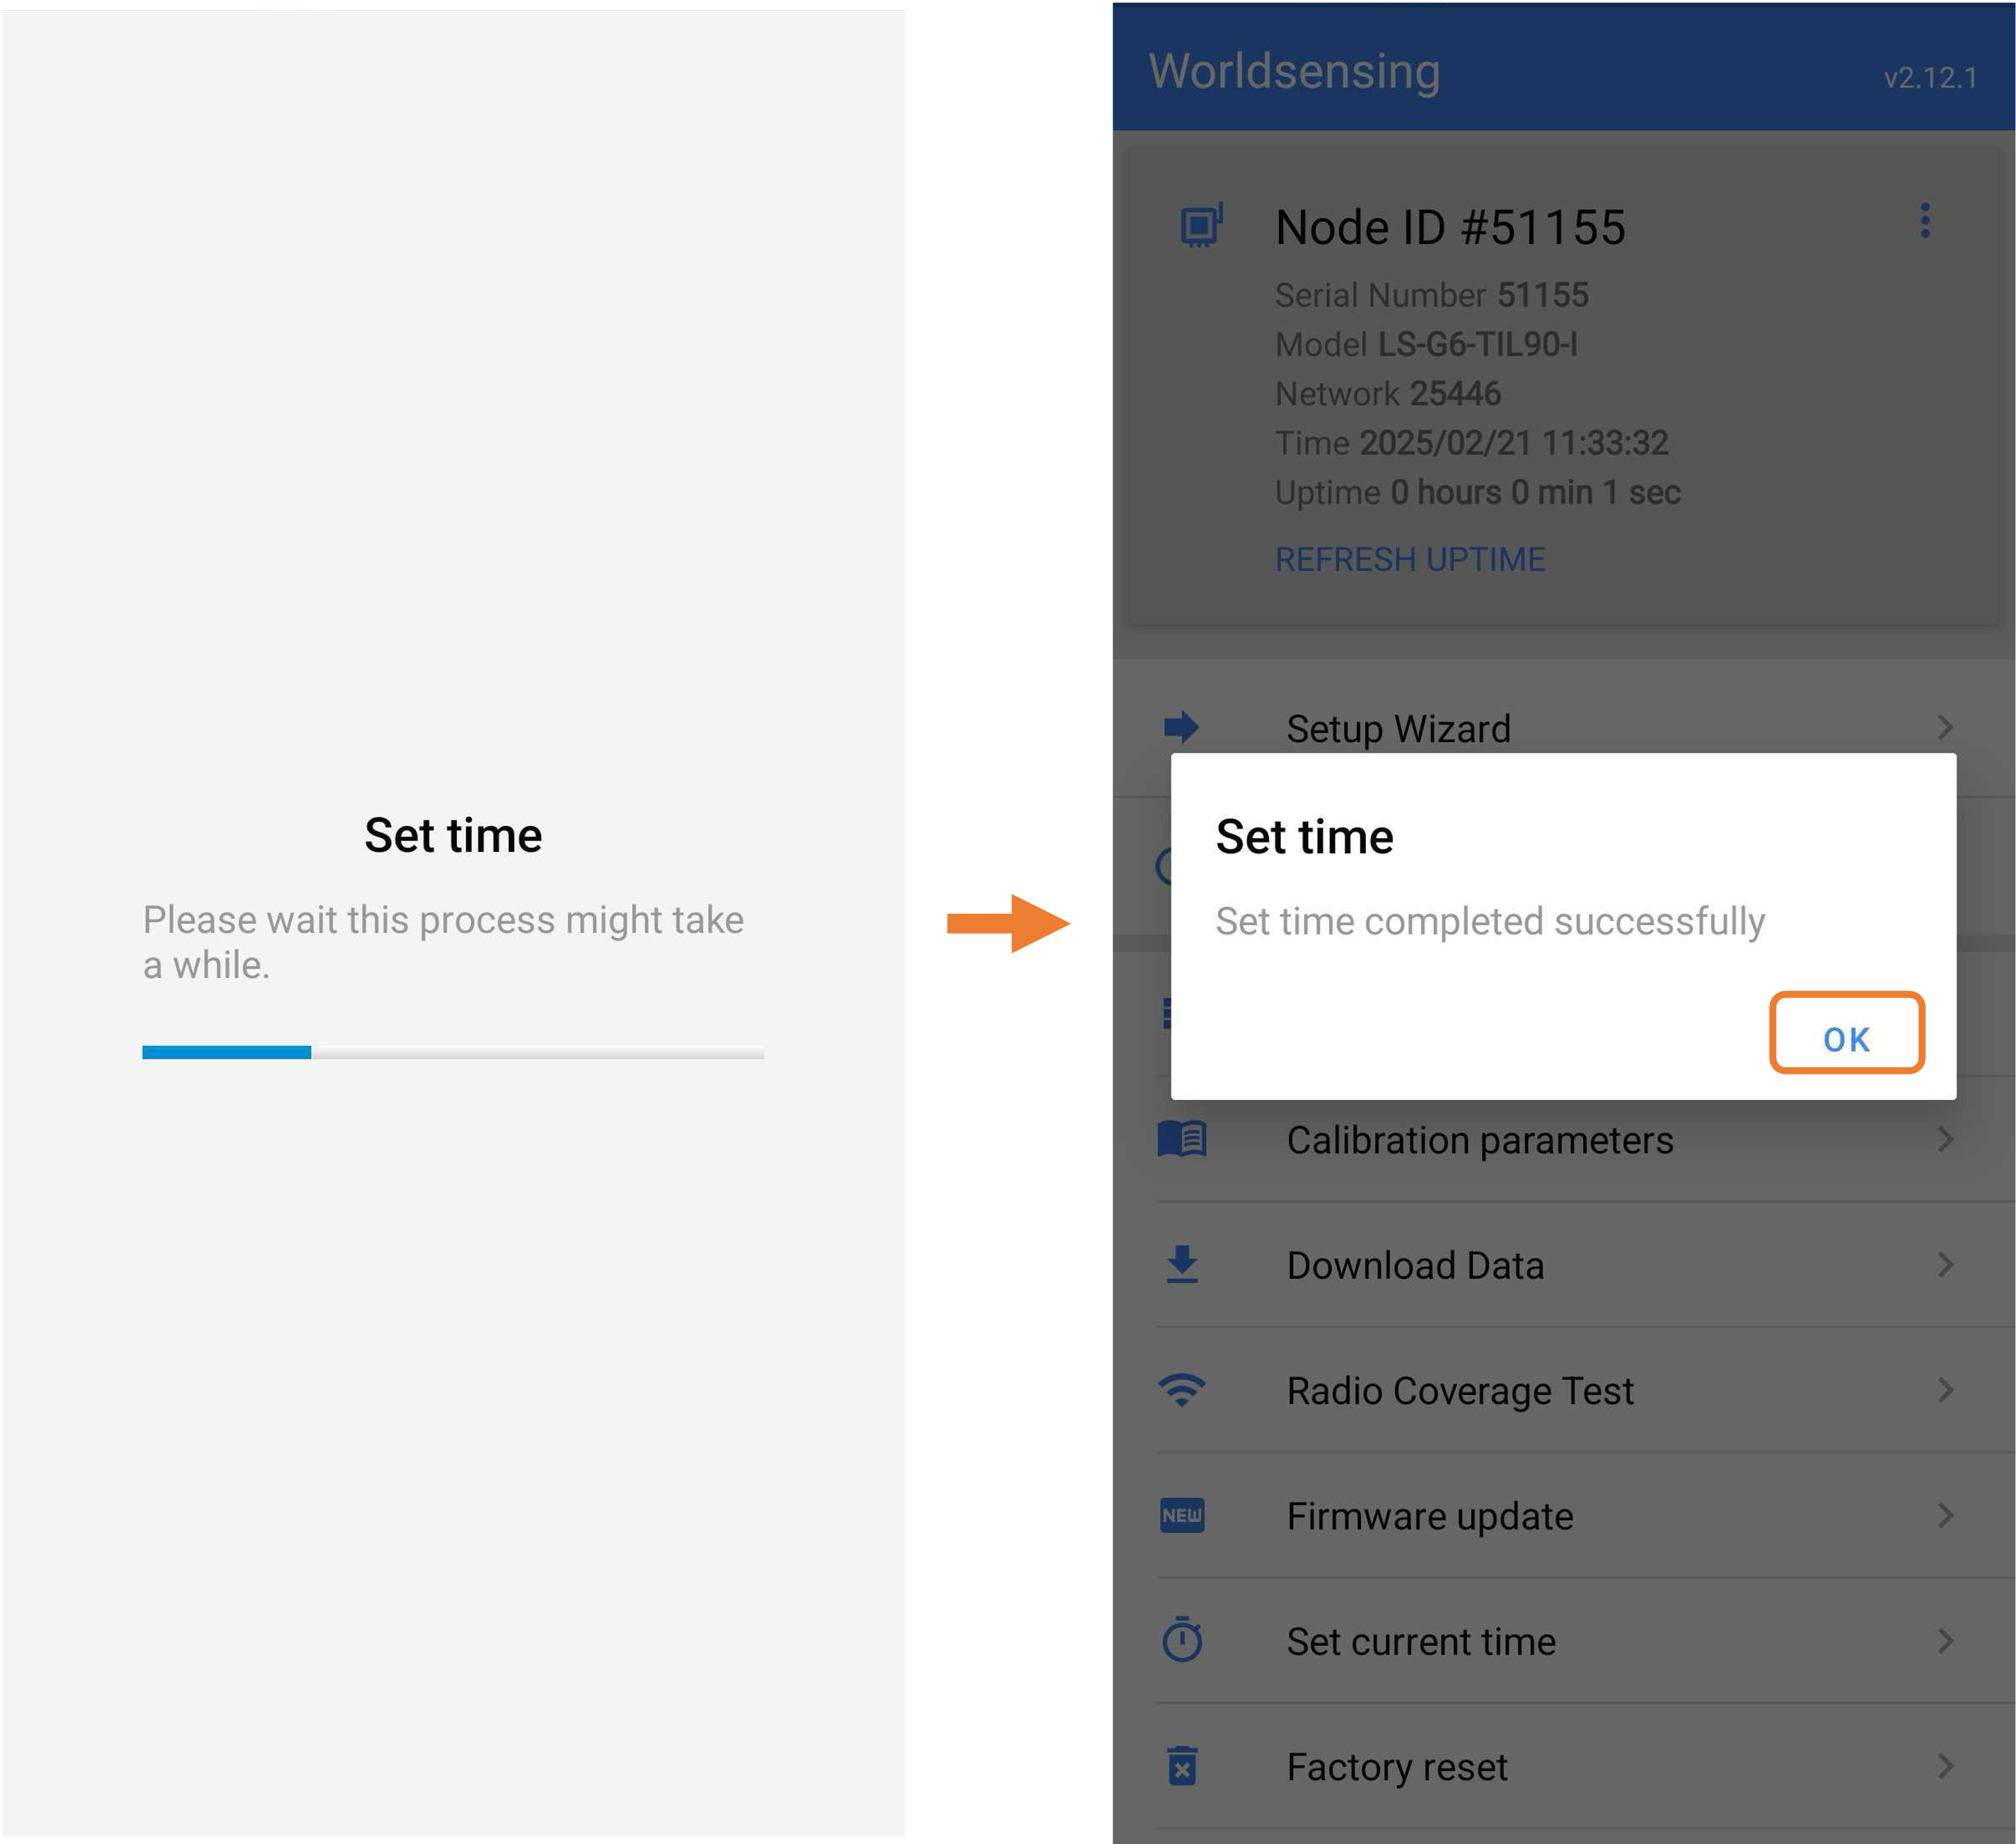
i. Select "Set Time".
ii. Select "OK".
b. In the app, select “Firmware Update” to check if the GNSS is up to date.
-
-
-
-
- If an update is available, install it.
- If no update is required, select “Skip."
-
-
-
4. Base Administrator
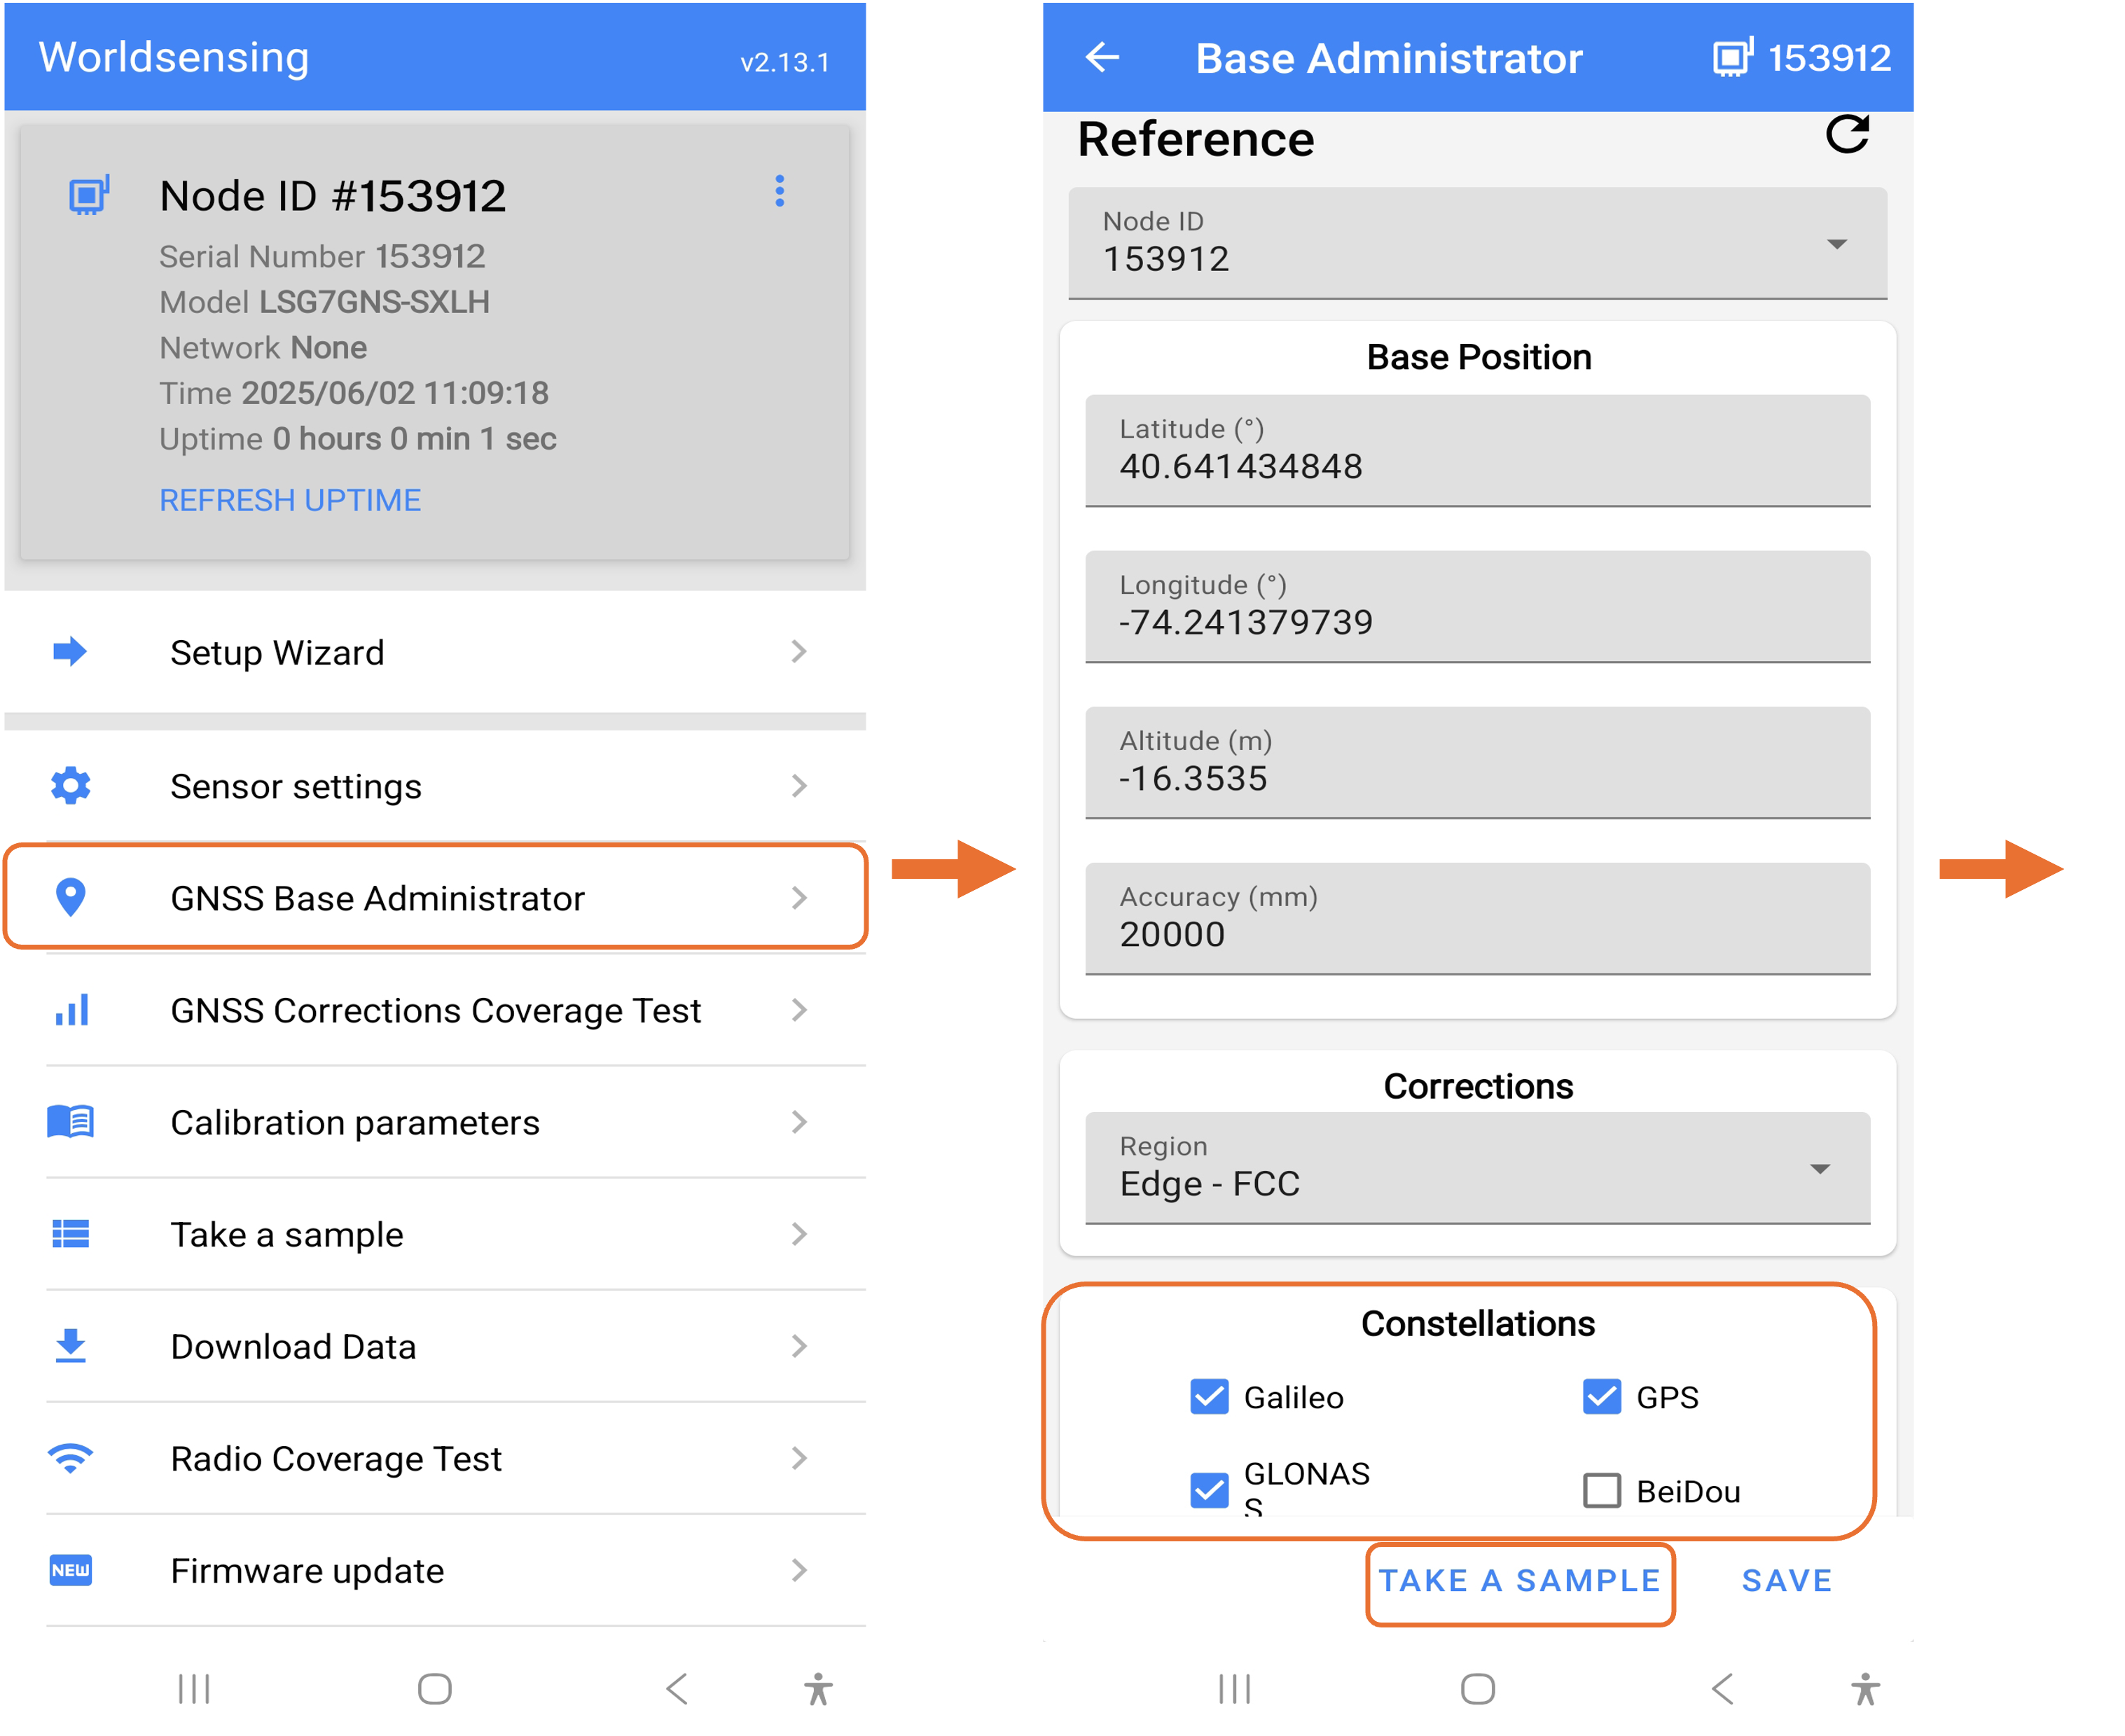
a. Select “GNSS Base Administrator” under the device menu.
b. Select the Node ID and save the Node ID as the Base Serial Number for easy reference
c. Using your mobile device, enter the coordinates of the Latitude, Longitude, Altitude
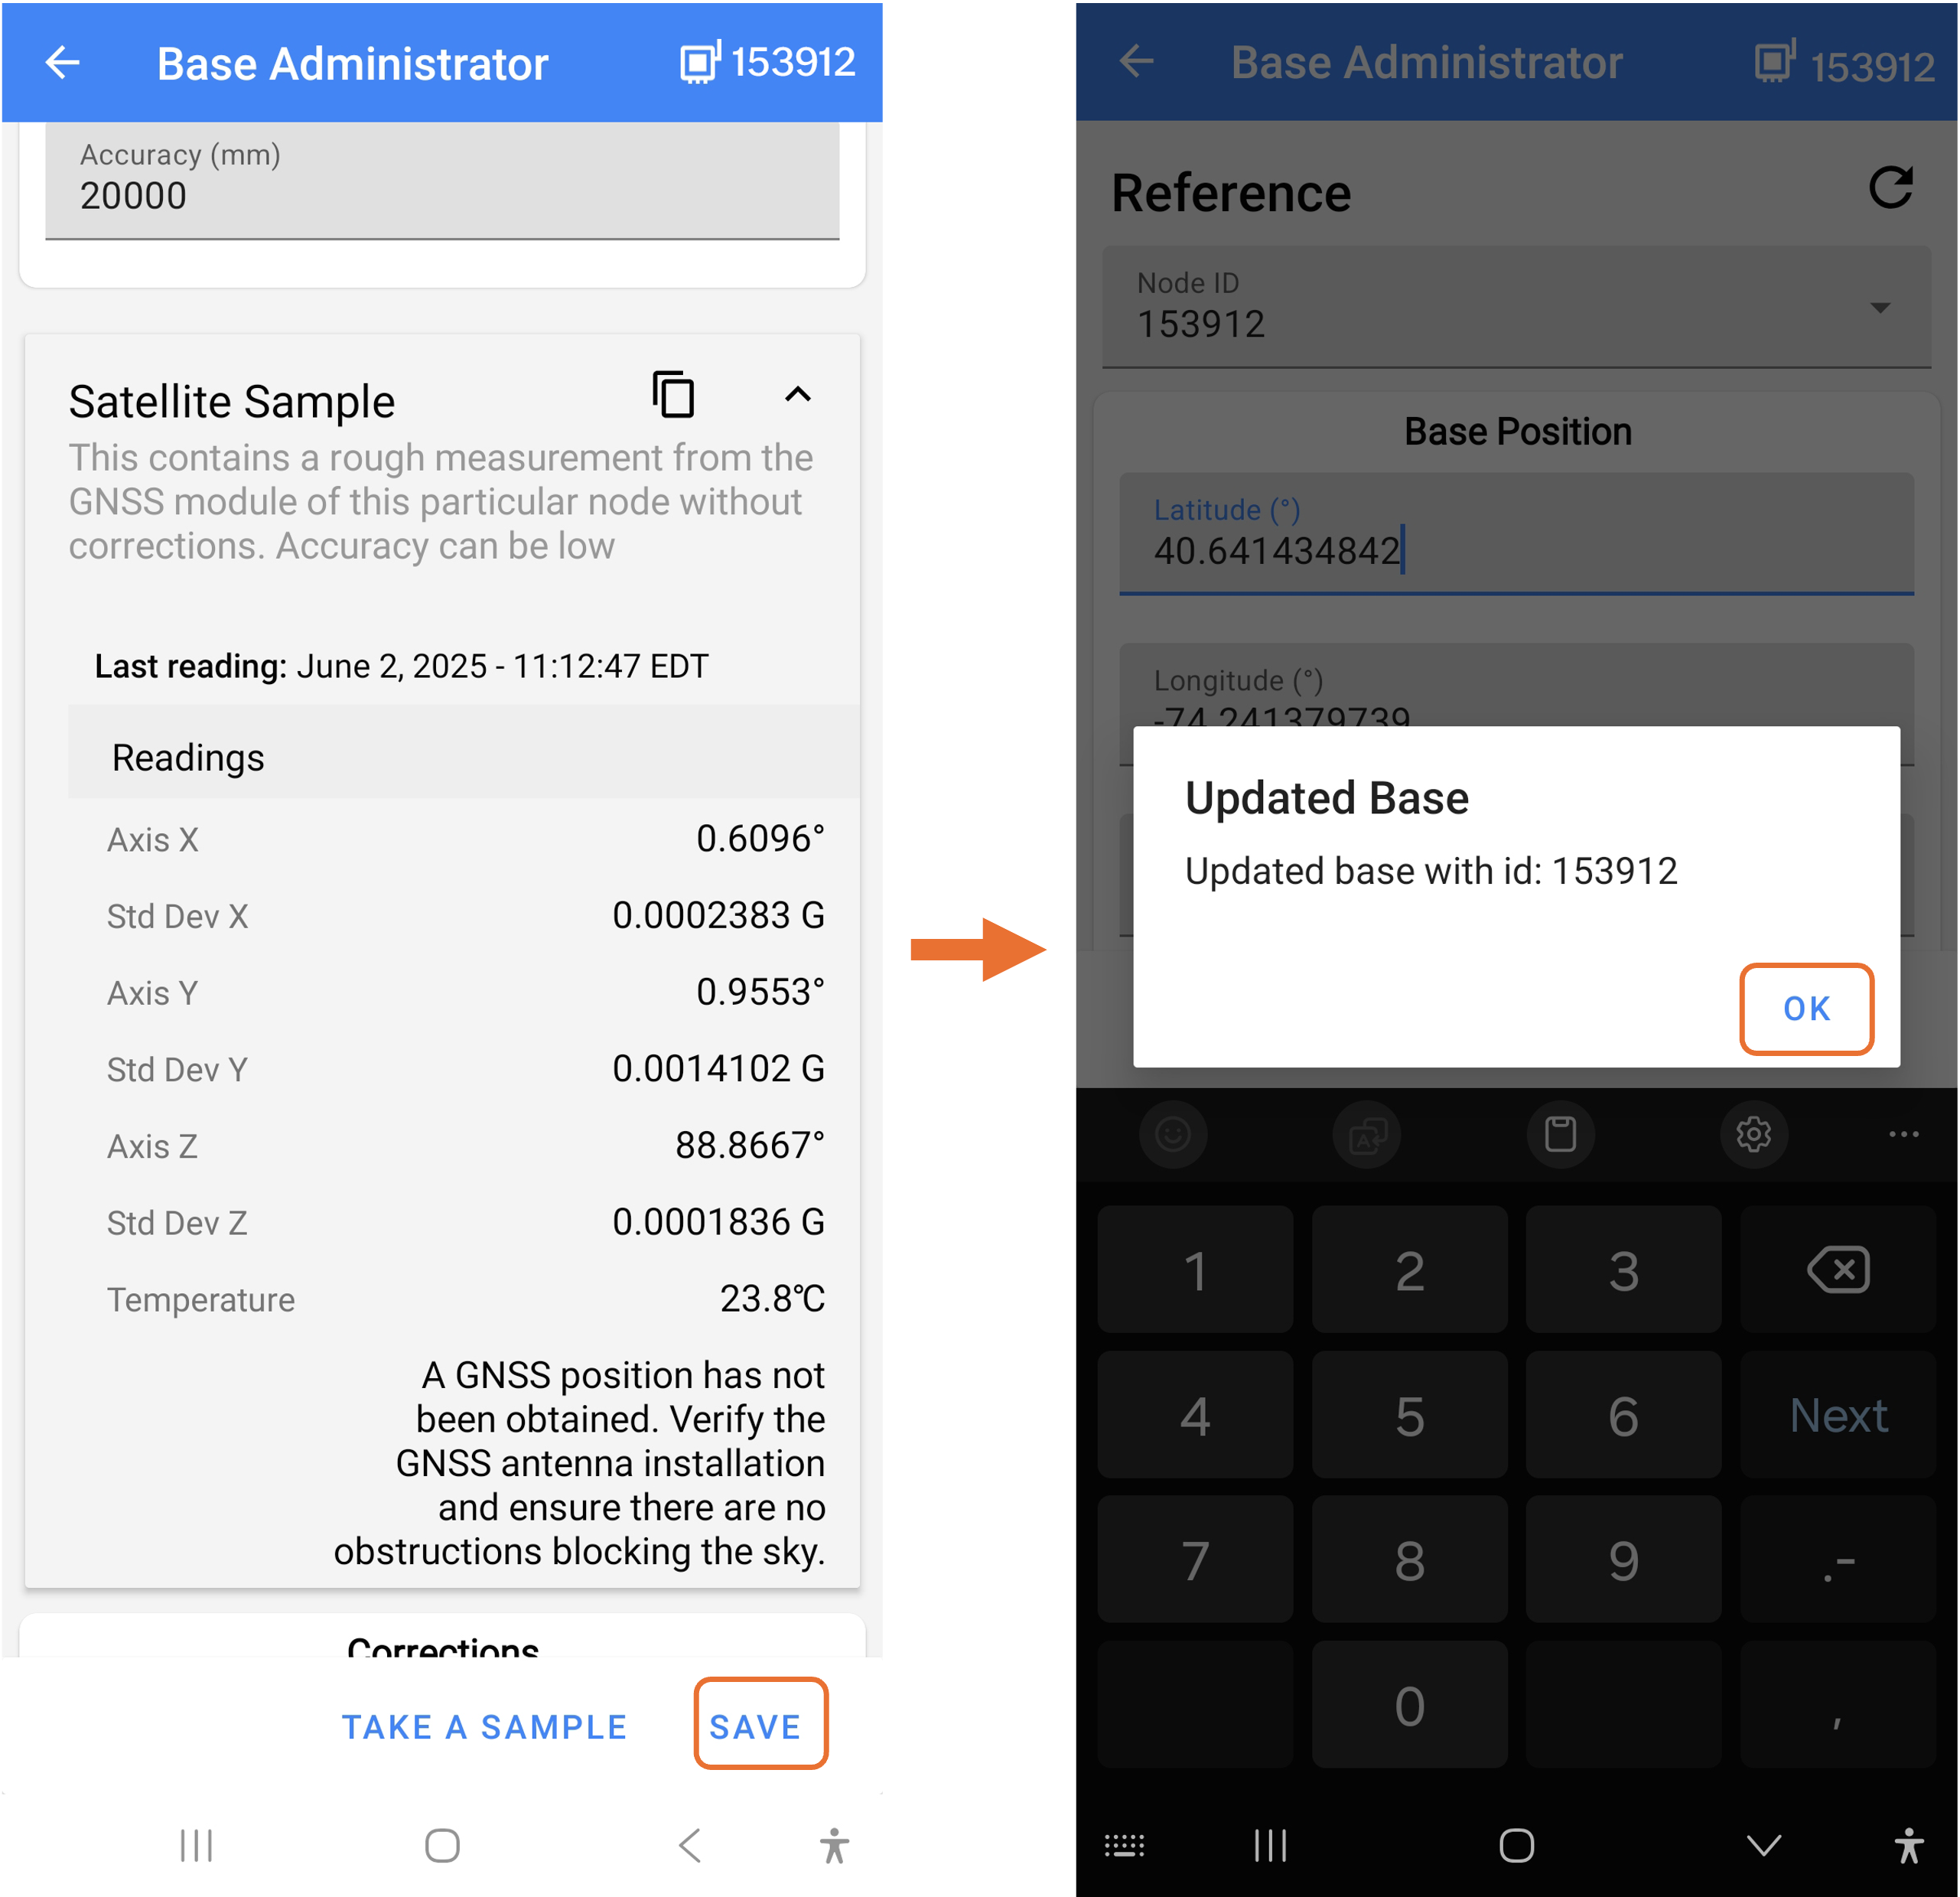
d. Accuracy (mm): set a desired accuracy threshold (e.g., 20000 mm or 20 m)
- If there are even more accurate coordinates for the GNSS prior to the install, a smaller accuracy threshold could be selected (e.g., 20 to 100mm)
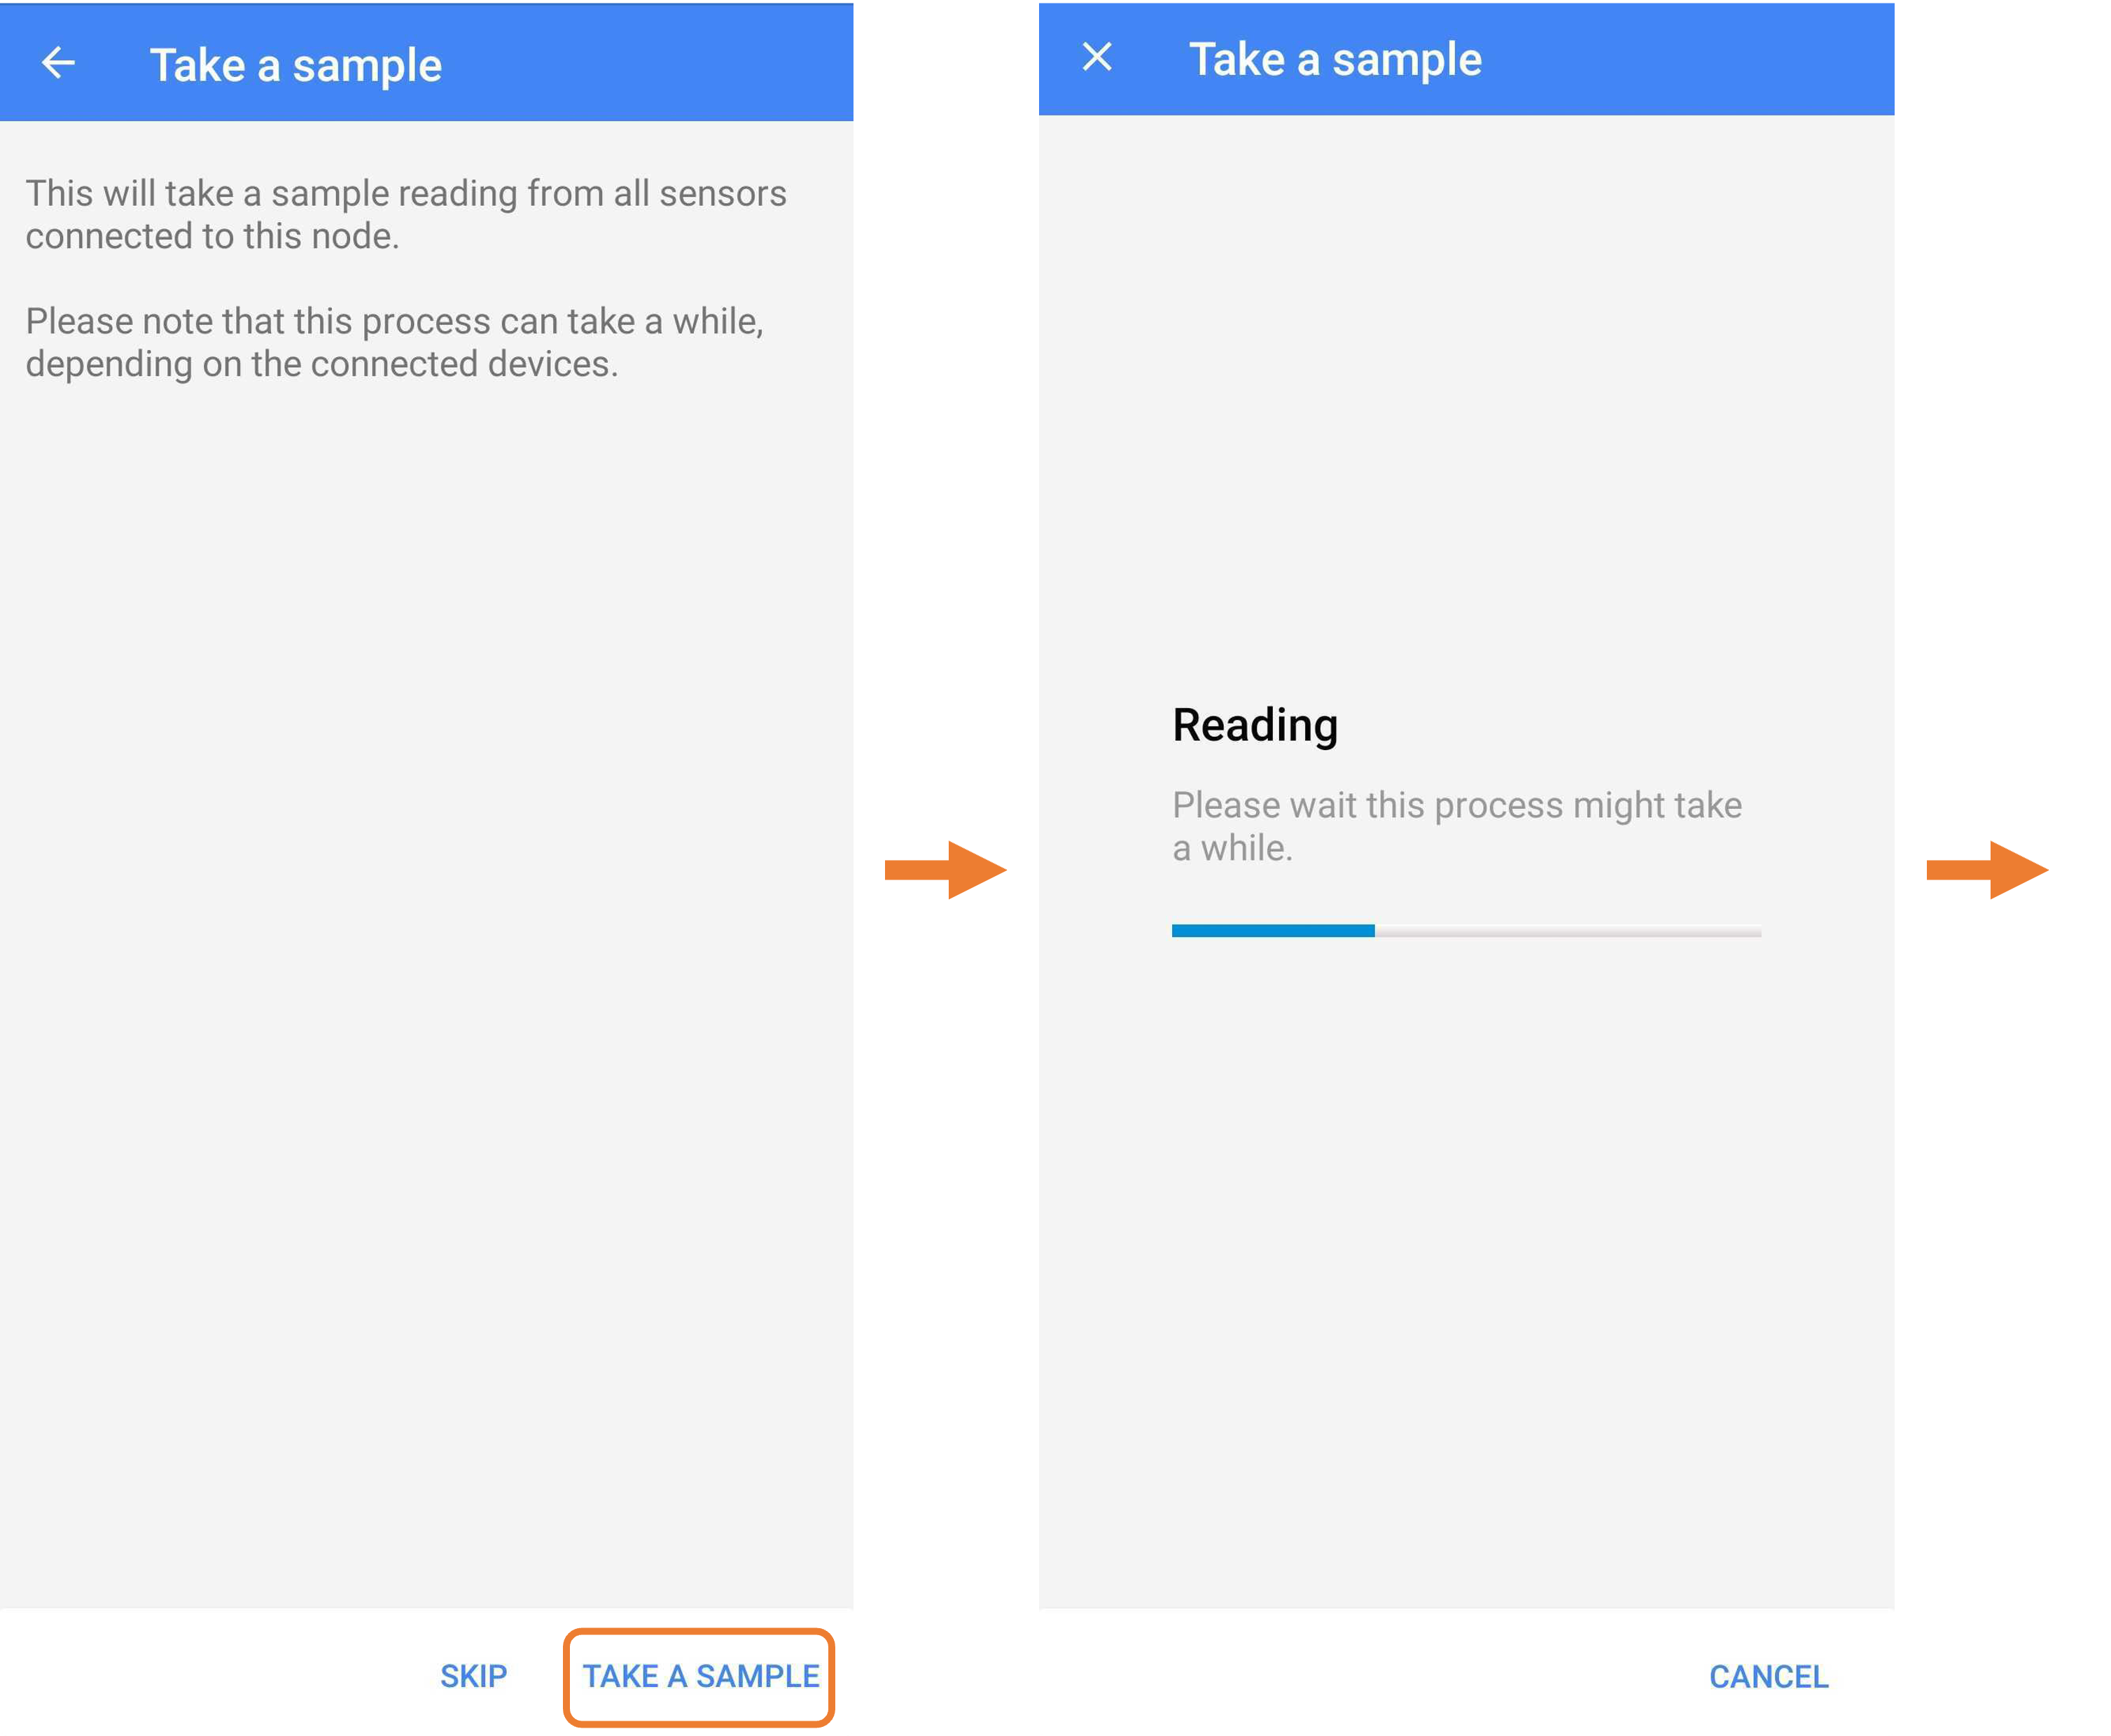
e. Select “TAKE A SAMPLE” to begin collecting the GNSS location
f. Ensure the boxes to the left of Galileo, GPS, and GLONASS are checked off
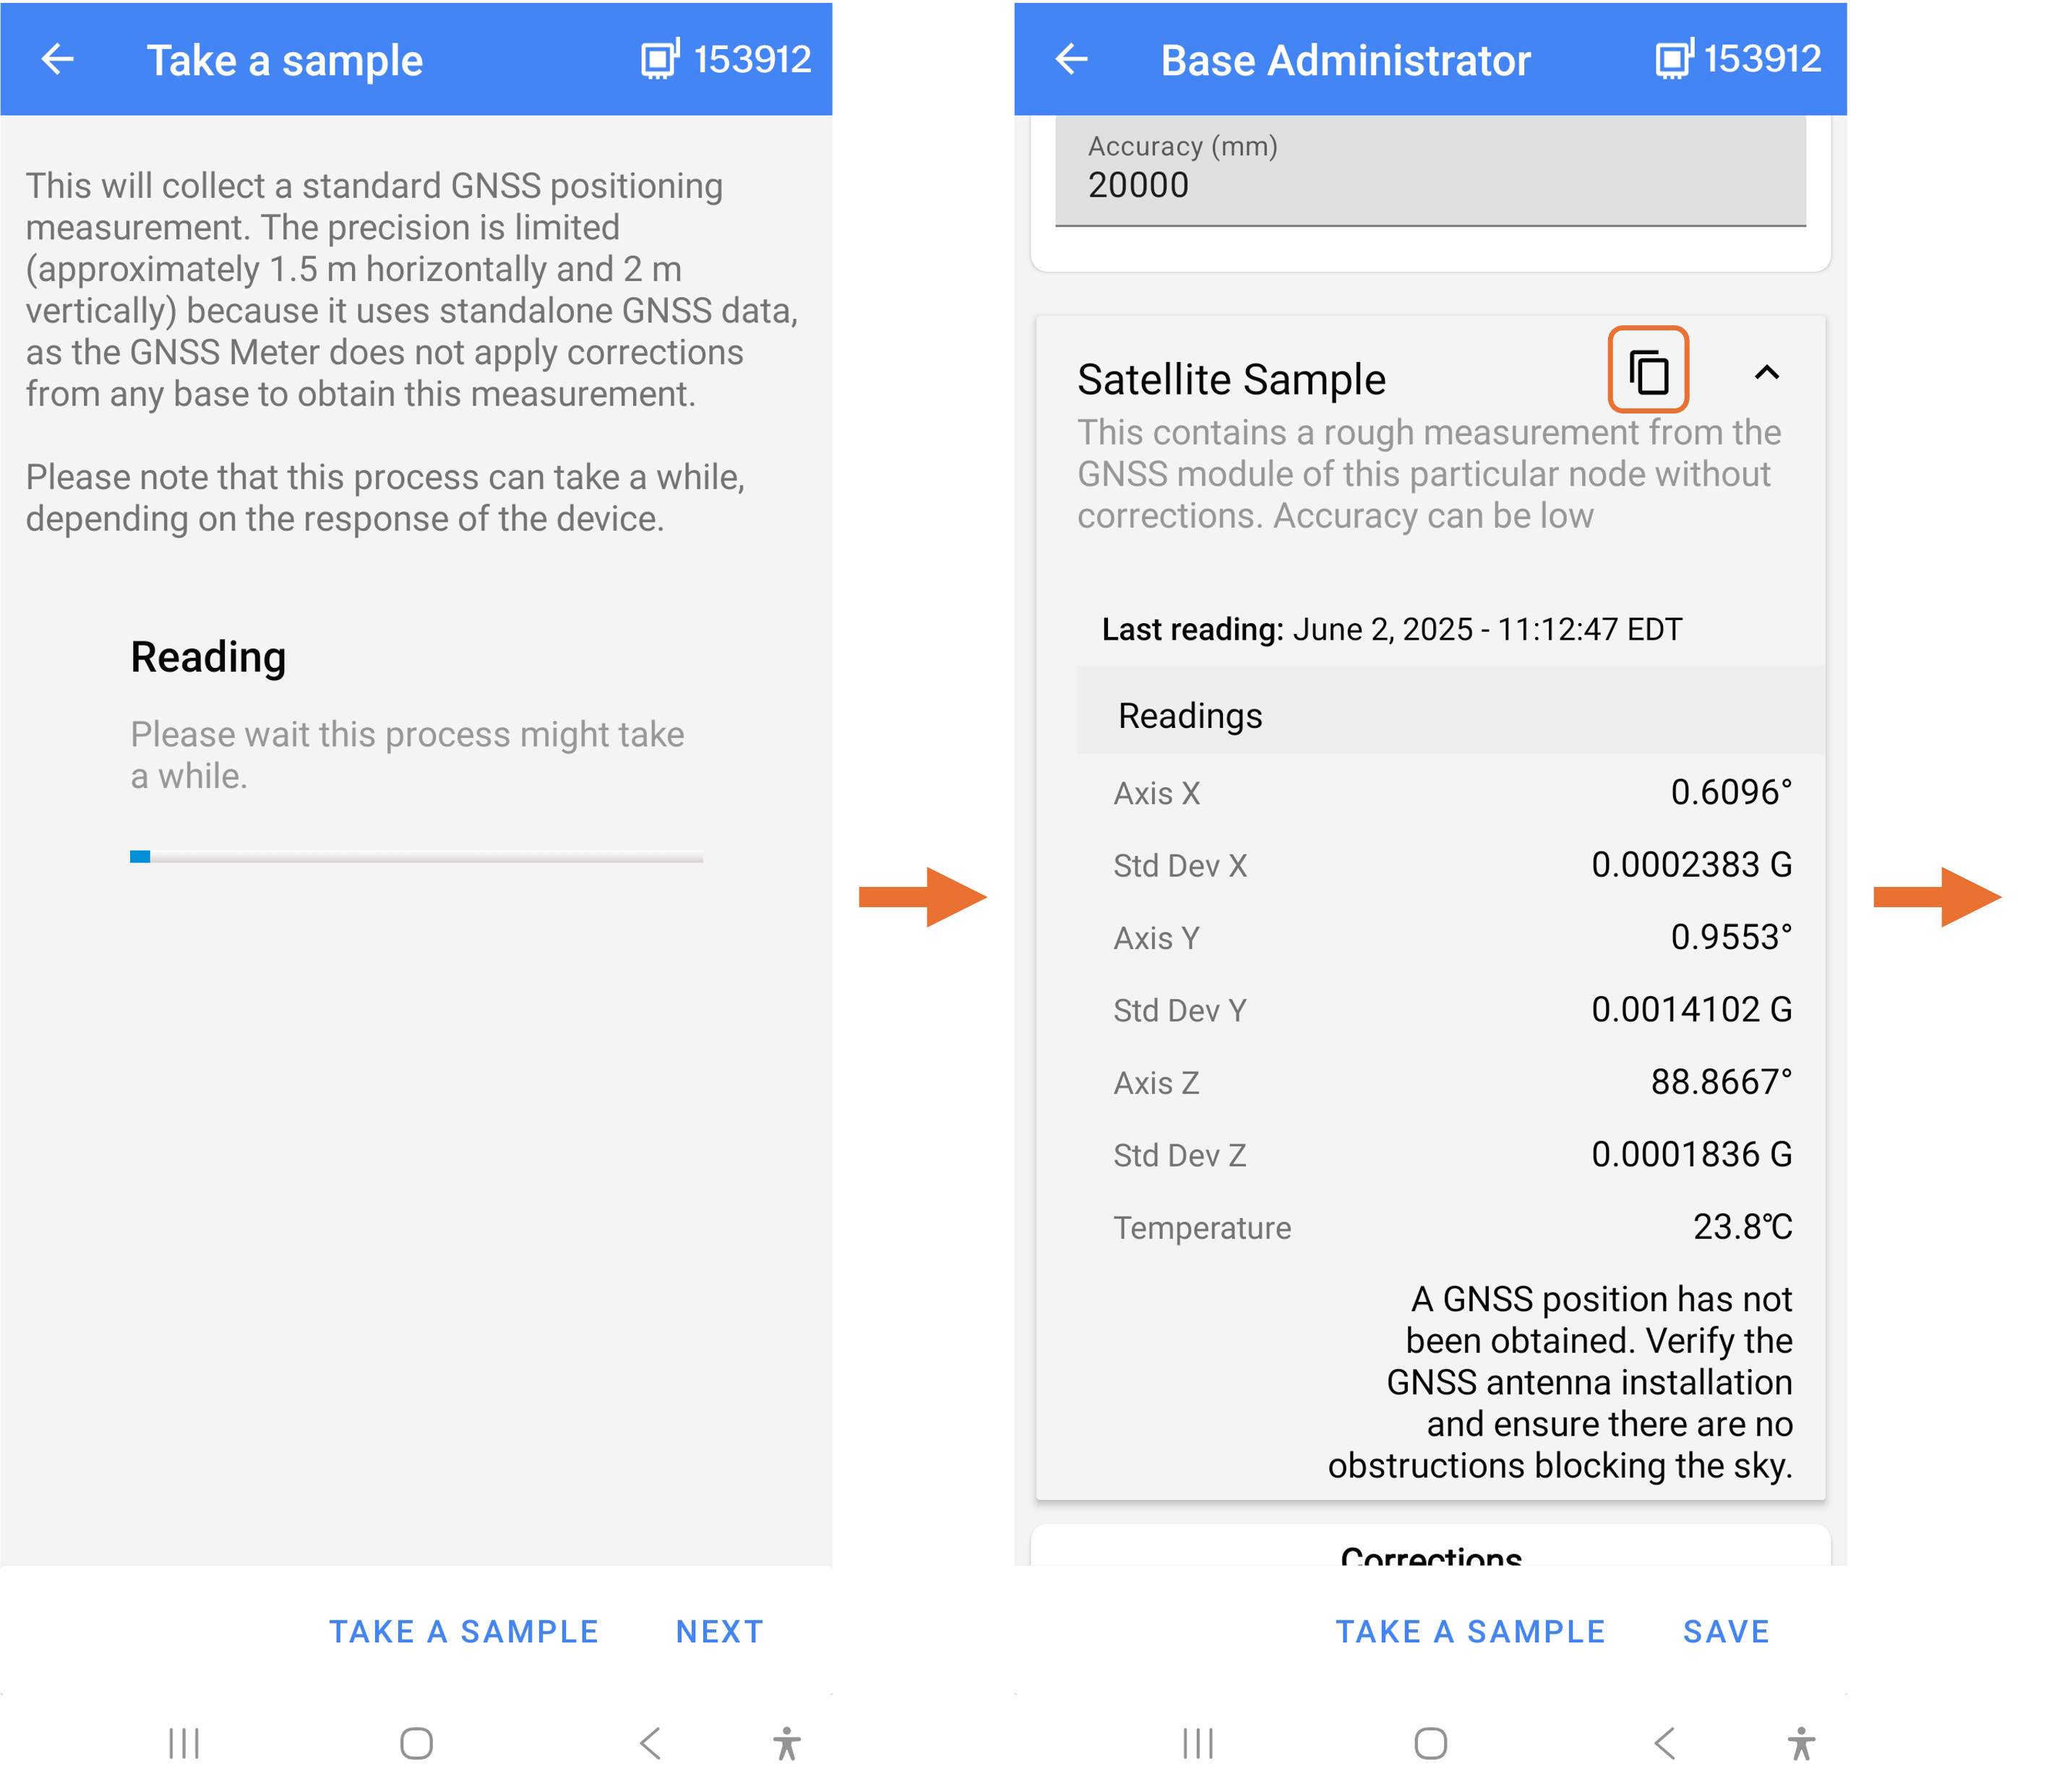
g. Select "Take a Sample"
e. Once the sample is complete, select the copy button, which will update the Latitude, Longitude, and Altitude
h. Select "Save" followed by "OK"
5. Configure the GNSS Using the Setup Wizard
a. Select “Setup Wizard” in the app.
b. Tap “Next” to validate the GNSS’s location.
c. Ensure the mobile device is connected to the internet.
d. When prompted for location access, select “While using the App” or “Only this time” to grant location permission.
e. The device’s location will appear on the map. Select “Next” to continue.

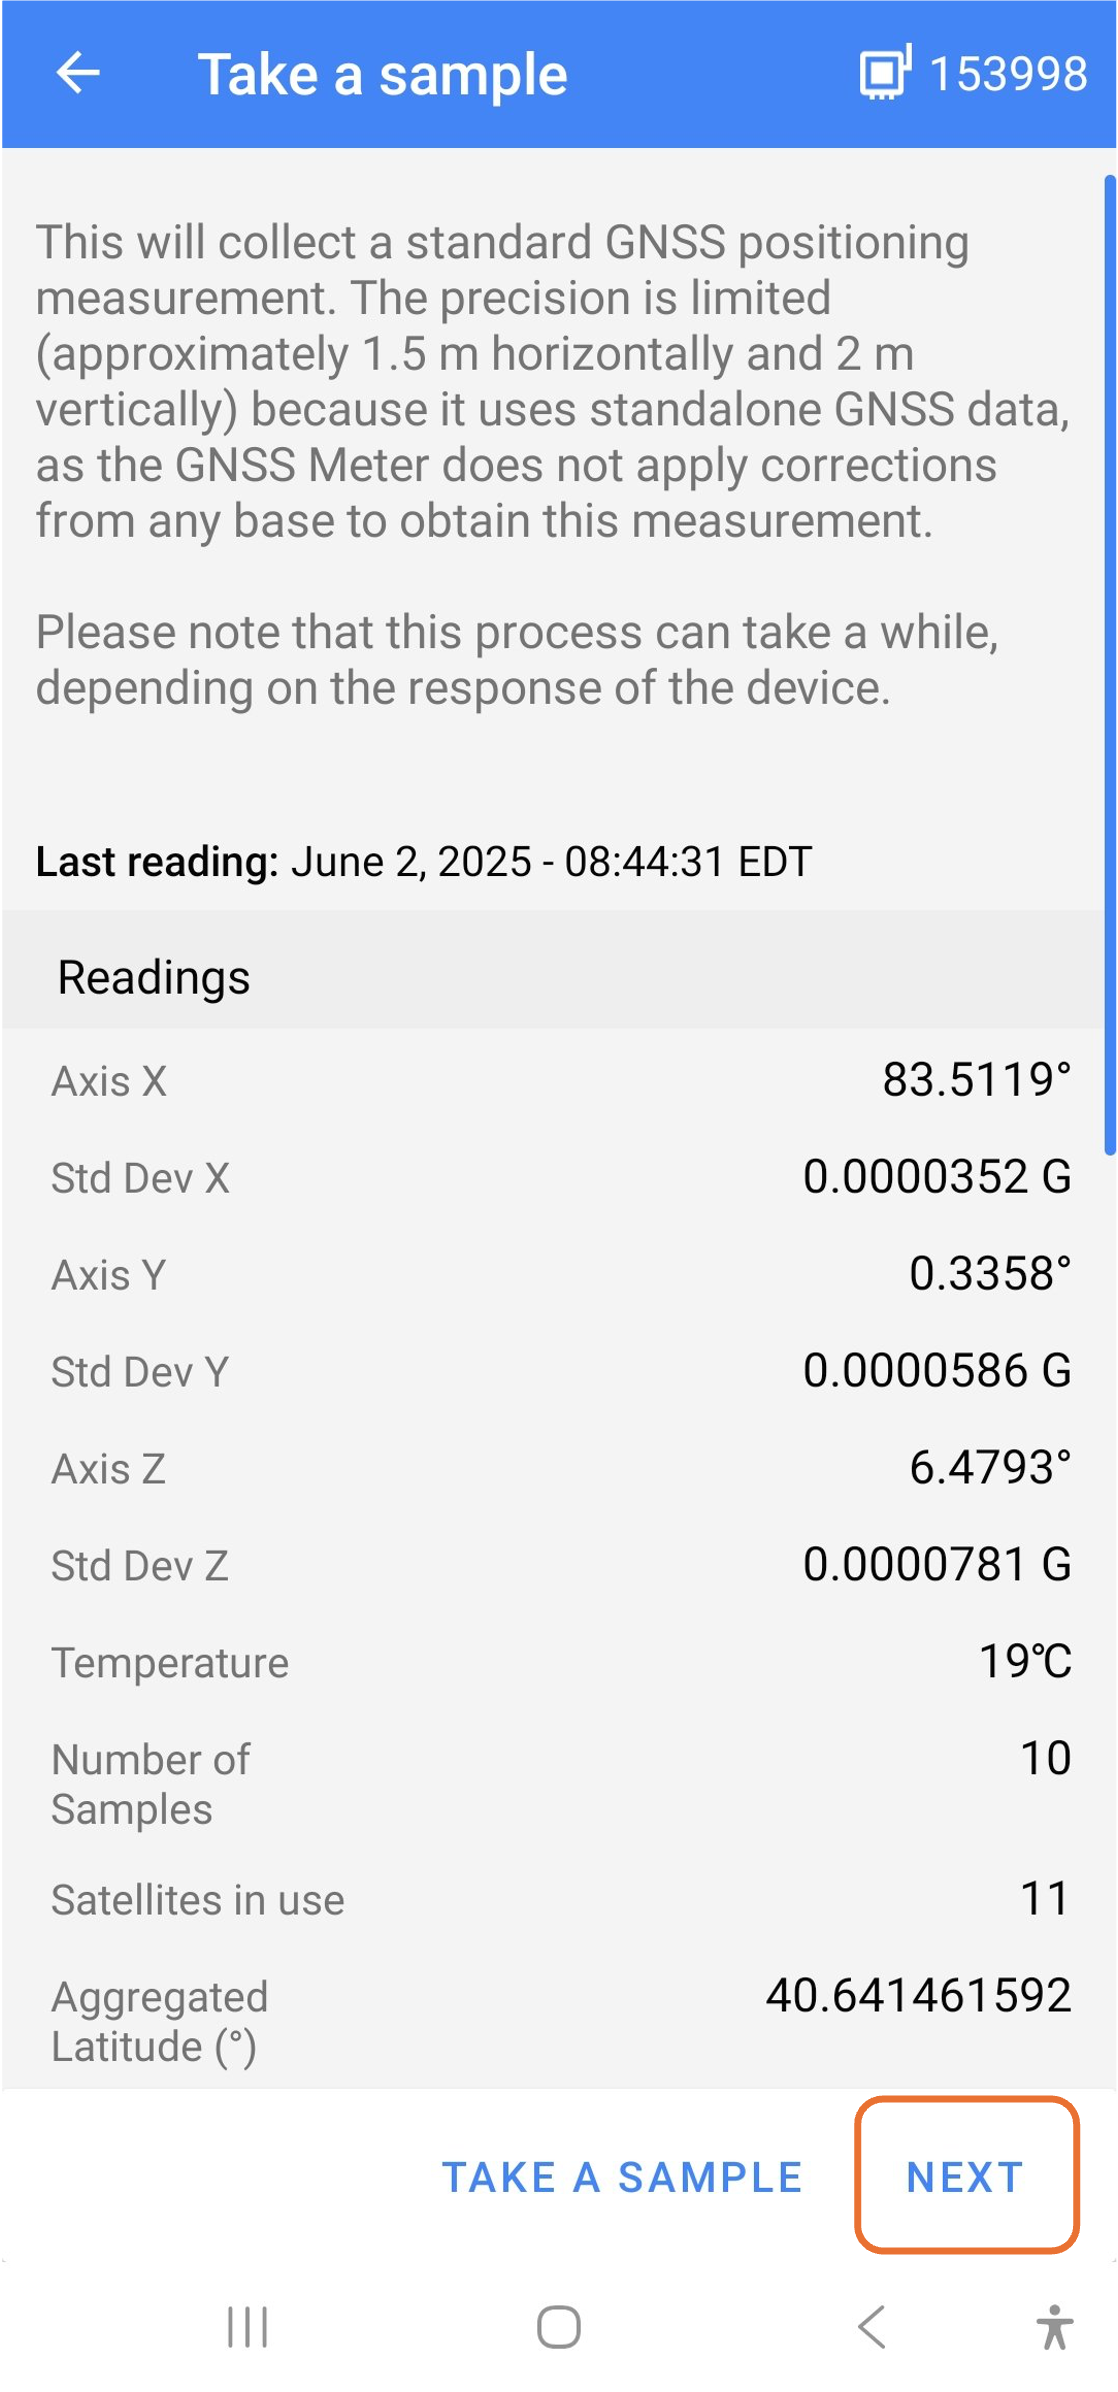
6. Perform a Sample Test
a. Select “Take a Sample” to test the GNSS.
b. Once the results appear, select “Next".
7. Sensor Setting
Note: The setup process will need to be completed twice. Once for the Base and once for the Rover. Please follow the instructions outlined above and below this section for both units. The only difference between the two setups will be in the “Sensor Setting” section.
a. Base
i. Ensure the "Base" is selected
ii. Select the Base ID saved from the “GNSS Base Administrator”
iii. Ensure the boxes to the left of Galileo, GPS, and GLONASS are checked off
iv. Select the check box to the left of "Installation Mode Enabled"
v. Select "Next"
vi. Select "OK"

b. Rover
i. Ensure the "Rover" is selected
ii. Select the Base ID saved from the “GNSS Base Administrator”
iii. Ensure the boxes to the left of Galileo, GPS, and GLONASS are checked off
iv. Select "Next"
v. Select "OK"

8. Sync with Edge
a. If Edge will be used, type in the Edge ID and the Password, and select "Sync"
b. If not, select "Skip"
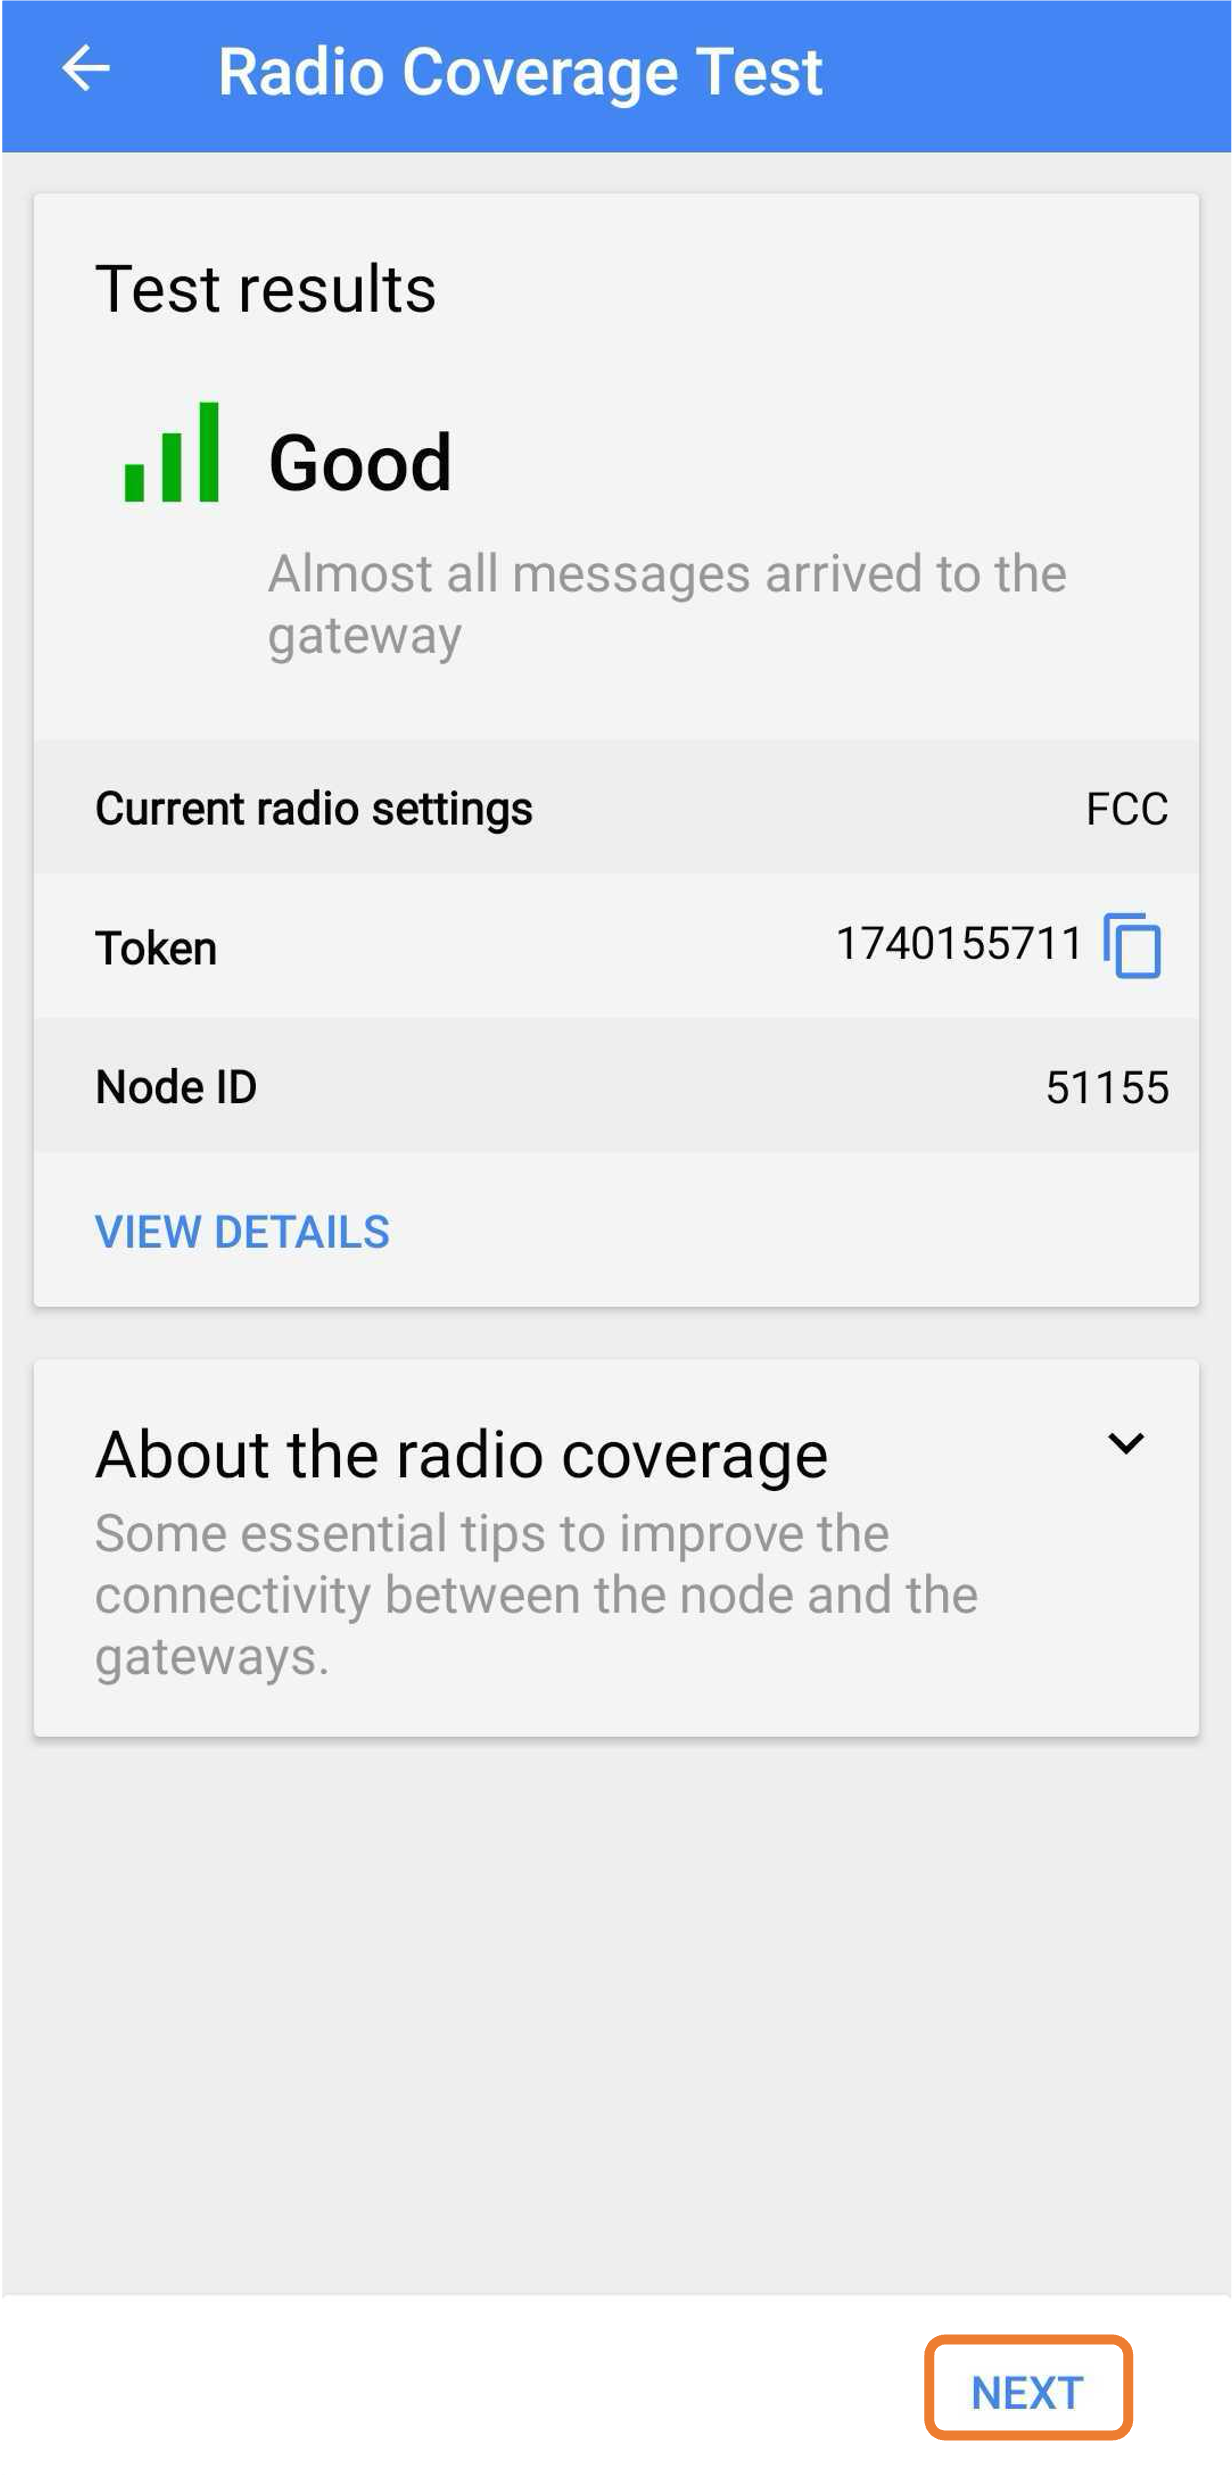
9. Select the Region
a. Choose the appropriate region for the GNSS:
i. United States: Select “FCC”.
ii. Other Regions: Choose the corresponding option. Contact Specto Technology Support if the Region selection is unknown
b. Select “Next”.

10. Configure the CMT Edge Radio
a. Select “CMT Edge Radio”, then tap “Next”.
b. Set the Maximum Spreading Factor to the default number, “9”.
c. Ensure the Channels selects “0 - Freq…”.
d. Ensure “ADR” is toggled on (it should appear blue).

11. Final Configuration Steps
a.Choose the maximum number of devices that will connect to the Gateway.
i. After setup is complete, confirm/change the reporting period on the gateway setting and select the reading frequency for the GNSS (default recommendation is 1 hour).
b. Tap “Next”

12. Complete the Setup
a. The GNSS is now operational.
b. Select “Close” to finish the setup.
