![99745fd6-afc8-495e-a1a1-c5fa6c1501aa.png]](https://resources.spectotechnology.com/hs-fs/hubfs/99745fd6-afc8-495e-a1a1-c5fa6c1501aa.png?width=300&height=113&name=99745fd6-afc8-495e-a1a1-c5fa6c1501aa.png)
1. Login
- If this is your first time accessing Vision II, an invite will be sent to you via email to set up an account.
- For Non-new members, go to the Vision II website (click here) and log in.
If you are facing any issues logging in, reach out to Specto Technology's Support team at support@spectotechnology.com.
2. Main Dashboard
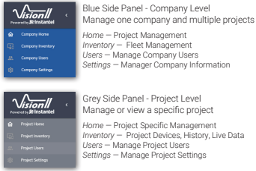
- After logging in, the next screen will be the Welcome Dashboard Landing screen. Here, you can select the specific project level screen that is desired. Below is an image that explains the different dashboard level screens.
3. Project Creation
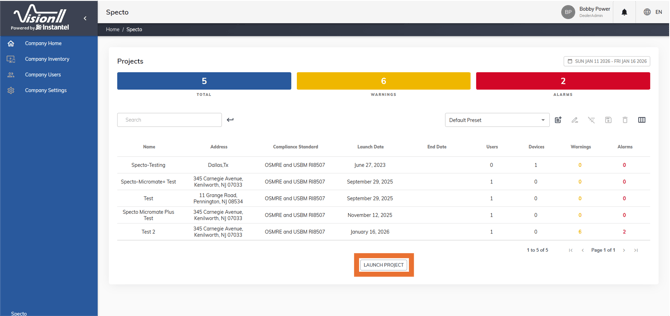
- Click Launch Project at the bottom of the page and follow the setup wizard
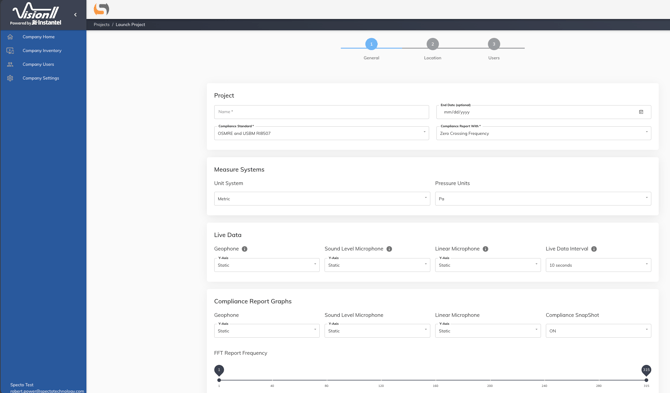
- Complete the “General” step by filling in specific information about the project and measurements.
- Click Next once all of the field info is filled in.
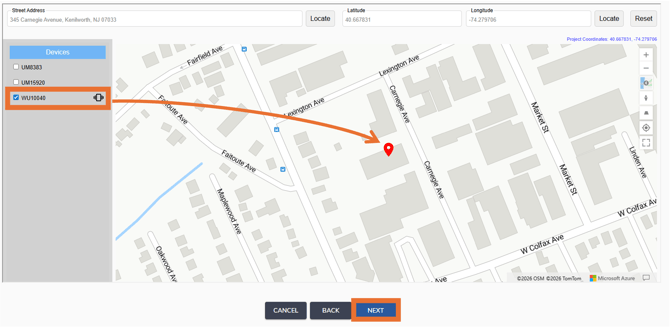
- On the map page, select the device(s) on the left that you want to use for the project. Click and drag the unit icon onto the map at the specific location for your project.
-Click Next, once complete.
(Note: If you attempt to place the unit and the logo does not stay on the map, left click anywhere in the grey area below the unit numbers so the page recognizes that you are attempting to place the unit on the map.)
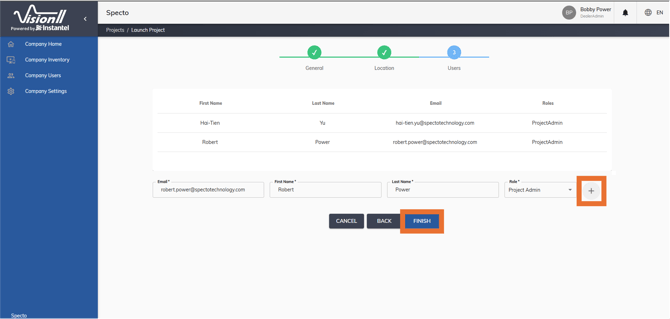
- Add any users who need access to the unit(‘s) data by either selecting a pre-existing user from the list or entering a new user and assigning a role.
- Project Admin: Full permissions
- Project Download: View and download reports
- Project View: View data only
- Click the + icon to the right to add the user to the project, then click Finish followed by clicking the Confirm button.