![99745fd6-afc8-495e-a1a1-c5fa6c1501aa.png]](https://resources.spectotechnology.com/hs-fs/hubfs/99745fd6-afc8-495e-a1a1-c5fa6c1501aa.png?width=300&height=113&name=99745fd6-afc8-495e-a1a1-c5fa6c1501aa.png)
Before beginning, ensure:
- The charge controller is powered on
- Bluetooth is enabled on your mobile device or computer
- The VictronConnect app is installed
1. Open the VictronConnect app and connect to your Victron Charge Controller.

2. Once connected, select the Gear icon located in the top right corner of the screen to open the settings menu.
a. Select "Battery."

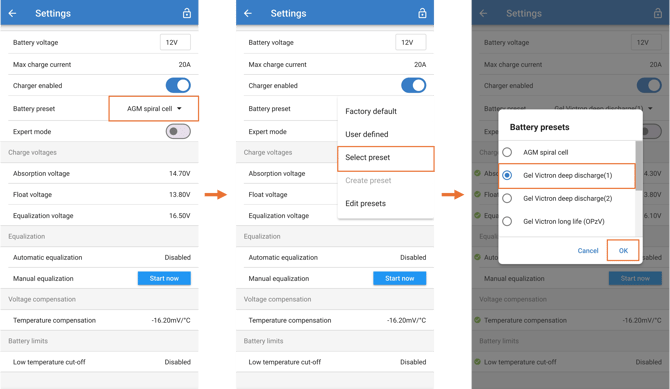
3. Select "Battery".
a. Select the "Battery Preset" dropdown.
b. Click "Select preset."
c. Choose "Gel Victron deep discharge(1)."
d. Select "OK."
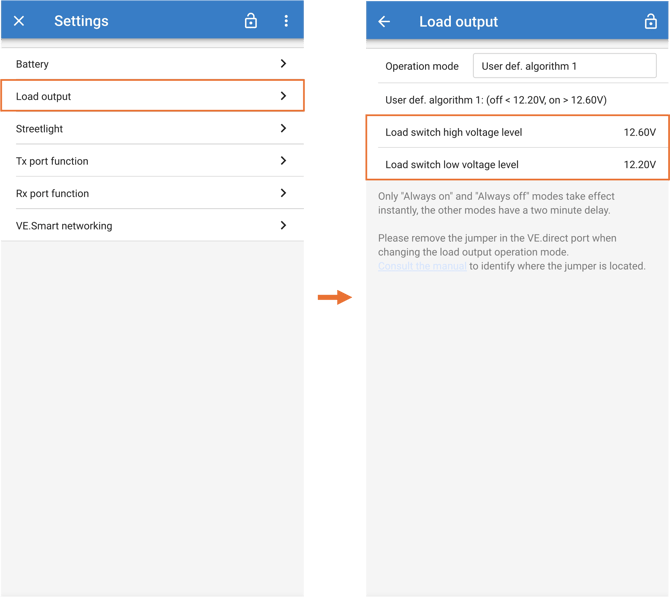
4. Return to the main setting page and select "Load output."
a. Verify that the following settings match the recommended values shown in the reference image:
- Load Switch High Voltage Level: 12.60V
- Load Switch High Voltage Level: 12.20V
These settings help protect the battery from over-discharge and ensure proper load operation.
-
After applying the settings, allow the controller a few moments to update and stabilize.
-
If the unit is connected to a solar system, verify the battery begins charging normally after configuration.
-
Always confirm the battery type before applying presets, as incorrect charging settings may reduce battery performance or lifespan.
To calibrate a Lithium-ion battery: Click here